Category: Arts and Crafts

Am I a Mother? {Women Who Inspire Us/Power of Women’s Voices}

by Julie Kohl – ARWB Content Cultivator & Calendar Girl

May is a special month for women, especially mothers.  In May, we celebrate Mother’s Day and here at Arkansas Women Bloggers we are celebrating the Women Who Inspire Us and the Power of Women’s Voices.  Over the next few weeks we will hear from several amazing women that live right here in Arkansas. They will make us laugh and make us cry and will inspire and empower us with their voices.

Having recently experienced one of the most tragic events of my own life, I hope you will not mind that I (Julie) have decided to open this months theme with my own voice.  I do not claim to be inspiring or powerful but I hope you will find something of merit in my story.

After many years of trying to conceive, my husband and I lost our first child to miscarriage on March 18th.  The days and weeks that followed were tough (still are) and went by in a blur. My body had fought being pregnant but fought being “un-pregnant” even more.

Surgery, multiple rounds of ‘labor inducing’ drugs and weeks of bleeding and my body would not release the pregnancy tissue. In fact, if I were to take a pregnancy test today (45 days later) it would still be positive. How’s that for a slap in the face?

If you have never experienced a miscarriage, I pray you never do.  If you have, you know and can sympathize with the fact that it is one of the most confusing, disheartening, and tragic things you will ever experience.

I have spent the last month and a half searching for God, searching for closure, searching for a way to feel right in my own skin again.  There’s a feeling of loss but I have nothing to hold onto.  No photo, no lock of hair, no tiny clothes that hold my babies scent.  All I have is a feeling of emptiness and fullness all at the same time. It’s a feeling I can’t explain and don’t understand. There are so many questions that may never have answers.

So what do you do in a time of tragedy and loss?  I write and I paint.
Here is my story in words and in art.

Am I a mother?
Written by Julie Kohl
Painting by Julie Kohl

I once had a childmiscarriage
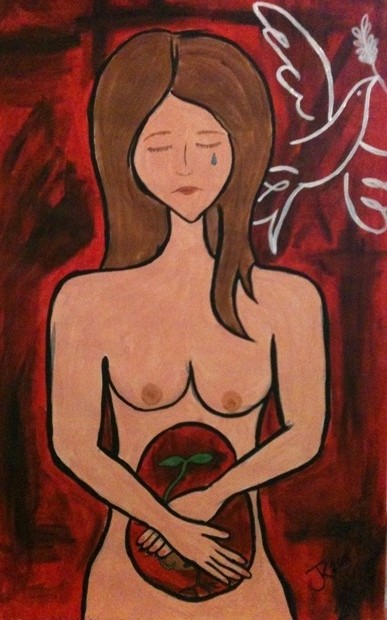
But it’s not on this earth

It’s heart never beat
And I never gave birth

I hope and I prayed
And I wished all the same

But that glorious day
It just never came

They said it was gone
But it’s hard to believe

We wanted it so badly
How could it leave

But God He has plans
That are bigger than ours

He loves us more
Than the number of stars

Still I can’t help but ask
Am I a mother?

Oh dear lord
Please bring us another

This child that I love
I will never hold

But I will cherish it deeply
Until I grow old

I know someday soon
There will be little feet

Tiny little hands
And kisses so sweet

But until that day comes
I can’t help but wonder

Was it all just a dream
Or am I a mother?

A Homemade Year {Crafting}

Post by by Jerusalem Jackson Greer

Happy Spring Break friends!

If you are like us, Spring Break has suddenly snuck up on us, along with a long to-do list. So today I am going to take the easy way out and share a little bit from my new book A Homemade Year; The Blessings of Cooking, Crafting and Coming Together, with you. The first bit is from the preface, and the last bit is from the chapter on Holy Saturday- the Saturday before Easter. The book is due in stores in just one short week, and I could not be more excited to share a little sneak peek with each of you today.

Cover

In my mid-twenties, cut free from the tether of a school calendar year, I found that I was attracted to—craved, even—the rhythm, internal and external, that liturgy seemed to bring to those who leaned in and embraced it. Once I had my own children, like so many other mothers around the world, I thought long and hard about what sort of traditions I wanted our family to have. I love a great celebration. I love party decorations and special menus and taking the time to do things up right. I even love the anticipation. To me, the preparation is half the fun because it is often in the doing and preparing that the best memories are made. So I set out to find a way that would create traditions of faith for our family through the rhythm of the liturgical calendar, using fun, modern, colorful crafts and recipes. In our home I have found that even the most common tactile acts such as kneading bread dough, threading a needle, or gluing paper can be important spiritual practices, especially when paired with intentional conversations and repetition over many years. A Homemade Year is a book written out of this experience…and out of my experiences as a busy, working mother, all too often burning the candle on both ends, and looking for a third .

In a recent post, blogger Penny Carothers wrote, “I’ve always elevated the lives of others above my own spiritual aspirations.…This mistaken belief parallels my long-held view that spirituality has to look a certain way to be legit.” I loved reading those words, because I too have gone through seasons of thinking that legitimate spirituality only fit into one very tight fitting box. My prayer is that A Homemade Year is the kind of book that will free you from just that sort of mistaken belief, from that phantom one-size-fits-all box. Instead I hope that this book inspires you to seek and experience God in a different way at your own pace. This book is meant to act as a guide, to encourage, and to teach—but never to induce guilt, to depress, or to intimidate.

Kids and Boat

Sailboat Easter Baskets
I am always trying to create new crafts that my boys will enjoy making and playing with as well. I designed these boats with Easter in mind, but they have also played host to Lego and Star Wars characters on the occasional bathtub excursion. When we made these for Easter, we talked about all of Jesus’s friends—the disciples who had been fishermen. Although the Bible gives us some indication of what some of the disciples did on Good Friday and on Easter Sunday, not much is said about their actions on Saturday. I like to think that a few of them went fishing to sort things out. To sit, to pray, to hope, and to wait. I know that is what Sweet Man would have done.

Materials Needed:
Red plaid paper food baskets (you can get these at most restaurant supply stores or online)
Modeling clay (2-inch square)
Bamboo skewer
12 x 12-inch scrapbook paper
Scrapbook paper scraps
Tape
Glue stick
Scissors
Easter grass
Plastic eggs or fuzzy chicks


Boat

Directions:
Place your square of clay into your food basket, off to the left side, toward the edge. Press down until the clay is stuck well enough to what is now the sailboat floor. The clay will not adhere permanently.

Print the pattern provided at the Paraclete Website (http://www.paracletepress.com/a-homemade-year.html ) to make your sail. Fold a 12 x 12-inch sheet of paper in half and place pattern (cut out) on the fold. Cut triangle out. To make a second, smaller triangle for a layered effect, reduce the size of the pattern by 1/3 and print and repeat all other steps.

Next, secure your sail to your bamboo skewer. Lay the skewer on the inside of your sail in the center crease, fixing it in place with a small piece of tape.

Using the glue stick, trace the inside edges of your sail. Once all edges have a thick layer of glue, close your sail around your skewer and press flat, smoothing out any wrinkles. This makes a double layer of sail for strength.

Embellish your sail with extra bits of paper, stickers, glitter, ribbon, or other ephemeraFinally, stick the skewer into the clay and voilà! You have a sailboat.

Fill with Easter grass, candies, and Easter eggs or fuzzy chicks.

A Homemade Year is available from all major bookstores online and will be in Barnes and Noble stores nationwide.

For more spring and Easter inspired crafts visit me at http://jerusalemgreer.com and search “Easter” or “Crafting”

A Homemade Year:The Blessings of Cooking, Crafting, and Coming Together
by Jerusalem Jackson Greer
©2013 by Jerusalem Jackson Greer,
images by Judea Jackson http://www.judeajackson.net/
Used by permission of Paraclete Press, www.paracletepress.com

Miss March 2013 ~ Jerusalem Greer

Hello AWB friends, my name is Jerusalem Jackson Greer and I am so happy to be hanging out with y’all this month.

Here are a few things about me: I am crafter, a writer, a former pastor, blogger, nest-fluffer, liturgical groupie, speaker and farm-gal wannabe. My day job is being the “Book Room Lady” at eStem Public Charter School in downtown Little Rock. I am surrounded by books and kids (including my own) all day. Working at my boys school is the closest I will probably ever get to homeschooling. Me, my husband Nathan (who I refer to as Sweet Man on my blog) and our two boys, Wylie and Miles, live in a 1940s cottage in Park Hill with an ever-changing rotation of pets, including a hen house full of heritage chickens and an English Sheep Dog mutt named Maizy. As a family, we are attempting to live a slower version of modern life. Sometimes it goes well, other times not so much.

Because I tend to think in words and pictures I thought I would take you on a little visual tour of my life. But first, go get your favorite beverage, find a comfy seat and settle in. Sometimes I get wordy when I get excited.

Jerusalem Greer

This is my family-well some of them. My boys who are almost always in some sort of costume;  my parents in their twenties during my dad’s seminary years in Memphis – I get my love of overalls from him;  me and Sweet Man whose shoulder I lean on often and who is my biggest fan;  my Maw – who is my muse and whose belief in me propels me forward and finally me and my siblings when we lived in Alaska wearing our Hope Watermelon t-shirts that my grandparents sent us. I am the tall one with the frizzy hair.  These are the people I was born to and who were born to me. They are the ones who shape me and encourage me and love me and put up with me and tell me the truth.

I am realizing now that I should have made a collage of my friends because they are the family I have chosen. But honestly I don’t know that you would stick with me through a blog that long. Sweet Man jokes that I have a hundred best friends.  He might not be wrong. If you come to the AWB conference you will get to meet at least a dozen of them.

Jerusalem Greer

Here are some things I love. I am a wee bit obsessed with icons of the Virgin Mary. I collect paintings and chalk statues and I take pictures everywhere I go of her.   My family and I love to camp. Especially places where there is already some sort of rough structure, like this tent at Petite Jean, where I can camp cute with my vintage quilts and melamine picnic ware. A dream job would to be a paid camping blogger for State and National Parks.  I adore my Ariat men’s Rambler boots. I wear them constantly. I also like to Instagram them.  We have 6 chickens in our back yard and they are precious. Sweet Man is a musician and introduced me to Bluegrass and Southern Rock. For this I am eternally grateful.  I love fairs- county fairs, state fairs, and local festivals. I love the fried food, the animal barns and the blue ribbon competitions and the craft booths.

Jerusalem Crafts
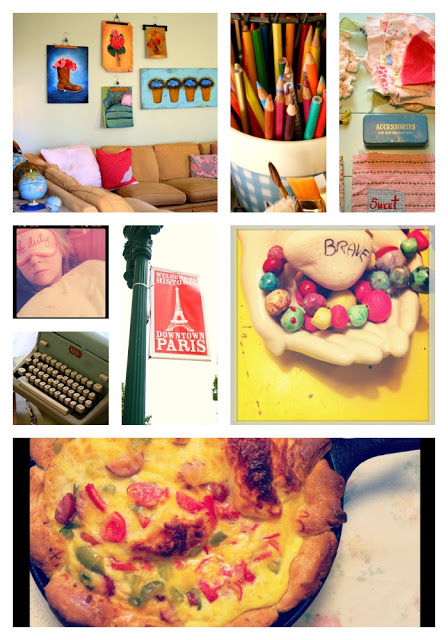
I have been blogging for 8 years this month. Growing my audience has been slow and steady as I have found my footing and my voice.  I have had to “re-boot” the blog twice and I am still not 100% sure why my readers like me, but I am grateful that they do.  I tend to blog about the following topics the most: Decorating our house, Crafting, inspiration out on the web (mostly on Pinterest these days!)  my desire to  slow down (and to sleep more,) what I am reading, other places I am writing, traveling – places I have been, places I want to go,  my faith, and food- cooking and eating.

A Homemade Year, Jerusalem Greer

Twelve years ago I took my first steps into the design and craft world when I began decorating friends homes for Christmas and appearing on Good Morning Arkansas as the “craft girl.”   Over the years I have had successes and failures.  None of them came easy or fast, as even the hard lessons were learned over time.  In a funny twist of fate (which is the only way things happen in my life) all of the really fun stuff, the “dream come true” stuff , has happened in the last few years. In the years after I officially closed my design and craft business.  Here are some of my favorite fun stuff:  Recently, P. Allen Smith came to our house to film a segment on urban farming. My boys are my favorite parts of this whole video (http://www.youtube.com/watch?v=eNePnp16fck&feature=youtu.be)  My friend Jeanetta and I occasionally dust off our talents and whip up some crafty and vintage items to sell at Craft Shows. We call our venture Bright Ridge Co-Op.  Parts of our home have been photographed for several magazines, including Vintage Style, Cottage Style and At Home in Arkansas.  I design positive posters that I sell online from time to time (http://jollygoode.bigcartel.com/) and which have been featured on some of my favorite blogs like Whatever and Farm Patch Flowergirl . But out of all of this, the one bit of creative work that I am most proud of is my new book, which is being released this month: A Homemade Year; The Blessings of Cooking, Crafting and Coming Together. (http://www.barnesandnoble.com/w/a-homemade-year-jerusalem-jackson-greer/1113830866)  The book is part narrative as I tell my story of faith, and part DIY/Inspiration. The entire book was shot by my sister Judea and styled by both of us. Everything you will see in the book was made by myself, Sweet Man, Jeanetta, Jemimah or my mother (the latter three helping me with the sewing) and the kids. Every meal we shot we ate, every person you will see I love. There are no models, no fake loaves of bread, no show homes.  When we weren’t shooting at my house, we went “on location” in the backyards, around kitchen tables, and on the screened porches of friends and family.

To say that this book- from the stories to the crafts to the recipes and the parties- is the result of love, tears dedicated hard work, and countless hours of smiling and waiting and helping from everyone around me would be just scratching the surface of the truth. I cannot wait to share A Homemade Year with the world, because I cannot wait to show the world what love looks like from where I sit:  Humbling, giving, generous, amazing, love.

So there you have it. All about me. I apologize if I talked your ear off. I tend to get excited about things like my family and the book. If you want to visit me at my place (http://jerusalemgreer.com)  I would love to have you!

Till next time, cheers and blessings- Jerusalem

AWB Handmade Ornament Swap {Secret Santa}

It’s Christmastime!  The last of the Thanksgiving leftovers have been served and you survived the Black Friday mad rush. Christmas lights have been lit and we’re now in the full swing of Christmas.  It’s the perfect time of year to spread a little bit of holiday cheer to one of your AWB sisters!

AWB Handmade Ornament Swap {Secret Santa}

This week we’re giving you the chance to show off your craftiness and surprise an AWB pal with a handmade ornament.  The ornament need not be fancy or complicated.  It’s just a chance for you to share a little something with a fellow blogger. Enter your information in the form below before midnight on Thursday, November 29. On Saturday you will receive an email with the address of your secret pal.  You will have until December 10th to mail your ornament to your secret pal.  On December 17th we will each blog about the ornaments we received and we will provide a Linky so you can check out everyone’s posts.

If you’re not that crafty, don’t worry.  We’ve created a Pinterest board full of handmade ornament ideas!  Check it out here.

May I send more than one ornament?

Only one ornament is required. If you would like to send several you are more than welcome to.  If you would like to include any extra little goodies you may, but this is not required!  If you do include something extra, please keep the total cost of the box contents below $10.

How do I sign up?

If you wish to participate, please sign up using the form below.  Remember, the deadline to sign up is this Thursday, November 29.

By filling out the form you agree to the following:

  1. You will make an ornament and send it to your fellow blogger.
  2. You will mail your ornament no later than December 10th.
  3. You will not reveal who you are sending to or whom you received from until December 17th.
  4. You will publish a blog post about what you received along with a link to the blog of the sender on December 17th.

Happy Swapping!
This swap is now closed. Join us again next year!

A Partridge in a Pear Tree? {Handmade Holiday}

We are a family of traditions – almost obsessively so (as I’ve mentioned over at The Food Adventuress). Still, I’m always looking for new additions to the list of things we love to do together.

Don’t misunderstand – this doesn’t mean I have my act together. Today, for example, I finally removed the remaining pumpkins from our front porch in recognition of the fact that a) it is mid-December and b) they looked kind of goofy along with our Christmas lights. I stand by my reasoning that they work right through Thanksgiving, but then my arguments get a little fuzzy. I promise, though, that pumpkins are (eventually) relevant to this post.

Starting a few years ago, my now eight year old daughter and I began concocting a “bird tree” as part of our holiday traditions. As much as I enjoy things that we can all do as a family (here’s a fantastic, free and easy idea you could still incorporate with your family this year!), I also yearn for those special things I can do to connect with just one child at a time or one on one with my husband.

Our bird tree has evolved from a single branch to trimmings from our real Christmas tree to the point that this year, we’re using a potted tree that will grow slowly and can be reused for many years moving forward. We set it somewhere very visible in the front yard – both for ease of bird-viewing and to incite questions from neighbors and hopefully inspire similar actions from other families. In fact, last year we used the same idea as a holiday staff activity at my workplace, the Ozark Natural Science Center (read Slowing Down with a Cranberry Garland).

The bird tree is meant to be a slowing-down activity, and a gift to nature at a time when many of us are incredibly focused on doing and rushing and buying. We start with a bowl of freshly popped popcorn (on the stove, without all the extras birds do not need) and a bowl of fresh cranberries. We sit together – talking, working slowly, getting sticky, pricking our fingers – and string them into garlands using needles and thread.

When our garlands are complete we set out to hang them on the tree along with quartered oranges, little reusable baskets of birdseed, pinecones with peanut butter and seeds, sunflower heads and anything else we think our feathered friends would safely enjoy. This year, we found some millet sprays to use, and sometimes we add twig or straw stars or other decorations. And, there is some good to those pumpkins left so long and forlornly on the front porch: I cut them into little pieces and found the weather had preserved them. They are full of good meat and seed that will help visiting birds this winter, so some good came of my inability to get things done!

This is such a great activity for anyone, and especially when you can include your own (or some stray neighborhood? With permission, of course!) kids. As an aside, we often start putting birdseed and treats out well before the weather turns very cold in order to start “coaching” the birds that we are the dining establishment to visit all winter long. We also took a little time several years ago to make our yard a certified wildlife habitat through a fantastic program from the National Wildlife Federation – this is another outstanding, free, educational, fun and ongoing family activity!

As you look for meaningful activities this holiday season, think outside the box when you consider handmade holidays. “Crafts” do not have to mean hours of baking and decorating cookies, purchasing pricey supplies or spending hours at a daunting task that may or may not turn out the way you intended. Creating a bird tree feels good, looks good, has a tangible outcome and is one of those tiny steps toward making the world a better place. Happy handmade holiday!


Beth is the marketing maven and one of four founding members of Arkansas Women Bloggers, but her real job is as executive director of the Ozark Natural Science Center – a nonprofit field science, environmental education, camp and conference facility in northwest Arkansas. She blogs over at The Little Magpie and The Food Adventuress and finds herself eating far more of her mother’s rum cake around the holidays than she would care to admit.


DIY Holiday Canvas {Handmade Holiday}

DIY Holiday Canvas {Handmade Holiday}
By Amanda Brown of My Hearts Desire

Thanks, Arkansas Women Bloggers, for the opportunity to guest post today! If you are new to the Arkansas Women Bloggers site, be sure to register and get to know other bloggers around Arkansas! It has been such a privilege to meet some really fantastic ladies through ARWB!

Today, I am going to show you how I used this Pinterest image as inspiration to make this simple, inexpensive, Christmas tree project that will take you about 30 minutes to create, but gives fabulous results!

Supplies needed:

  • Canvas-I used an 11×14, but any size will work (use coupons at craft stores for great prices)
  • Scrapbook papers for trees, tree trunks,or stars–I made matching trees, but you can use 3 different papers for interest. It doesn’t have to be “Christmas” paper!
  • Scrapbook embellishments (optional,for stars)
  • Mod Podge
  • Mod Podge applicator–spongebrush pictured
  • Ric Rac
  • Stars for treetops–use coordinating paper or other scrapbooking embellishments
  • Elmer’s Glue
  • Scissors

Using a ruler, lightly draw a triangle on the scrapbook paper. Trees shown are 9 1/2 x 3 3/4 inches. Use this first tree as a template to cut out the next two.

Cut three mini triangles for tree trunks. Only the bottom of the triangle will show.

Measure and lightly mark the middle of the canvas so you can place your first tree, but do not glue the tree yet!


Using a spongebrush, cover the entire surface of canvas with Mod Podge. Then coat the back of your first tree with Mod Podge and place it in the marked spot. Glue the tree trunk under the bottom of the treebefore brushing the entire surface, including tree, with Mod Podge again. Be sure to seal edges of tree.

Repeat this process (ModPodging entire surface) after each tree and trunk.

 Lightly press with your finger to seal the edges to the canvas.

If your paper bubbles, no worries! Magically, these disappear once the Mod Podge dries!

 Next, cut the Ric Rac the exact length of the canvas. Glue it to the canvas using Elmer’sglue.

 Glue paper or other”star” embellishment to tops of the trees, using Mod Podge for paperstars or Elmer’s for 3-dimensional ones.

Hang directly onto the wall,


or use a plate stand to display it on a table!

This versatile craft can easily transfer to any Holiday using different paper, shapes, or colors!

Happy Crafting!


Amanda is a mom to three kids and has been married to David for 13 years. She has a passionfor cooking, journaling, blogging, authentic relationships, and making her homea “haven.” You will find creative ideas for your home, recipes, and anauthentic place to be yourself at www.myheartsdesireblog.com.

Pinterest Wreath Challenge and GIVEAWAY!

Written by Gina of Desperately Seeking {Gina}.

Thank you to the ladies of AWB for inviting me to share one of my favorite Pinterest Projects thus far!

I’m not sure what it is about this site that is so interesting and addictive.  Maybe it’s the pretty picture overload? Or the insane amount of talented, creative people sharing ideas, tips, and tutorials?  Whatever it is, I’m enjoying looking and doing!

At first glance, it may be difficult to understand what Pinterest is all about. It can be overwhelming for first-time pinners-pretty picture overload for sure.  But, at the heart of this newest social networking craze, Pinterest provides a unique outlet for crafters, photographers, aspiring cooks, and artists of all kinds.  Pinterest is a visual pinboard.  It’s a place to bring out all those sites we have saved in the deep depths of our browser bookmarks and store them in picture form instead of words.  It is a place to inspire {artists, crafters, cooks sharing their creations} and to be inspired {spinning those pins and making them our own}.

Finding inspiring Pinners is as easy as following your favorite bloggers-who-pin. Many of the bloggers here on Arkansas Women Bloggers pin and you can often find links on their websites.  Additionally, one Pinner leads to other like-minded Pinners creating a communtity of fun, interesting, and inspiring projects.  It is a place to gather ideas for everything from deciding what to have for dinner to painting techniques for that old dresser you hope to refurbish.  Pinterest is a place to grow our blog-reader lists and circle of blog friends around the world.  And, most importantly, Pinterest is a place to connect with those friends and artists.

Gather, grow, connect- exactly what the creators of Arkansas Women Bloggers hope to accomplish here in this forum!  Pinterest just provides another chance for you to get to know the great ladies here on Arkansas Women Bloggers.

Pinterest Wreath challenge

The project I’m sharing today comes from my Craft Inspiration (http://pinterest.com/gknupp/craft-inspiration/) pinboard and is from Jen over at the ever-inspiring Tatertots & Jello blog (http://tatertotsandjello.blogspot.com/2010/01/2010-burlap-wreath-and-giveaway.html)

Lets get started:

The key to this project, for me, was gathering and prepping the supplies over a three or four day period.  Having the supplies at-the-ready
was a hurdle well cleared when it came time for this challenge.


Pinterest Wreath Challenge


For this project you’ll need to gather:

-3 yards of burlap (Note: You can buy burlap cheaper at hardware stores like Lowes and HomeDepot than at fabric stores!)
-scrap fabrics
-scrap booking brads or buttons
-hot glue gun and glue sticks
-14 inch wreath form
-twine
-paper
-stamp pad
-assorted scraps and yarn to hang wreath
-circle cookie cutters {to trace onto fabrics}
-fabric marker
-a good pair of fabric shears

Begin by cutting a four inch section down the length of the burlap and set aside. This will be used to wrap the wreath form a little later.

Using your cookie cutter {or a cup} draw one 3-inch  circle, and one 2-inch circle on the burlap and cut out. Use this template to cut remaining circles.

Pinterest Wreath Challenge

You’ll need:

Burlap : 50 – 3 inch circles
25 – 2 inch circles

Fabric  25 – 3 inch circles
25- 2 inch circles

Combine layers of circles that are pleasing to you, forming flowers of burlap and fabric.  Secure in the center by pushing a brad through and fastening on the backside.  Lay out flowers as you go.

Pinterest Wreath Challenge

Tip:  layer more burlap-on-burlap flowers than you think you need.  Layer 2 to 3 circles each.

Pinterest Wreath Challenge

You’ll need a total of 120 – 150 finished flowers.

Pinterest Wreath Challenge

Lets put it all together:

Pinterest Wreath Challenge

Take the 4 inch section of burlap you cut earlier and secure one end of the burlap to the wreath form with a beaded line of hot glue and gently {and CAREFULLY} press the fabric into the glue until secure.  Begin wrapping the form tightly, overlapping as you go.

Time now, to begin hot glueing your fabric circles to the wreath form.  A small bead of hot glue on the back of each circle will be enough to attach your flowers.

 Pinterest Wreath Challenge

Start by laying out 3 fabric flowers symmetrically around the form.

Pinterest Wreath Challenge

Fill in with remaining circles adding pops of color with your fabric flowers.

Pinterest Wreath Challenge

Next, flip the wreath over and attach twine with a small dot of hot glue on each side of the wreath.

Pinterest Wreath Challenge

Flip back over and attach your message to the twine with tiny paperclips or tiny clothespins.  I originally typed and printed a message onto paper, cut out, and inked the edges.  However, during my search for clothespins I came across a little letter “g” and covered it with leftover fabric scrap from this project. I attached it with a paperclip from my scrap booking stash.

Pinterest Wreath Challenge

Finish by looping scraps of fabric, yarn, or leather {such as shoelaces!} to the top of the wreath from which to hang your finished wreath.  Hang and Enjoy!

Pinterest Wreath Challenge

Gina has graciously agreed to giveaway one of these beautiful wreaths!  You have several chances to win and we will be using Rafflecopter to help us keep track of your entries.  Entries will be open through December 16th.  Good Luck!

(For info on how to win – please click the “continue” button below!)

Read more