Category: Tuesday Tech Tips

Growing an Email Newsletter for Your Blog

Growing An Email Newsletter for Your Blog

Growing An Email Newsletter for Your Blog

There are few things that bore me more than email newsletters. 

Seriously.

Unroll.me has saved my life from the tedium of having my inbox constantly interrupted with the inane announcements that fill most email newsletters. Just in case you don’t know about it, Unroll.me is a brilliant service that a) helps you efficiently unsubscribe from everything you don’t want and b) rolls up the rest of your subscriptions so that you only get them once a day.

When I read my Unroll.me roundup, I delete almost all of it at barely a glance. I don’t even bother opening most of the emails, and when I do open one, I am usually irritated that I bothered.

Because they are so boring.

15% off sales. Lists of things I MUST have. Articles that EVERYONE ELSE has read. Places that I MUST TRAVEL THIS YEAR.

DELETE. DELETE. DELETE.

So, friends, I ask you…

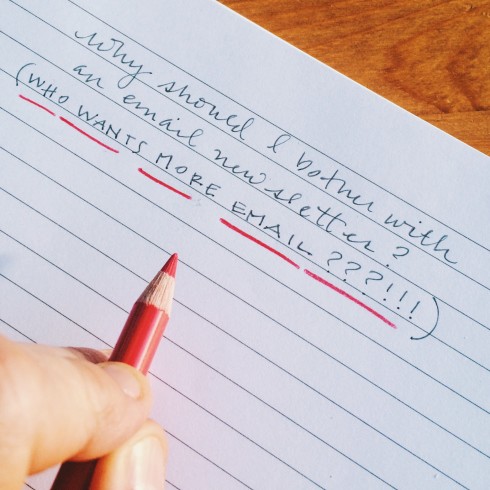
WHY should we even bother having an email newsletter for our blogs? 

Do we just hope that everyone else is not like me and they read rather than delete most of their emails? (I doubt it.)

Even if only 2% of the people who receive it open it and read it, should we just be glad that those 2% are reading? (Maybe.)

Do some of us have the ability to convert an email newsletter into sales if we are using our blogs to sell products? (Perhaps.)

Do we continue to try to collect our blog readers’ email addresses in the hopes that one day we will write a book and when that happens we will be able to email them all and beg them to buy it? (Just me???)

Actually, I am not sure why we are supposed to have an email newsletter. I think that maybe the answer to that question is as individual as each of our blogs. When I asked myself this morning why I have an email newsletter, in addition to the above and rather unlikely scenario, this is what I came up with:

When someone subscribes to my blog via email, they are saying to me: Hey, I like what you do! Keep doing it. Oh, and I don’t want to miss it when you do some more. 

And I like that kind of feedback. I am delighted if someone reads something I write, and likes it. And wants to read more. It feels good. And it encourages me to keep writing.

Sidenote: However, it doesn’t happen very often so I have to find other encouragement to keep writing. If I was relying on email subscriptions for my motivation to write, well, let’s just say I would never write anything. Ditto comments and social media likes/shares.

So, that’s my reason for having an email newsletter. It’s probably not the greatest, but for what it’s worth, it seems like a good enough reason to keep having one.

What’s your reason for having an email newsletter?

I think it’s a good idea to come up with an answer to that question before you go any further.

But I’ll move on.

How do I get more subscribers to my email newsletter?

Let’s talk about how to build that list. Get those subscribers.

Here’s what I have surmised are the best ways to get email subscribers.

Pop-ups and Opt-ins.

Personally I have not used either of these methods because I really, really want people to subscribe to me out of a sheer sense of delight in reading my blog. (I live in a fantasy world.) Not because I interrupt them with a pop-up or because I dupe them with a free PDF of Camping Menus or Travel Tips. In my head, I am afraid that if I dupe people with these methods into typing their email addresses into a box, that they will be inclined to quickly unsubscribe when they have the option the next time they receive an email from me. (Because again, Unroll.me.)

But people use these methods because they work. And depending on the goals you have for your newsletter, you might want to grow that email base, so you should probably use them too.

Pop-ups and Opt-ins are relatively easy to add to your blog via plugins. Of course, if you want to use an Opt-in (something you offer for free in exchange for someone subscribing to your blog), you have to write it first. But after you have your Opt-in material, you can easily distribute it with the help of a pop-up.  

Here’s a list of ten free pop-up plugins for WordPress users. 

Sidenote: You can actually listen to a podcast where the man who invented the pop-up now apologizes for ruining the internet with this annoying feature. It’s pretty funny.

Also, here is an article on turning viral pins into email subscribers. Who’dda thought?? Annnnnnd, if you really want to go crazy with gaining email subscribers, you should probably learn how to use LeadPages.

Go get ’em!

Ok, now that you have all those email subscribers, what do you do with them?

Of course, that depends on what your goals are in the first place. See again: Why should I have an email newsletter?

But, as far as your future email missives to your readers go, I have some suggestions. These are not proven to work. They are based solely on my personal preferences, so you can take them with a grain of salt. But if you’ve gone to the trouble of creating pop-ups and opt-ins and collecting email addresses, I feel that at this point, you don’t want to lose those same subscribers by having a boring email newsletter. 

Also, I have been playing around with a newsletter for my blog for a couple of years now. I use Mailchimp to send a little hello out into about 90 inboxes about once a month, and I am just beginning to get a feel for what makes people decide to hit the eject button. I still only have a 50% open rate (Mailchimp’s fancy statistics are free), but I keep trying to hit my email stride. 

So here are my top tips for keeping your newsletter NOT BORING. 

Keep it short. 

I am a fan of Longform. And I am a big believer in blog posts being as long as you want them. (OBVIOUSLY! As I drone on and on here…) But emails should be short. Very to. the. point. Lately, I have even been experimenting with leaving photos out of my emails. Just one less thing for people to have to wait to load. However, if I do use a photo, I use only one. Not a collage my last 18 Instagrams. Simple is best. 

Be consistent, but don’t overload.

I vote for once a month. Or less. Be succinct. Choose the best of your blog posts to highlight and let your readers wander around to the rest of them once they are on your website. Don’t include a bunch of partial feeds. I don’t want to read the first paragraphs of four different articles. Just tell me about the best one. Oh, and maybe tell me a little bit about you. It’s been a minute since I subscribed and maybe I can’t remember who you are. But briefly. (Remember, keep it short.) 

Keep it delightful. 

Every time you land in someone’s inbox, they are giving you their attention, even if it is only for a second. I want to be the email that is a “Daymaker.” I know I am just one person writing my heart out in one little corner of the internet, but I still want to use my words to bring light and love and joy into the lives of whoever reads them. 

So when I sit down to craft something that is going to land in someone’s inbox, I am going for delight. One thing that helps me is that sometimes I pretend I am just writing a quick email to a very dear friend. Of course, I don’t want to bore my friend! 

So go forth and write email newsletters friends! (If you want to.) 

Oh, and if you want to subscribe to my blog or email newsletter, well, you can do that right here

(See what I did there? Tricksy.)

I think it would be super valuable for all of us if you were willing to share in the comments a few words about your experience with or questions about email newsletters. Do you have one? Does it work? What service do you use to write it? How do you get your followers? How do you keep your followers? Tell us all about it. Collectively, we probably know LOADS about email newsletters!

XO

Alison

4 Risky Ideas for Blogging

By Alison Chino

Blog Talk, Blogging Risks

In keeping with the this month’s theme at Arkansas Women Bloggers, I’ve been contemplating RISK.

And possibility.

Thinking about the risks I want to take in blogging and in life makes me excited!

So here are some ideas for taking a risk with your blog this month.

Because taking risks and having new ideas make blogging so much fun!

1. Write a public letter to one of your internet heroes. 

Is there a blog or a column you have been reading for years? A person whose ideas you could not live without? Someone who makes you laugh. Or cry.

Write them a gushing letter full of compliments and heartfelt thanks. Then publish it on your blog. 

(Bonus points if you find your hero’s address and actually snail mail the letter as well!)

2. Write exactly what your readers want.

Do you have an email newsletter? Maybe consider sending this letter out to your subscribers:

Dear beloved readers,

Will you do me a quick favor? Hit reply to this email and ask me one question you’d love to know the answer to. It can be anything!

I will use your replies as my next several blog posts.

Thanks so much for reading! 

You make blogging so much more fun!

XO

Even if you only get four questions back, that’s four more blog posts/writing prompts than you had before. 

You could also ask this question on Facebook if you don’t have an email newsletter.

3. Write an advice piece.

Is there a skill or hobby or craft you’ve been learning about lately? Even if you don’t feel like you’re an expert, you probably know more than I do. Tell me how to repair my wood floor. Tell me how to get started on quilting. Or how to narrow down the massive number of paint color choices for a room. How do I dress for an interview? Or start a podcast? 

If you’ve been working on a project of any kind over the last few weeks, you have acquired knowledge that someone needs to know. You could be the answer to someone else’s Google search!

4. Make a vlog.

Putting yourself out into the world via video can feel like a HUGE risk if you have never done it before. It also can seem daunting, but a one minute video of you doing something as simple as introducing yourself can help your readers connect with your personality. 

So dig out a cute outfit, set up your phone and give it a go! 

We want to see your pretty face.

If you’re in a rut or looking to take a risk this month, give one of these options a try.

Or tell me other risks you are hoping to take this month! I’m super curious!

Only those who will risk going too far can possibly find out how far it is possible to go.

T.S. Eliot

Baby Steps To Becoming A Vlogger

Alison Chino

vlogging, alison chino


Confession: Over two years ago, when I first heard that we were all going to have to add video to our blogs in order to stay on the “cutting edge” of the blogging scene, I thought,

Nope. No way. Not doing it. Not. Ever. Gonna. Happen.

Famous last words.

But do you feel me?

I mean, don’t we all already have enough to do?

As bloggers, we promote our posts and tweet our hearts out and we’ve learned photography and hashtags and some of us have even attempted a little web design.

Plus somehow, we find time to actually write our blog posts.

Who has time for video?

That’s like a whole other level.

And then last year I was negotiating contracts with two different companies and they both included video on the list of media coverage that would be required of me in the deal.

And so, not for the first time in my blogging career, I committed to do something I was not entirely sure how I would pull off.

I thought:

How hard can it be? I’ll figure it out somehow.

They just said I had to provide video. They didn’t say it had to be good.

My first attempt into the world of online video was to sign up for a Vine account. I know it seems counter-intuitive to start a new social media platform with zero followers but I did not want to start badgering my Instagram and Facebook followers with my first attempts at video.

I started playing with Vine around my house, taking videos of rooms. A Vine is six seconds long, so it was so easy! It takes me longer to edit a photo for Instagram than it does to shoot six seconds of video. 

I started taking Vines of hotel rooms when I traveled or even when I went for a walk. It was actually kind of fun to have a new platform to experiment with where I was not worried about the audience. Because there wasn’t one.

But if I really wanted to share a certain Vine, I could push it to another platform. (In fact, Twitter owns Vine, so if you share a Vine with your Twitter followers, the video comes up in your feed. Fancy!) I could also embed a Vine into my blog post, and voila! Mini vlogging!

My next foray into the world on online video was to start shooting Hyperlapse videos for a travel company’s Instagram feed. Here’s how that came about:

Company Rep: Hi Alison, do you think you could use the new Hyperlapse app to post videos of your next walk on our Instagram feed.

Me: Of course. I would love to do that! (Googles “Hyperlapse app.” Googles “How to use Hyperlapse app.”)

I actually found this app super easy to use and I had lots of fun thinking up things that would be more fun when sped up. (Sheep and cartwheels come to mind)

Then, when I went on my long walk with my friend Diane, my Grand Adventure of 2014, the company said they really enjoyed the video footage of the scenery but could I do a little more where I actually narrate. Maybe even talk in front of the camera.

Me: I’m sorry. Did you say in front of the camera? 

Company Rep: Yes. We’d love for you to add your voice to the video.

Me: Well, we’ll see. 

And so with that small request in my brain, on day 2 of the Coast to Coast Walk, I launched my YouTube channel with 40 seconds of sheer ridiculousness.

I believe that it was about ninety percent delirium that contributed to the posting of the daily videos that followed on the rest of our walk, but Diane and I had loads of fun with making our video updates, and as the walk went on, we found that folks loved the daily updates.

I stumbled upon something that I later heard described as “the power of live.” 

There is something urgent about consuming content that is happening right now.

There’s a reason my son HAS to be online at 8pm for the moment something is going live:

MOM! It’s only streaming from 8-10pm and after that you can’t see it anymore. Ever. 

The power of live is the reason Snapchat is the fastest growing social media platform. 

But that’s a topic for another blog post. 

Besides, who over the age of fifteen is getting Snapchat?

Not me. No way. Not. Ever. Gonna…

Oh wait. Does that sound familiar?

Yeah. I have to stop saying that. (Of course I already have Snapchat.)

Now over to you, are you using online video? Did you fall into it like me or did you set out to learn it intentionally? I’m so curious to hear more stories of forays into vlogging?            

5 Lessons from A Blogging Festival

BlogStock, Blogging Festival

Last weekend I slept in field full of tents with lots of other bloggers at an event called BlogStock, the world’s first blogging festival. Bloggers from all different genres gathered in Aldenham Country Park, which is north of London, England. Travel bloggers, mommy and daddy-bloggers, fashion bloggers and lifestyle bloggers were all in attendance. In fact, you would be amazed at how well a group of fashion bloggers can dress for camping and still be functional in rain! There is always plenty of rain in the UK, and we had our share of showers at the festival, but the sun came out on Saturday for us, so most of the sessions were in open air tents.

My family stopped at the festival on our way home from a road trip around Europe because I had agreed to do a morning session on Saturday in a tipi. Full disclosure: Only three people attended my session and two of them were my children. Still, it was a wonderful learning opportunity for me and a chance to run my material on a few guinea pigs who were happy to give me feedback for the next go around, which will be at AWBU in just a few short weeks!

BlogStock 2014

I always come away from events like these with an overwhelming amount of new knowledge, so I thought it might be helpful + fun to share a few of my biggest takeaways from the festival! That way you can benefit from my willingness to camp out in the rain!

BlogStock Takeaways!

1. “Be funny and honest, but never mean.” Niamh Shields from Eat Like A Girl

I went to Niamh’s session on Food Blogging, but this little gem of advice applies to everything we write about on our blogs. She reminded us that it takes more time and creativity to craft an honest, but playful review (be it of a restaurant, a product or an experience) than it does to just be mean. And since I really agree that there is no place for meanness in blogging, I loved her advice.

She also ended her talk with the reminder that envy is destructive but joy is infectious. Both. So. True.

2. Aperture Priority is My Friend Jeanne Horak-Druiff from Cook Sister

I have had a new camera for over six months now that I have trouble working. For the first time, someone explained Aperture, ISO and White Balance in a way that did not make me want to run screaming from the room. Jeanne used pictures to explain taking pictures and I was so relieved to come away with a basic understanding of how to use my camera. This is probably old news for those of you with nice cameras but it is a new takeaway for me that setting my camera to aperture priority is a step between shooting in automatic mode and the overwhelming + daunting RAW option.

3. Motivate the Elephant not the Rider Karen Sargent from Global Help Swap 

Karen used this simple, yet wonderful analogy of an elephant and its rider to describe why we get stuck in our writing (and in life). The rider represents our brain and all our knowledge about blogging. Things like learning methods or how to do SEO, new techniques, and even reading blog posts like this one fill our minds with all kinds of knowledge about things we could/should do to make our blogs better. But the elephant is our emotional energy. And it doesn’t matter how much knowledge we have, if our heart isn’t motivated, we are not going anywhere. I loved this analogy, because I often think I need to learn to do something new in order to make my blog better, but actually, I just need to be motivated to put into practice the things I’ve already learned. Karen’s suggestion was to dig for the reason we wanted to write a blog in the first place. To connect with why we’re doing what we’re doing. It’s the why not the what that makes the elephant move forward.

4. Set Your Rates High Julie Falconer from A Lady in London

Whatever the service is that you’re offering, set your rates at what you think your time is worth and not at what you think “they will give you.” I’ve heard it a million times before, but for some reason, I can’t get it into my head that it’s better to have a few high paying clients and less work than tons of small, low paying jobs. As a freelancer, I have a long way to go to get to a “sustainable living” but if I would be brave enough to heed this advice, I think I would get there sooner.

5. Be a Part of a Blog Collective from The Future of Blogging Panel

This one made me smile A LOT because I am already a part of an AMAZING Blog Collective! Arkansas Women Bloggers!!

I listened to a panel of different industry experts talk and answer questions on the future of blogging, and this came up a lot. Companies don’t want to have to hunt down individual bloggers themselves, but they want to find the right bloggers for the jobs. Enter blog collectives, which do the work of finding the right blogger among them for the task. Also, they can combine to have a larger voice among multiple communities. Being an active member of a blog community is a great way to be on the forefront of whatever innovations are coming in blogging.

That is just one more reason I’m super excited about Arkansas Women Bloggers University! I can’t wait to see my Arkansas friends and meet new ones, and to get new ideas from each other! I hope to see you there!

Are you coming? What are you hoping to learn? Tell me in the comments or on Twitter!

XO

Alison


Plugin Love

by ARWB Gal Alison Chino

Plugin Love, Five Favorite Plugins

Ok y’all! This might officially be the nerdiest blog post I have ever written, but how much do you LOVE it when you are trying to make a change to your blog and you find the EXACT right plugin to make the magic happen?

When I find the right plugin for the job, for just a second, I feel like a computer GENIUS!

Until the next time.

Conversely, it can be super frustrating to search for hours and hours for a plugin for your blog and come up empty.

So I thought it would be fun to share my favorite plugins and why I love them, and hopefully, this is just a start to a conversation. I want you to share your own favorites in the comments and maybe together we will create a great resource of go to plugins for Arkansas Women Bloggers!

I am a WordPress user, so all my plugins will be for WordPress (self-hosted) but often they are available on multiple platforms, but if you use Blogger or another platform, be sure to mention that in the comments as well.

My Five Favorite Plugins

Jetpack, of course. Because. Everything.

Jetpack gives your self-hosted blog the features from WordPress.com. The analytics, the comments, the social sharing and many other things you don’t even see. My personal favorite feature is that if your theme is not mobile friendly, Jetpack can make it so, which is so important since almost everyone reads from their mobiles these days.

I know lots of people use other plugins for comments and for social sharing besides Jetpack, but I find that most of those options (specifically Disqus) are not mobile friendly.

Yoast SEO for helping your blog be found by Google.

This plugin makes it SUPER easy to optimize your blog posts for SEO, by pointing out what you still need. And there is a little light by the plugin that changes color as you optimize your post. When the light turns green, you’re golden! It’s like a little game for me to get it to turn green.

Easy Instagram for a sidebar full of your Insta-Life.

If you know me, you know that I LOVE Instagram. So of course I want to share that love on my blog. This plugin drags your latest IG images (you choose how many) into your sidebar. If Instagram is not your thing, there is a similar one available for Pinterest, so you can show off your latest Pins!

Picasa Express for dragging in your Google+ photos.

I’ve already talked at length about how much I love using Google+ photo albums and this plugin makes it so easy to pull the images to my blog. And because they are hosted on Google, the page load time is faster.

Engageya for Related Posts.

I always hope that when someone finishes reading a post on my blog, they will want to read more. This plugin makes suggestions based on the last post someone finished. There are lots of plugins out there that do this, but I like this one because it specifically suggests posts that are similar to the one just read instead of just pulling four random posts off my blog. There is also a feature available to add content from other sites, which means content from your site can be listed elsewhere as well.

Honorable Mentions: A plugin that chooses your giveaway winner, one that gives you access to pretty social media icons, one that replaces your 404 error page with a link to sponsor a child at Compassion and one that gives an option to subscribe to comment responses.

I know that is just the tip of the iceberg when it comes to what is available via plugins, so share away! What are your favorites and why?

Creating a Watermark Using PicMonkey

 
Creating a watermark to add to your blog photos is quick and easy and totally accessible for those who don’t own fancy photo editing software. I’ll show you how in just 8 steps using Picmonkey.
 
1. Open Picmonkey in your browser and choose “Design.” Choose the square option. 
 
image
 
2. Change the canvas color to black for the purpose of editing; we’ll be able to see our design while we work. We’ll change the background again, later.
 
image
 
3. For this tutorial I’m showing you how to use text as your watermark. Hit the “T.” Choose your font. Type your text.
 
image
 
4. Adjust the color and opacity of your watermark text. I suggest using a grey or white. You can adjust here. You’ll also be able to adjust a bit more when you add the watermark to the photo. 
 
image
 
5. Now that you have the text the way you’d like it to appear, crop the image.
 image
 
6. Now we’ll turn the canvas color to transparent so that only your image will appear. Your watermark text will most likely disappear so be sure to have it exactly the way you want before you complete this step. Hit the “Canvas Color” option on the editing menu. Click “transparent canvas.”
 
image
 
7. We’re ready to save this watermark! Don’t worry, you probably can’t see your image but it’s there, I promise! Be sure to name your watermark and save as a .PNG file. This will ensure that only the text youcreated will appear on your photos.
 
image 
 
8. Great! Now open the photo you’d like to watermark. Hit the “Overlay” button on the editing menu; it looks like a butterfly. Click the “Choose Your Own” option, find the watermark you saved and there it is! Yay!! Place the watermark anywhere you’d like. You can adjust the color/opacity as needed. Save your new photo and you’re finished!
 
image 
 
Now you can easily add your pre-made watermark to all  your photos.  
 
image 

Easy Photo Blogging with Google+

 By Alison ChinoGoogle+ Blogging Photos, St Cuthberts Way

Photos are the first thing people see when people arrive at your website. Professional looking photos can set a blog a cut above the rest for sure, but I have to admit that I have come very slowly to the art of photography.

For the longest time, I said that I was a writer, not a photographer. I was afraid that if I spent more time on photos that I would have less time for writing. And to some extent, this has been true. However I have found a few time savers and shortcuts for those of us who want to have pretty pictures but are not ready to take the plunge as a serious photographer.

For the sake of this post, when I say “serious photographer,” I mean someone who has a very big camera, a Macbook and Photoshop. I’m not saying you can’t be serious without those things, but I am intimidated by the combination of those three because of the investment they would take from me, both in time and in money. Maybe. One. Day.

But for today, here’s what I am doing to create the best possible photos for my blog.

First, I take loads of pictures on my iPhone, which I edit with Snapseed and VSCOCam and then send straight to my blog via a WordPress App. (I wrote a guest post all about using IPhone photos for blogging that includes more detail about this.)

Back in December, I won a real camera. Seriously. I could not believe it. I submitted an Instagram photo to a real photo contest and actually managed to emerge with a new camera. Which I am still learning to use. But I am not ready for the plunge into Photoshop. So here’s what I am using:

Google+!

Here’s why:

1. Accessiblity

Uploading and storing my pictures on Google+ is super easy! I did not have to purchase or install anything new. I just open Google Chrome and get started from my Google+ Dashboard.

2. Easy Editing

I can edit photos within Google+ with Snapseed photo tools, so it’s already familiar to me from using Snapseed on my phone.

Easy Photo Blogging with Google+, Tech Tips
Snapseed Edit Options on the Right


Easy Photo Blogging with Google+, Tech Tips
HDR options


Easy Photo Blogging with Google+, Tech Tips
My favorite edits are these more subtle tuning options.


Easy Photo Blogging with Google+, Tech Tips
Image Tuning in Google+


3. Auto Awesome Photos

Google+ is smarter than me! Seriously, when I upload photos, Google+ immediately recognizes groups of pictures and creates Auto Awesome images for me without my telling it too. It combines scenery images to create panoramas, combines series of photos to create animated gifs and it even combines several family pictures to create the one that has the best set of smiles. When I first realized that Google was doing this with my pictures, my mind was blown. (Easily impressed, much?)

Easy Photo Blogging with Google+, Tech Tips
Google generated Panoramic Image of Ireland


Easy Photo Blogging with Google+, Tech Tips
Google generated Panorama in HDR


4. Easy Sharing, Easy Accessing

I can choose to share albums or keep them private. And unlike a Facebook album, I can then access those albums from anywhere. I can grab a photo from my phone through a Google+ app if I want to use it on Instagram or Twitter. I can access them for my blog through a Google+ Plugin that adds a little icon to my dashboard that brings up all my Google+ photos.

Easy Photo Blogging with Google+, Tech Tips
Google+ Album Access


Easy Photo Blogging with Google+, Tech Tips
Viewing Google+ Albums from within WordPress


When you click on that little icon, it brings up all your Google+ albums.

Easy Photo Blogging with Google+, Tech Tips
Set your image width in Options


On the options you can choose the size width at which to import them, and because Google+ is hosting the images, they load immediately on your page.

Easy Photo Blogging with Google+, Tech Tips
Select the photos you want to insert


I just select and insert them.

Easy Photo Blogging with Google+, Tech Tips
Your images are in code on your post


In your post on your dashboard, the photos are all in code, but when you preview your post, you can see your images.

Easy Photo Blogging with Google+, Tech Tips
Preview your post to see your images.


Yay! Beautiful pictures for your blog from Google+!

I would love to hear from you all what you use most to edit photos for your blog! Do you use your phone, a big DSLR or even stock images from other sites?

Do tell!

Do you have any Google+ questions I didn’t answer? Ask me on Twitter!

Being Social, Not Doing Social

AWB Gals Being Social

By ARWB’s All Things Bloggy Gal Alison Chino, Photos photo by Whitney Loibner

I know I was here all last month sharing my journey of blogging, but I am super excited about showing back up at Arkansas Women Bloggers to talk some more about blogging once a month-ish.

So if you have questions about blogging or topics you wish I would cover, shoot me an email (alison at alisonchino.com) or tell me on Twitter!

This month, I want to talk about Social Media, and since there are eleventy million opinions in the world about all the different social media platforms, I’m not going to try to define the right way to go about it. Instead, I’m just going to tell you what I’m doing with social media.

Last fall, I was introduced to the idea that maybe we should view social media a little differently.

Maybe we should work on being social instead of doing social.

AWB Gals Being Social

Here’s a group of Arkansas Women Bloggers being social! 

I was challenged to stop publishing the same exact content to all of my social media channels, but instead to look at social media as a circle and to give people a reason to follow me in more than one place. Since this approach requires a little more creativity and time, I have found that I have narrowed the platforms I”m really using. For example, I have practically abandoned my Facebook page, which I feel ok about since Facebook rarely shows it to anyone anyway.

So here are my favorite platforms and what I use them for, plus a little bonus link to a post from a real expert!

1. Instagram

Instagram is my very favorite social platform. It’s where I put my favorite discoveries, my happiest moments and my most beautiful finds. I often use my Instagram photos later on my blog, but I don’t usually promote my blog on Instagram. I might mention about once a month that I have a blog and the link is in my profile, but for the most part I find that people follow me on Instagram to see the pictures and they don’t really care about my blog.

However, lots of folks have had loads of success using Instagram to build a brand. Katja of Skimbaco Lifestyle has done a great job doing just that and has released a free eBook (when you opt in for her email list) about using Instagram for travel that has a lot of great tips about Instagram in general.

2. Twitter

I publish most of what I write on my blog to Twitter, but I try to make it slightly more interesting than just listing the title of the post. I also tweet other things I read that I find helpful or enjoy. I almost think it means more these days to share someone’s post than it does to leave a comment on it. It validates your content when someone shares it with their friends!

I’m trying to really use Twitter to talk to people. I participate in a couple of Twitter chats about travel and I have several lists in Twitter where I keep up with what is happening in my industry. Then I have another list of Arkansas gals! I also have a list of folks I’m a big fan of and I engage with them when I’m feeling brave. I can be as shy on Twitter as I am in real life though! 

Here’s a great tutorial on using Twitter lists.

3. Facebook

I mentioned that I am over the whole Facebook page season of blogging. Now if you want to talk to me on Facebook, I just want you to become my friend. Every once in a while I will share a blog post I wrote on my personal Facebook, but I don’t do it all the time because I feel like it starts to seem like noise. Facebook is where I share pictures of my kids and my family. It’s where I check in with friends back home.

One new way Facebook has been really helpful for me in the last year is in the common use of Facebook groups. I belong to several blogging groups that basically act as forums and are wonderful for sharing information. Arkansas Women Bloggers Facebook group is one of them. I also started my own Facebook group for the #48walks project I am doing on my blog this year. This has been so much more effective than my Facebook page because people are engaged with groups that they join. Of course, if a group member gets tired of the group’s notifications and turns them off, then you lose that engagement, so you have to be careful not to abuse this platform.

Here’s my favorite post from a company on why they are breaking up with Facebook.

4. Google+

These days I use Google+ like I used to use Facebook. I put my photos in Google+ albums, which for a non-Photoshop user like me is handy since you can do simple edits of your photos right in Google+. I also share my blog posts, as well as other ones I enjoy on Google+. I have not learned how to be super engaged with my Google+ feed, but I would say this is the platform that I am growing into the most right now.

Here’s a great beginner’s guide to Google+ for blogging.

5. Pinterest

I go in seasons with Pinterest. I really love how visual it is and so I always pin my recipe pictures. But I also use Pinterest like Evernote and pin lists I want to remember or articles about blogging to a board called Learning. This is very counter productive to keeping my Pinterest boards pretty, which is the expert advice I often hear about this platform.

Since I’m probably doing it all wrong, here’s a tutorial on using Pinterest for Blogging.

Tell me in a comment or on Twitter what your favorite social media platform is and why! I would love to know.

And if you want to follow me on any of these platforms, I’m @alisonchino everywhere.

Here’s a bonus read about why you want all those handles to match.


Your Questions Answered {Tech Tuesday}

If you were unaware, we have a great Facebook group page for Arkansas Women Bloggers.  Some great discussions are happening in our group and we will occasionally bring a few of them here to share.  This week we talk about Facebook itself.

Jamie
General question for fellow bloggers: I’m seeing more and more that bloggers are putting their status update with a note that the link to the blog is in the first comment. What is the purpose/point of this? I know that Facebook links are kinda ugly, but it makes it that much harder for people to find and share the link. Can anyone enlighten me?
  • Karen  Since Facebook started deciding who gets to see what, it seems that link-free status updates are seen more than statuses that have links in them. I noticed that if you put the link in the comments rather than the actual status, more people see it. I don’t do it as often as I would like since I schedule a lot of mine, but it works when I do take the time to do it.
    November 12 at 2:47pm · Like · 6
  • Jamie  Interesting! OK, thank you for that explanation. It was starting to drive me a little nuts because quite frankly, if I’m on my phone I really usually don’t take the time to click on comments but I might for that reason.
    November 12 at 2:49pm · Like
  • Heidi Yep- exactly what Karen said.
    November 12 at 2:57pm · Like · 1
  • Jamie  So it seems like a good compromise for those of us who autofeed/schedule would be to let the link go through the first time then do a reminder post later in the week using the other method.
  • Stephanie H Looking at both FB algorithms and my personal stats, I found this not to be true. I encourage you to look at your own numbers and decide if it works for you. On a personal note, as a reader, the practice pretty much guarantees that I won’t click the link.
    November 12 at 3:11pm · Like · 5
  • Jamie  I think this is very true and I know I for sure don’t bother to click if the link is in the comments. What a frustrating catch .22
    November 12 at 3:12pm · Like · 1
  • Angie Same goes with images. I haven’t looked at my personal stats. I don’t worry about it there, but on the pages I manage it is certainly true that text-only updates get a LOT more views than anything with a link or an image. However, if you keep the link itself in the update and just delete the thumbnail thing, you can have the link handy and still get the maximum views, thus avoiding the link in the comments thing.
    November 12 at 3:27pm · Like · 2
  • Jamie  I thought images were supposed to be the way to INCREASE interest/engagement? Has that reverted back?
    November 12 at 3:29pm · Like
  • Stephanie H Again, I get far better clicks with images. I take great pics, though.
    November 12 at 3:30pm · Like · 1
  • Angie  Isn’t FB a funny critter? People DO interact more with photos; however, FB’s algorithm right now doesn’t favor them. So a healthy mix of text, images, and links seems in order. On the pages I manage I put the stuff I REALLY want people to see as text only. Stephanie H, I don’t doubt that you get more clicks. In general that’s still true. It’s just that FB doesn’t do the reach on images for fan pages like it does for text only right now. But when I do run images, I get lots more response from the people who do seem them. Rest assured, this will all change tomorrow or the next day. Then again the day after that.
    November 12 at 3:33pm · Like · 1
  • Stephanie H You also have to decide what you are going for. Do you want ppl to see your photos and links, or do you want good FB numbers. I post what I’d want to see as a customer and what makes it easiest for them to engage.
    November 12 at 3:34pm · Like · 1
  • Karen I agree with Angie. Images used to get way more views but it seems they hurt you now.
    November 12 at 3:34pm via mobile · Like
  • Angie When I was managing the FB page for the Botanical Garden it would have been ridiculous not to post pictures regularly. It’s a visual place! I just tried to make a mix of things. The numbers were SO obvious, though. Out of 7200 fans, I’d get 2500 views on a text update and 235 on an image or a link. CRAZY!
    November 12 at 3:35pm · Like · 2
  • Jacqueline It also matters where you post it from… if you are using your phone and the Pages app, online, etc. That can REALLY change your views!
    November 12 at 4:50pm · Like
  • Jamie One my pages it seems like (obviously) the ones where I tag people get the best views and certain hashtags seem to do worse than others. As in drastically worse.
    November 12 at 4:52pm · Like
  • Debbie  Hmmm. Wonder why this is? I’m such a visual person that I am far more likely to follow a link posted with a picture. Crazy, huh?
    November 13 at 5:10pm · Like · 2
  • Janeal Sometimes I post an image from my blog and put the link in the description. If it’s something of mine, I post it now and then do a timed post for later. That seems to help increase views.

Interested in joining the Arkansas Women Bloggers Facebook Group?  Click on the group and request to join.  Please note that we will ONLY add people who are registered members of Arkansas Women Bloggers.

Want a Super Power? Learn to Code {Tech Tuesday}

by the Incredible Tech Goddess Sarah Daigle Scott. Check out her cool Tech Adventure Club.

For the third year, I met all these super women. Not a single one admitted it …typical super hero behavior…denying her excellence, intuition and desire to save the world. Now, time to get her one more killer skill.

Women in programming, engineering and mathematics are still highly outnumbered for many reasons, that isn’t likely to be solved with this 100 strong audience of Arkansas based bloggers. However, all these women are creative writers, photographers, parents, and businesswomen who are all keeping or supporting blogs. Blogger ladies want to fix their own sites, add their own widget, gadgets and dilliwops [my own word].

Guess what powers the engine of a blog, oh and nearly everything? Code!

So…. My mission is to create a special breed of coders… I hack the women!

1. Get started with the foundational structure of the page and how to style it:/ {CSS} W3 Schools comes out of the World Wide Web Consortium that polices the standards.

2. Excellent video lessons from Lynda.com (not free, but worth every penny for a few months of focused learning)

Next week…

Guiding the Whiz Kids through the Minecraft