
This week’s Foodie Friday guest is Chris H. Olsen a nationally known home and garden guru, designer, author, TV personality, public speaker and friend of ARWB. In his book, Chris shares his landscape and gardening knowledge along with his unique flair for home decor and design. He is also a member of the Association of Professional Landscape Designers
This recipe is more of a method than a firm step-by-step because there’s a lot of flexibility when it comes to barbecuing ribs.
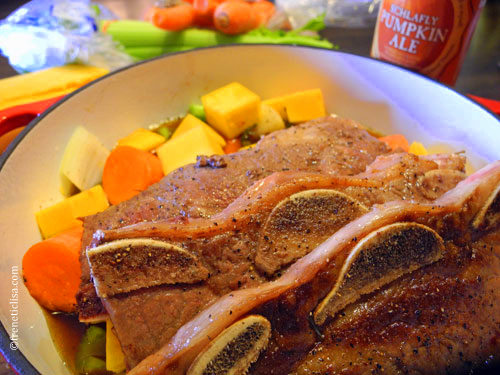
Before we start, you’ll need pork ribs. Baby back ribs come from the loin of the hog and the bones are generally smaller and the flesh is leaner and meatier than spare ribs which come from the side and belly.
You’ll also need a dry rub. I like using the rub I use for my Grilled Pork Chops. For glazing, a barbecue sauce is needed. (Nate from Debbie: Hubby uses a rib rub from Cookshack.)
Wood chips (hickory or mesquite both work really well) are also needed. Part of what makes barbecue ribs authentic is the taste of smoke permeating the meat. Since the ribs cook in just a couple hours, the smokiness will be fairly mild.
The night before you plan on barbecuing, prepare your pork ribs. Working with one rack at a time, lay the rack on a large cutting board. You’ll want to trim off any excess meat because they won’t cook at the same rate as the rib meat. Usually baby back ribs don’t come with any extra flaps of meat, but spare ribs, St. Louis style and country style ribs often do.
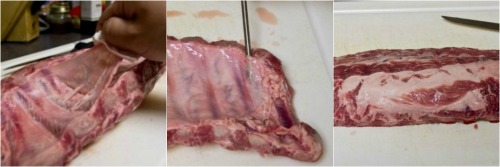
Flip the rack over so the meaty side is face down. There is a thin membrane on this side that goes over all the bones. Removing this membrane is optional, but generally a good idea. It can become a very tough sheet that tastes and feels like you’re chewing on plastic if you cook it with the ribs. To remove it, just thrust a blunt object (like the blunt tip of a thermometer) in between the membrane and the bones as shown in the photo. Wiggling your tool around a little should give you enough room to get a finger beneath the membrane. Once you’ve got a grip on the membrane, pull it away from the back of the ribs. You’ll need to use some force, but if you’re smooth about it, the membrane should come away as one piece. Using a paper towel can help you grip the membrane better if your fingers keep slipping.
Cover both sides of the rack with a generous portion of spice rub. I generally use about 1/2 cup of rub per rack of ribs. Make sure you use your hands to rub the mixture into the ribs. The moisture from the pork should be enough to make the rub stick and coat easily.
After both sides have been rubbed with the spice rub, place the rack onto a large sheet of heavy duty aluminum foil. The foil should be large enough to wrap the entire rack in it (just image you’re going to gift wrap the ribs).
Fold the foil over the ribs and fold the aluminum foil onto itself to seal just like you would if you were preparing to freeze it.
Put them onto a sheet pan and slip it into the refrigerator so the rub can do its thing. We’ll want to leave the ribs in the fridge for at least 10-12 hours. The salt and sugar in the rub should draw out some moisture from the ribs which serve two purposes. First, it firms up the flesh a little bit, and, second, helps provide moisture to the rub which turns it into a paste and then a liquid. The liquidy rub penetrates into the meat during the next several hours, so it’s important to wait before cooking the ribs.
About an hour before you plan on cooking, soak 2 cups of wood chips in water for that hour.
Prepare a grill for indirect heat. For a charcoal grill, start a fire and move the coals to one side, leaving the other side without coals. For a gas grill, turn on the burners only on one side. (If your grill doesn’t have burners on just one side, then I suggest you rig up something so your ribs will be much higher up and away from the flames than they normally would be.) You’ll also need a rib rack (a metal device that looks like a desk top filing rack. Flip it over so the point of the V is facing up and stick it on the grill. That’s how I do it. Place the rack on the side of the grill without direct heat.
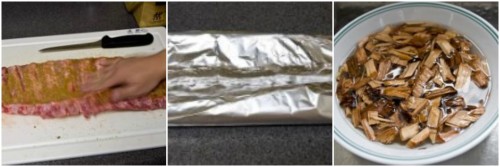
Remove the wood chips from the water. If you’ve got a charcoal fire going, put the wood chips directly onto the coals where they should begin to smolder. If you’re using a gas grill, place the wood chips into a smoker box (or an aluminum foil sheet shaped into a box with holes punched in the top like the one in the picture) and put it on the side where the flames are on. Turn the fire up until the chips begin to smoke and then turn the heat down to low
Remove the ribs from the refrigerator and unwrap them. If the racks are too long to fit on the rib rack on your grill, then you might have to cut them in half. Insert the racks or half racks into the rib rack so they are standing up. Position them so they are as far away from the heat source as possible. Close the lid.
Every twenty minutes, open the lid and rotate the ribs. Move each rack closer to the heat source, and then move the rack closest to the heat source to the position farthest from the heat.
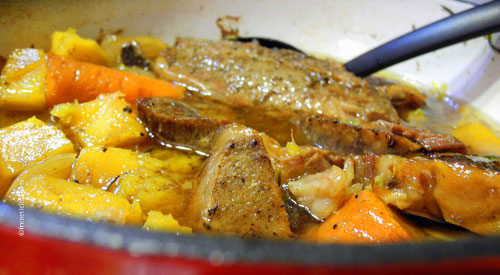
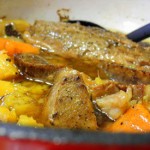
After about 1-1/2 hours for baby back ribs or 2-1/2 hours for spare ribs, the meat should have shrunk away from the bone substantially. The temperature of the rib meat should be over 180°F which means much of the collagen in the meat has probably converted to juicy and unctuous gelatin (the reason we love ribs).
At this point, pull the racks off the grill and clear off the smoker box and rib rack. Redistribute the heat so it is even throughout the grill (for gas grills, use medium heat). Place the racks of ribs back onto the grill and brush on your favorite barbecue sauce. Every three minutes, flip the racks and brush more sauce on. Repeat until you’re tired, have run out of sauce, or can’t wait any longer.
Cut the ribs apart to serve.
That’s it. Follow these steps correctly and you should have some great barbecue ribs.
Getting to Know Your ARWB Foodies
Chris H. Olsen
Living the Good Life with Chris H. Olsen
What food reminds you of childhood?
Cake! My grandma would make a wonderful strawberry cake for me for my birthday!! It’s still my favorite!
What is your favorite international cuisine?
. I LOVE Mexican food!!! I spent a LOT of time in Southern California and that just became my favorite food when I would eat out! I love to experiment with lots of different recipes!
What is always in your refrigerator at home?
I ALWAYS have cheese, raisins and milk!
What is your most used cookbook?
I don’t use a cookbook! I cook from my heart!
What is your favorite kitchen gadget?
. My wine bottle opener…lol! No..I really don’t use “gadgets”. I’m kind of an “old fashioned” cook, so I do my own chopping, cutting. I don’t really get all fancy! I like to keep it simple and easy!
Do you have a favorite food indulgence?
CHOCOLATE!
What is your go-to ingredient that you use time and time again?
Peppers! Peppers and onions! Oh…and fresh rosemary from my yard!
What is your favorite food meal to cook at home?
I love to make homemade chili!
What is a cooking tip that you would like to share with beginning cooks?
. Don’t be afraid to just get in there and try it! No one succeeds the first time, so keep at it!
When you’re not cooking, what are your favorite pastimes?
Gardening, working in my two nurseries, Botanica Gardens and Plantopia and speaking to groups around the country!
What else would you like us to know about you?
I love to try new things and I don’t think that anything is ever a failure! Being positive is the key to success in life and in business!
Connect with Chris::
Twitter: @ChrisHOlsen
Facebook
Chris H. Olsen
Botanica Gardens
Plantopia