Author: Debbie

Jerusalem Greer: Wylie’s Triple Treat Lasagna

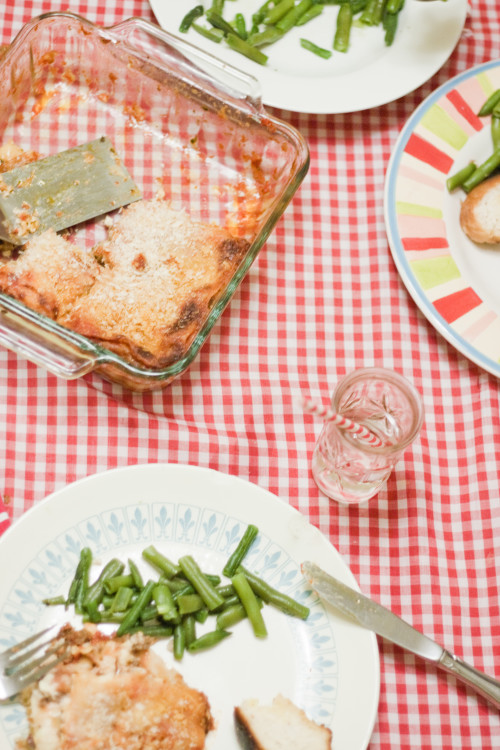
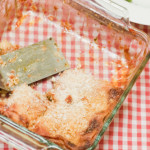
 When my son Wylie was younger he had a bit of an obsession with Garfield, the lazy, fat cat with a lasagna habit, which in turn led Wylie to develop his own lasagna habit. A few years ago, while working on my book, A Homemade Year: The Blessings of Cooking, Crafting, and Coming Together , I needed an Italian pasta recipe for the chapter on St. Joseph, so I turned to Wylie for inspiration. Together he and Sweet Man (my husband Nathan,) developed the following recipe which calls for three cheeses, three meats, and three sauces – a triple threat of deliciousness that will please a crowd!

jerusalem lasagna

Wylie's Triple Treat Lasagna
Write a review
Print
Ingredients
  1. 1 pound bacon cut into bite size pieces cooked crisp and drained
  2. 1 pound ground beef chuck browned and drained
  3. 1 pound ground pork browned and drained
  4. 1 cup grated Parmesan
  5. 3 cup shredded Mozzarella
  6. 1 15oz tub Ricotta cheese
  7. 1 24-ounce jar of your favorite prepared marinara sauce
  8. 1 15- ounce jar of your favorite prepared Alfredo sauce
  9. 1 6-7 oz jar of prepared pesto sauce
  10. One egg
  11. Prepared Italian or Panko bread crumbs
  12. 2 boxes lasagna noodles (We prefer the smaller square pasta sheets that have no ruffles. You probably will not use all of both boxes, but you will likely need more than one.)
Instructions
  1. Preheat your oven to 400
  2. The best way to build a pan of lasagna is to first create a buffet of the various ingredients.
  3. Mix the cooked meats together in a large bowl.
  4. Mix the Parmesan and mozzarella in another large bowl.
  5. Put the ricotta in a third bowl and mix in the egg.
  6. Pour the marinara sauce into a fourth bowl (fairly good sized) and then refill your sauce jar with tap water, and mix this into your marinara sauce. (The extra water will be absorbed by the lasagna noodles, which will enter the baking pan uncooked)
  7. In a large lasagna pan, spread a layer of the thin red sauce, completely covering the bottom of your pan.
  8. Next place a layer of uncooked pasta on top of the sauce, followed by layers of Alfredo, meat, mozzarella/Parmesan, pesto, and ricotta/egg.
  9. Continue building layers in this fashion until you reach the top of the pan, always starting with the thin sauce
  10. The top and final layer should be composted in this way red sauce, pasta, red sauce, mozzarella/ Parmesan.
  11. Cover dish tightly with foil and place on the center rack of the oven for about 30 minutes, or until it has thoroughly cooked through.
  12. Remove foil, sprinkle with bread crumbs, and return to oven until cheese and bread crumbs are browned.
  13. Let stand for 15 minutes before slicing into portions (if you do not let it stand and cool the whole dish will fall apart into a slippery mess when you try to cut it.)
  14. Enjoy!
Arkansas Women Bloggers https://arkansaswomenbloggers.com/
jerusalem1


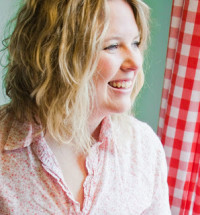
Jerusalem Jackson Greer is a writer, speaker, nest-fluffer, recent farm-gal, and author of A Homemade Year: The Blessings of Cooking, Crafting and Coming Together. She is the Minister to Children, Youth, and Families at St. Peter’s Episcopal Church in Conway, Arkansas. Jerusalem lives with her husband and two sons on a little farm in Shady Grove, Arkansas. As a family, they are attempting to live a slower version of modern life.  She blogs about all of this and more at http://jerusalemgreer.com

Tour of Trees with Billie Cornwell.

Billie 1

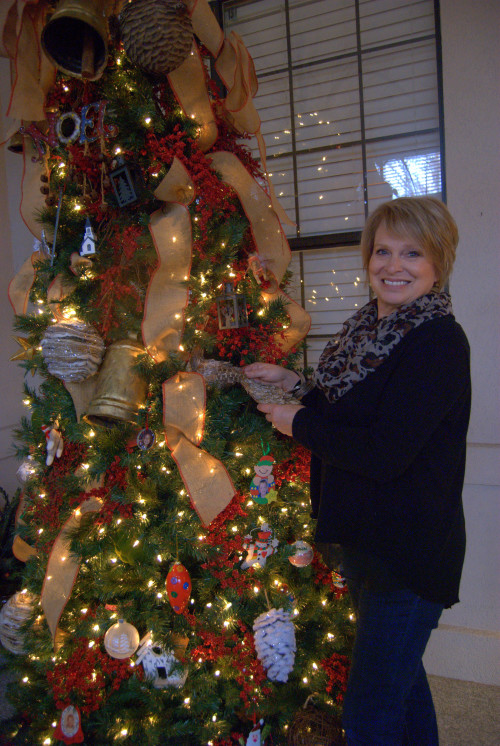
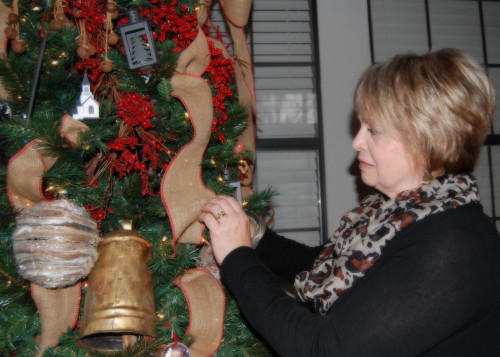
Billie Cornwell of Benton has more talent in her little finger than I can even begin to wrap my head around.  She’s a self-professed Pinterest and Southern Living addict who titles herself “Martha Stewart on a budget.”  In her former life, she was an exec with Arkla who took early retirement to become a full-time grandmother,  church and community leader and  civic volunteer.  She’s the person I look to for every decorating question — including the staging of our ARWB booth at the Arkansas Flower and Garden Show last February.

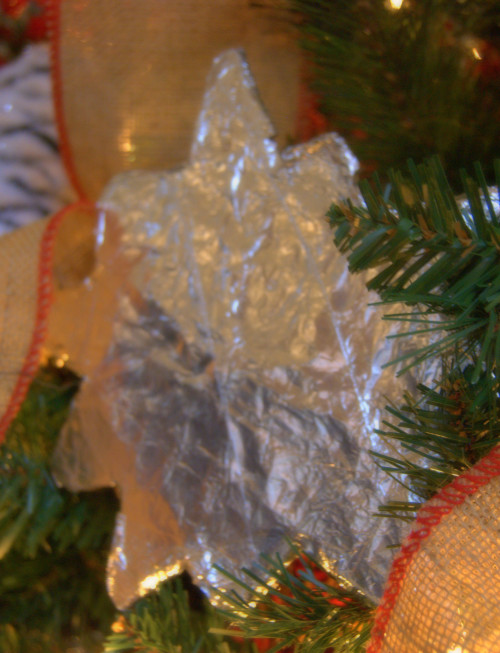
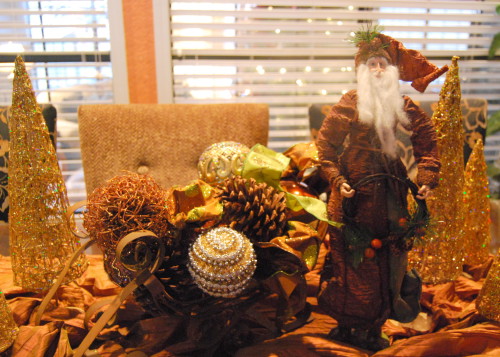
When it comes to decorating for Christmas, Billie is all about family.  There are little touches of family throughout her home from the sentimental, handmade aluminum foil star made by her daughter Meredith in elementary school,

billie meredith star

 to her son’s favorite sock monkey

bllie 16 sock monkey

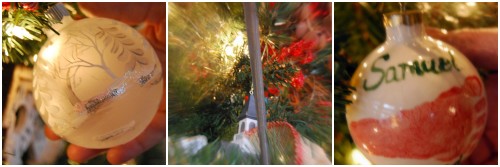
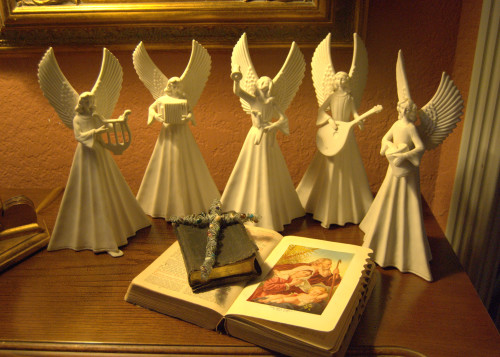
or the handpainted ornaments from a favorite aunt or a grandson, the prominently- paced spike symbolizing those used on the Cross of the Crucifixion
 billie ornament collage

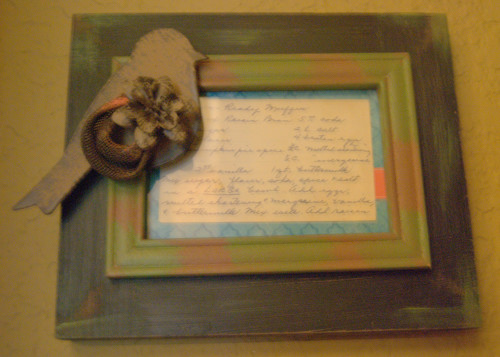
 to the handwritten, framed recipe card for muffins handed down from her mother, now deceased.

billie muffin

Family is everywhere.

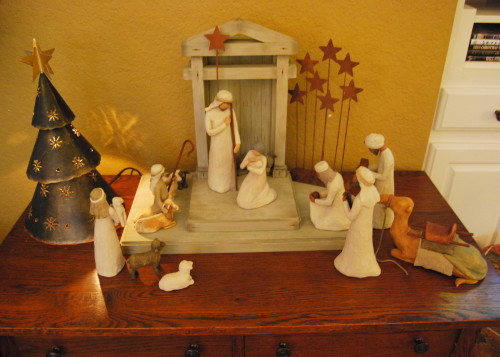
And taking center stage  among the nativities collected from their travels, is an original painting of three snowmen made especially for her by one of her grandsons.  A masterpiece to be sure.

billie 12 3 snowmen2

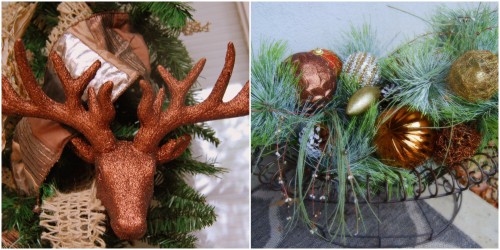
From the time you arrive at her front door, you sense the presence of the Christmas holidays.  Simple yet elegant.  Welcoming.  Beauty abounds in every nook and corner.  Yet, by her own admission, she’s cut back quite a bit.  (Yeah, right) 

billie front porch

It’s just a sense of style that comes as naturally to her as breathing, I think.  Some of you are talented in much the same way.  As for me, I have to admire your talent and prey on your generosity for assistance.  You see it.   You take what you have and create a beauty like no other.

bllie 12 mantel

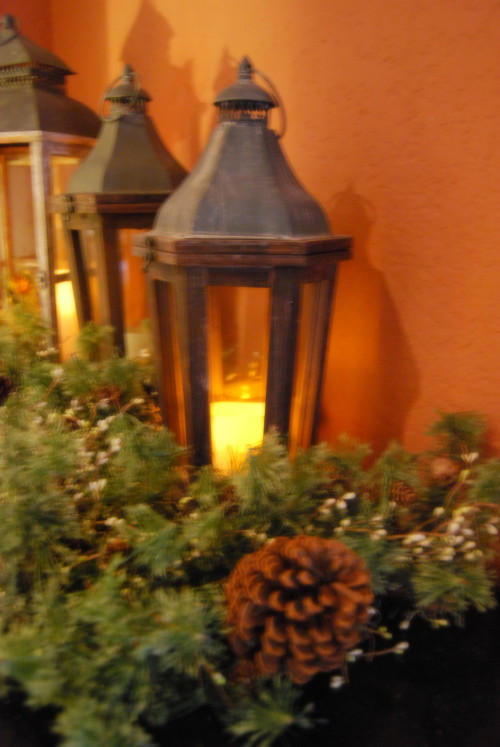
And sometimes it’s all about discovering the unexpected in unusual places
billie tree top

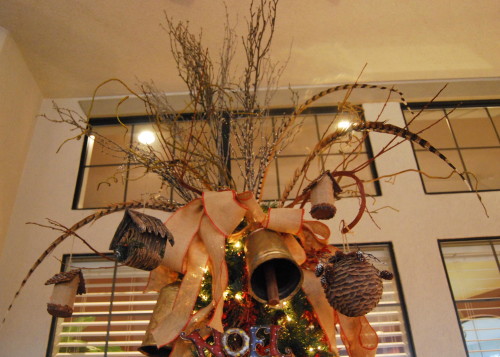
 When I asked Billie if she would be willing to let me give you a tour of not just her Christmas tree but of her home as well, she was more than willing.  I also imposed upon her for some words of wisdom — five pointers that would guide all of us in decorating our own homes for the holidays.  Simply put, here’s what she shared:

  • Stick to a clearly defined color palate and transition that color scheme throughout your home.

billie 7 kitchen table

  • Make one big statement whether a floral arrangement or a huge vase filled with fresh greenery.

billie 17 lanterns

  • Keep it simple.  (Her tree is totally striking in its simplicity.)

billie 9 angel choir

  • Invest in heirlooms…something you love and will use year after year, such as a manger scene.

billie nativity

  • Learn to cluster—use things in 3’s or 5’s.

billie tree

  • Use what you have.

billie 11 kitchen center cab

 And that really is what she does.  I’m just waiting for her to come do the same thing at my house.

Debbie Arnold


 Arkansas Women Blogger member and co-administrator Debbie Arnold pontificates and eats at Dining With Debbie.  She and her Hubby split their time between Central and Northwest Arkansas.  She loves to cook, develop recipes and have play dates with her two perfect grands.  Mostly, she has play dates with the Perfect Ones.  Twitter: @diningwithdeb  Intagrams : @diningwithdebbie

Rhonda Bramell: Breaking Bread {Foodie Friday}

bread final

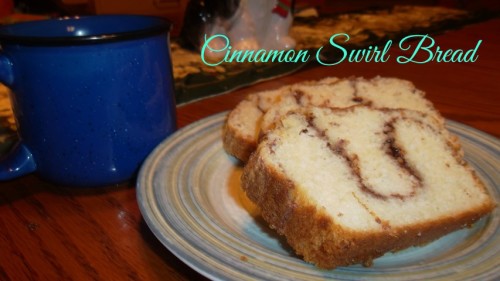
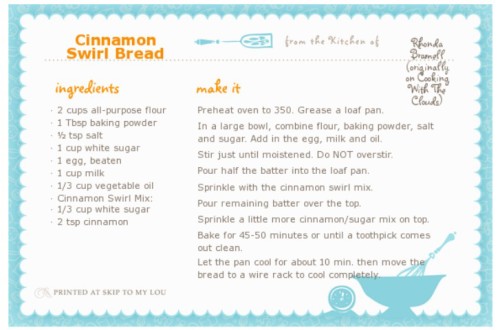
As my deadline for this post approached, I was mulling over several different bread recipes that I could have shared.  I’m a bread eater; what can I say? I’ve never met a bread, roll or muffin that I didn’t like, so I knew it would be a tough choice.  As luck would have it, my  husband came home from work last week and told me the guys at work had requested that I make some cinnamon swirl bread for them. Bam! There’s my post.  I love when that happens.
 
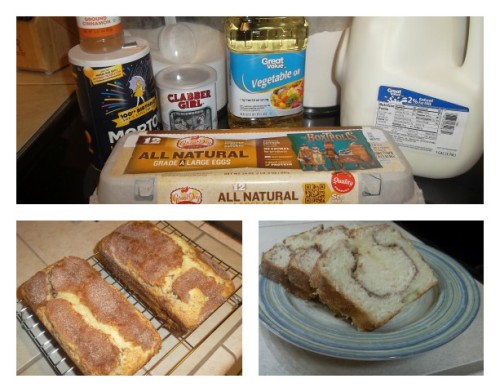
I got this recipe for cinnamon swirl bread from my friend Reba, who was my daughter’s kindergarten teacher. She has a blog where she posts all of her family’s weekly meals and recipes, so I often look to it for fresh ideas. I hit the jackpot when I found this recipe!
 
This bread is so versatile that it can be served as breakfast with coffee, as a snack or even as a dessert. I like to eat it warm with a glass of cold milk in the mornings. In addition to feeding the guys at my husband’s work, it also goes well to potlucks and picnics. And last year I gave each of my neighbors a loaf during the holidays.
 
If you have a sweet tooth, this bread is definitely for you. Enjo

recipe collage
 
recipe_final2

Rhonda_bwfinal


I live in Northwest Arkansas with my husband and three kiddos. I write at Bramell, Party of Five , where I’ve been blogging for seven years.   I’m your typical Southern gal turned minivan-driving mama.  Life with twins + 1 is a crazy, busy life but definitely provides me with lots of creative inspiration.

Kaylyn Cavalier: Merry Merry Munchies {Foodie Friday}

Kaylyn 1To me, recipes are memories.

This recipe passed down from grandmother to granddaughter is host to countless scents, tastes, moments, and celebrations.

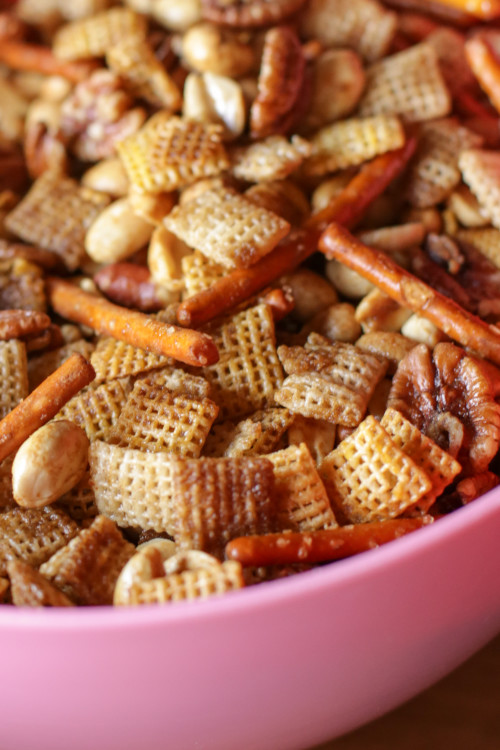
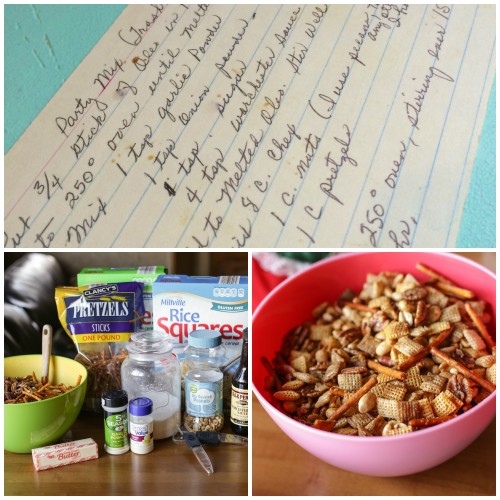
My fondest recollection of a recipe memory is my Mamaw’s Trash (or Chex Mix as it is more often called).  Having just celebrated Thanksgiving, I spent a lot of time last week remembering my Mamaw and her warm kitchen full of home canned goods, Schwan’s Ice Cream (hah!) in the freezer, and a yummy treat always waiting to be devoured.

Our entire family coveted the days my Mamaw made Trash. The house always smelled a little bit spicy, a little bit buttery, and a lot loved. She kept it in a huge Tupperware cake  “taker” turned upside down because it was the biggest container she could find. There was always Trash on the holidays, so I suppose that’s why I correlate the two so much!

Trash Munchies
Write a review
Print
Ingredients
  1. 1/ 2 cup salted butter
  2. salt
  3. 1 teaspoon garlic powder
  4. 1 teaspoon onion powder
  5. 1 teaspoon sugar
  6. 3 Tablespoons Worchestershire sauce
  7. 8 cup Chex (mixture of rice, corn and wheat)
  8. 2 cups nuts (mixture of pecans, peanuts, and any others n hand)
  9. 1 cup pretzels
Instructions
  1. Preheat oven to 250*.
  2. Put 1 stick of butter in a saucepan and melt over medium heat. Add spices, sugar and Worchester sauce and simmer until combined.
  3. In a large bowl, toss dry cereal ingredients, and then pour over butter mix. Toss gently to coat.
  4. Spread out evenly between baking sheets, and bake at 250*, stirring every 15 minutes, for an hour.
  5. Sometimes, we add a little hot sauce for a kick, or a little extra Worchester sauce for more spice!
Notes
  1. I think Trash is even better the second day, so save a little to enjoy!
Arkansas Women Bloggers https://arkansaswomenbloggers.com/
 kaylyn collage 2 

 It’s is the merriest of all munchies for the holidays and I hope you enjoy my Mamaw’s take on this holiday favorite.

Merriest of Holidays to you!

Ikaylyn‘m Kalyn 
love music. love the outdoors. love life.
Following life around with a camera is my passion; along with mama-ing, DIY-ing, cooking, and exploring.  
 

Michelle Shellabarger: Tamales Panamanian Style {Foodie Friday}

Tamale Collage Panamamama 

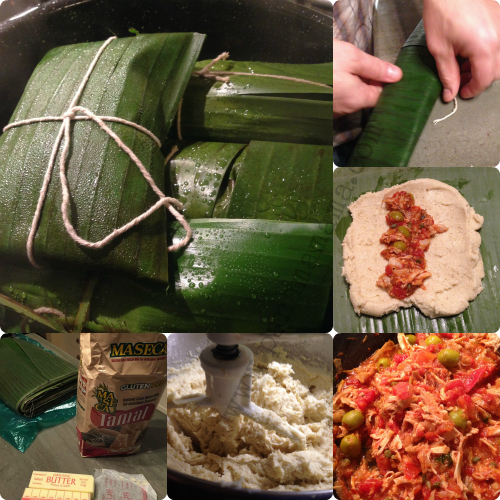
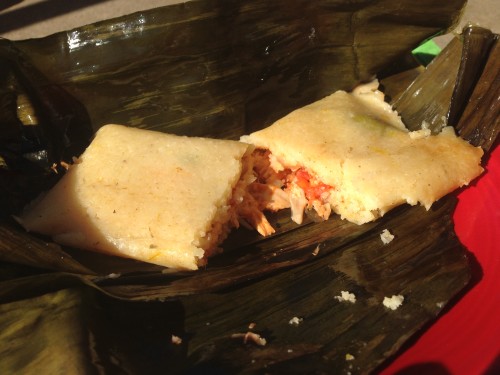
 Growing up in Panamá I always looked forward to the holidays because it meant…

Tamales!  

Not the corn-husked wrapped, cheese smothered type that Arkansas is so famous for (which I have discovered are fantastic in themselves) but the fat, presents of corn dough and favorful meat wrapped up with banana leaves and twine.   No big party was complete without this special treat.  The steamy smell brings back wonderful memories of family and friends.  Traditional tamales take a long time to make because you cook the meat, cook, husk & grind green corn, find platanillo leaves etc.  Then put it all together.  A true labor of love.

 I learned how to make tamales by watching, but my recipe is adapted from a traditional recipe and is much simpler.  I don’t eat pork (thus, no lard or ham) and I’m not a total purist (meaning I don’t cook and grind up the corn myself.) I always like to make them after the holidays and use leftover turkey to make a great meal on New Year’s eve. (Freeze the turkey in bags and use it to make them a few weeks later.)  You could easily make them vegetarian by simply using veggies instead of the meat.


The hardest part of making the tamales is in the wrapping. Finding the banana or platanillo leaves can be difficult depending on where you live.  Check out your local Latin grocer (sometimes Asian or Indian stores have them also.)  Try and find fresh, pliable, very green leaves.  The fresher the leaves are the easier to wrap the tamales.  Wrapping might take a couple of tries, just remember it’s like wrapping a ribbon around a package!

 tamale

Tamales Panamanian Style
Yields 10
Write a review
Print
For masa dough
  1. 1 cup of butter
  2. 4 Tablespoons of coconut oil
  3. 4 cups of masa
  4. 2 Tablespoons of baking powder
  5. 4 cups of broth or bouillon (I like to use vegetable or chicken)
  6. 1 cup of cooked sweet corn off the cob (frozen or canned)
  7. salt & pepper to taste (this will vary depending on your broth)
  8. achiote paste or powder for coloring if desired
For Filling
  1. ½ of an onion, finely diced
  2. 1 large clove of garlic, diced
  3. 1 green bell pepper, diced (or 7 aji criollo peppers, if you can find them)
  4. 4 cups of leftover cooked chicken or turkey (more or less is fine too!)
  5. 1 14.5 ounce can of diced tomatoes
  6. 4 Tablespoons of tomato paste
  7. 1 cup of green Spanish olives (more or less if desired)
  8. 2 Tablespoons of capers if desired (I like more!)
  9. a handful of golden raisins or chopped prunes (if desired)
  10. 1 cup of vegetable or chicken broth
  11. Spice to taste (salt, pepper, Sazon or saffron)
  12. 2 Tablespoon of Goya’s Recaito or 2-3 culantro leaves, chopped *Culantro is used in Panamanian cooking, but is not easily found in the United States. Goya Recaito is a cultantro based sauce that adds a bit of the flavor. Cilantro is NOT the same spice but can be used if nothing else is found, just chop about ¼ cup of leaves and add to sauce.
  13. Banana or plantanillo leaves for wrapping tamales
  14. Cooking twine
Instructions
  1. Mix masa and baking powder in bowl.
  2. Add hot broth and mix. (Your hands or pastry cutter work well for this.)
  3. Beat butter and oil in mixer and slowly add in masa mix, beating until fluffy.
  4. Add salt & pepper to taste.
  5. For filling pull or chop meat into small bite sized pieces.
  6. Saute onion in large skillet, medium heat, until almost translucent.
  7. Add garlic and peppers and continue cooking until onion is translucent.
  8. Add meat, tomatoes, tomato paste, culantro, and broth and stir, cook for two minutes.
  9. Add olives, capers, raisins and spices. Cook until mixture is warmed through and raisins are plumped.
  10. Cut banana leaves to about 12-15” long pieces and wash & dry leaves.
  11. Spread about 1 cup of masa dough fairly thin, in a square shape in middle of leaf (about the size of a slice of thin white bread.)
  12. Add a few tablespoons of meat mixture in center of masa.
  13. Carefully roll up leaf with masa, tucking ends under as you go. Sometimes the leaves will rip, especially if they aren’t very fresh. Don’t worry, just use another leaf to wrap up the one you are working on. You just don’t want any masa showing that can leak out while cooking.
  14. Take twine and wrap up tamal like a gift, tying a knot fairly tightly.
  15. In a large steamer place water to cover bottom of pan, then banana leaves to cover steamer rack. (I use my canning pot with the jar rack on bottom, water to top of jar rack and banana leaves on top of that.)
  16. Carefully place tamales in layers in steamer on top of rack. On top you can place another leaf to hold steam in nicely.
  17. Steam for about an hour over medium high heat.
  18. Carefully remove tamales, unwrap, and enjoy!
Notes
  1. Some people like a sofrito sauce over the tamale, but you don’t have to use anything. I personally like a bit of hot sauce! Any extras will freeze beautifully if you let cool and place in a bit of waxed paper, then freeze in a freezer bag. To reheat just pop in microwave for awhile or re-steam.
Arkansas Women Bloggers https://arkansaswomenbloggers.com/

I’ve been a baker, translator, and candle-stick maker, (among other things) now a mom of four trying to live a “green” life in the city.  Chicken keeping, simple living, art and road trips make me happy. I lived mainly in the Republic of Panama til I met my man and moved to Arkansas, which I now call home.