Category: Foodie Friday

Keisha Pittman: Manhunt Menu {Foodie Friday}

By Keisha Pittman of Big Pitt Stop

keisha Collage

I’ve always heard it said that the way to a man’s heart is through his stomach.  But, I’m convinced that not just any meal will do. 

As a single gal one thing I’m thankful I snagged from my mama is her cooking skills.  (I guess it doesn’t hurt that I look just like her too!)

But, I’m pretty sure if I knew my house were burning down, there are about 3 things I’d quickly grab and the typed collection of my mama’s recipes are at the top of that list. 

See, at our house, food was the way you told someone you loved them.  Whether it was a German Chocolate pie when my dad got a promotion at work or a pasta dinner to carb load the night before my sister’s big soccer game, she always came through with just the right meal. 

So, one can only assume then that if one were on a manhunt, then one would prepare a meal. **hypothetically of course! **

I recently found myself walking into my Sunday night bible study with what I thought was a perfectly prepared offering for the dinner menu that had been posted on our Facebook page.  What I quickly found out was I was the only one who showed up with a 9 x13.  Everything else was in its original grocery store container and displayed perfectly for our smorgasbord buffet.  Much to my amusement the new guy in the group was standing closest to the delectable delight I had hauled across town in my carriage which was protecting the dessert I had just removed from the oven moments before I left the house. 

“What’s wrong with these people?” was my first thought.  But I quickly learned that girls my age don’t really do much home cookin’. (Which surely has to give me the upper edge?)  So, I’ll keep showing up with homemade desserts and hope at some point it will overcome all my other faults. 

The way I see it, I have two options: show up with a homemade layer cake or bat my eyelashes and twirl my hair.  Since my lashes are stubs and I’m not one for putting up fronts, I’m gonna stick to mama’s recipes.  They worked for my daddy and he’s a pretty cool dude.

So, today I’m sharing with you Dirt Dessert – the last menu item I made and carried to a man’s house to finish off the menu, just the way my mama fixes it on a summer afternoon while dad’s mowing the yard!  After all, everybody needs a treat for dinner.

Dirt Dessert
Write a review
Print
Ingredients
  1. 1 package chocolate sandwich cookies
  2. 3 cups milk
  3. 2 3.5-ounce packages instant chocolate puddling
  4. 8 ounces cream cheese
  5. 1 cup powdered sugar
  6. Dash vanilla extract
  7. 1 tub frozen whipped topping
  8. Gummy worms, optional
Instructions
  1. Mixthe pudding and milk in bowl and set aside. The pudddig will thicken while you prepare the other ingredients.
  2. Crush the cookies in food processor (If you don’t have a food processor, put them in a gallon Zip loc bag and crush with a rolling pin or meat mallet – you know the tools you’ll use to chase him when he’s your husband later!)
  3. Beat together the cream cheese and powdered sugar until smooth.
  4. Add in vanilla and mix thoroughly.
  5. Fold in ½ of the tub frozen whipped topping.
  6. Reserve ½ cup of cookie crumbs; spread the remainder of the crumbs across the bottom of 9x13 baking dish.
  7. Top with the cream cheese mixture and spread evenly.
  8. Cover cream cheese mixture with pudding, spreading evenly to edges. Cover top with remaining frozen whipped topping and sprinkle with reserved cookie crumbs.
Notes
  1. I’m not a fan of the worms. I just don’t feel like grown men are into gummy worms, but if you’re making this for kiddos or another occasion, feel free to make it a little more “fun” and add your own gummy creepy treats! And of course, it’s always better when served in a container where you can see all the pretty layers – to make the layers, split the cream cheese and pudding layers in half and save a few cookies for in between.
Arkansas Women Bloggers https://arkansaswomenbloggers.com/
 While I’ve still not snagged the man, I’m going to guess it has nothing to do with the menu.  The right one just hasn’t eaten any of my treats yet!


Keisha headshot Keisha Pittman is learning to dance in the rain and glory in the rainbows. She started a blog, bigpittstop.blogspot.com, to tell the story of her walk through cancer. Five years later, she’s kicked cancer’s butt, and learned to navigate life a little differently. A self-proclaimed nerd, there’s nothing she won’t try, no side road she won’t take and no recipe she won’t improve. Lucky for us, she likes to talk about her adventures with a healthy dose of self-deprecation humor, and always looks for the good in every situation and person.  Come follow along.

Blog – bigpittstop
Twitter – @bigpittstop
Instagram – bigpittstop
Pinterest – Keisha Pittman or bigpittstop
Facebook – bigpittstop-new journey, new normal, new adventure


Kimberly Campbell: Lemons, Limes and Lavender Oh My!

By Kimberly Campbell of kd316

 collage

Lemons, limes, and lavender – oh, my!  What a world of options when you have these three delicious “from the farm” ingredients.  Fresh ingredients are so important to tasty, healthy, and/or delicious recipes.  These three small wonders have been in my thoughts since I knew the theme of this Foodie Friday post.  What a delicious mindset!

The recipes started taking shape by looking at several websites and browsing some of my favorite cookbooks.  Just looking at pictures of brightly-hued lemons, small, green perfect limes, and from the garden lavender made my mouth water in anticipation.

My in-laws were in town for Easter Sunday – and I knew my husband and his family mostly like lighter desserts.  We were having a heavier meal, so I liked the purpose of lemons for the pie.  Oh, delicious pie that it was!  A lemon ice box pie.  Surprisingly, I’d never made one before.  Happy to my tummy!  But, it took two tries.  I don’t know where my brain was but I poured the entire pie into the pie shell and was just about to slide it gently into the oven, when I realized I had forgotten the sugar.  Now, one tablespoon of sugar may not seem like a lot to even matter – but when you have lemons – you need sugar.  So, I hesitantly sent my husband back to the store because you can’t have Easter Sunday meal with no dessert.  Thankfully, he wanted the pie as much as I did and was all the more willing to go. 

So, you would think by the time I came around to altering the lemon pie recipe to make a lime pie recipe I’d have it down and not make any mistakes, right?  Wrong.  First, I zested and juiced my limes, and then I dumped a whole egg into the bowl.  Yep, I only needed yolks for this recipe.  So, back to the store I went for more limes.  (Note: I’m very glad in both Little Rock and Atlanta – where I now live, I’m very close to a Walmart or Kroger or Publix.)  And a side note that I’m missing now living in Atlanta: Great Day Farm eggs.  Oh, please, start shipping to Atlanta!

The flare for the lime pie was indeed the coconut whipped topping.  Cool whip is a staple in our home, but real whipped cream, I dream in fluffy white goodness.  And I adore cream of coconut (you know, the famed ingredient in the cocktail aisle).  Just put some of this whipped cream in a bowl and hand me a spoon.  Delicious!

Now, what to do about the lavender?  My husband wonders where I come up with this stuff, but he was very glad I did in this case.  Mini pound cakes, infused with a lavender simple syrup with a homemade buttercream (again, I could eat it by the spoonful) with the same simple syrup.  Heavenly.  My husband said it was the best buttercream I’ve made – and believe me, I’ve made many batches of it in the three years that we’ve known each other.  He gets my vote for Most Encouraging Husband!

So, whether you want a pie or a cupcake – or just decide to go with a spoon and bowls of the whipped topping or buttercream, start your summer off right and try these recipes. 

What are your favorite ways to use lemons, limes, and lavender?  Please share recipes with all of us so we can enjoy the fruits of summer!

cupcakes lavender

Lemon Ice Box Pie
Serves 8
Write a review
Print
Ingredients
  1. 1 graham cracker crust
  2. 3 lemons, juiced and zested
  3. 3 egg yolks (save the whites to make a meringue or an omelet)
  4. 1Tablespoon sugar
  5. 1 14- ounce can condensed milk (full fat version)
  6. 1 ½ cup heavy whipping cream
  7. 2 Tablespoons sugar (or to taste)
  8. ½ teaspoon vanilla
Instructions
  1. Preheat oven to 350.
  2. Zest and juice the lemons. To that, add the eggs, sugar, and milk. Mix well.
  3. Pour into pie shell.
  4. Cook for 10 minutes
  5. Let cool completely then store in fridge overnight.
  6. In a cold mixing bowl, whip the heavy cream, sugar, and vanilla until medium peaks – or peaks of your choice form.
  7. Carefully spoon onto top of pie.
  8. Serve!
Notes
  1. Chill the bowl and electric mixer beaters in the freezer overnight as the pie sits in the refrigerator.
Adapted from Sara Foster of Foster's Market in Durham, North Carolina
Arkansas Women Bloggers https://arkansaswomenbloggers.com/
Lime Ice Box Pie with Coconut Whipped Cream
Serves 8
Write a review
Print
Ingredients
  1. 1 shortbread pie crust
  2. 5 limes, zested and juiced
  3. 3 egg yolks
  4. 1 Tablespoon sugar
  5. 1 14-ounce can condensed milk (full fat version)
  6. 1 cup heavy whipping cream
  7. 1 cup cream of coconut
  8. Zest of 1 lime (garnish, optional, but pretty)
Instructions
  1. Preheat oven to 350 degrees.
  2. Zest and juice the limes.
  3. To that, add the eggs, sugar, and milk. Mix well. Pour into pie shell.
  4. Cook for 10 minutes.
  5. Let cool completely. Store in fridge overnight.
  6. For garnish, whip the heavy cream and cream of coconut together until soft peaks forms. Spread on top of the pie
  7. Sprinkle on the lime zest for a pretty presentation. (Another option if you had more time would be to toast some shaved coconut and use that as your garnish.)
Arkansas Women Bloggers https://arkansaswomenbloggers.com/
Mini Pound Cakes with Honey Lavender Buttercream
Yields 12
Write a review
Print
Ingredients
  1. Honey Lavender Vanilla Simple Syrup: (adapted from Bldg 25 Blog)
  2. 1 cup local honey (also has been known to help calm allergies)
  3. 1 cup water
  4. 1 vanilla bean (seeds scraped and keep the pod)
  5. 2 teaspoons culinary lavender buds
Mini Pound Cakes
  1. 1 cup sugar
  2. 1 ½ plus 1/8 cups all-purpose flour
  3. 1 1/4 teaspoons baking powder
  4. 1/3 teaspoon kosher salt
  5. 6 Tablespoons unsalted softened butter
  6. ½ cup plus 2 Tablespoons whole milk
  7. 1 1/2 teaspoons vanilla extract
  8. 2 large eggs
Buttercream
  1. ½ cup butter, very soft
  2. 1 ½ cup powdered sugar
  3. 2 ablespoons simple syrup (or to your taste)
Prepare the simple syrup
  1. In a small sauce pan on medium heat, bring all ingredients to a boil.
  2. Simmer for about 15 minutes until the syrup lightly coats the back of the spoon.
  3. Using a small mesh strainer – pour the syrup through into a storage jar.
  4. Store in fridge for a few weeks (if it lasts that long).
Cakes
  1. Preheat the oven to 350 degrees and prepare cupcake pans with liners or nonstick spray.
  2. For cupcakes (this recipe makes 12), combine dry ingredients in a mixer.
  3. Put butter in and mix until the mixture looks like pebbly sand.
  4. Add the wet ingredients, then add the eggs one at a time until well-incorporated.
  5. Fill cupcake liners 2/3rd full and bake for 23 minutes at 350degrees.
  6. Let cool completely. Or you can eat one right out of the oven if you so desire.
  7. Once cooled, poke holes in the top of the cupcakes with a fork.
  8. Drizzle simple syrup down through the holes.
  9. Let sit for about an hour before frosting.
Buttercream
  1. To make frosting, cream all ingredients until desired taste and texture.
  2. Instead of using designer tips, I just cut the tip off of a small plastic sandwich bag. It works perfectly for me.
  3. Frost the cupcakes.
  4. If you have some lavender buds leftover, you can decorate the top of the mini cakes. If not, some pearled sugar toppings would be lovely as well.
Adapted from 990 Square
Arkansas Women Bloggers https://arkansaswomenbloggers.com/

photo 


Kimberly Campbell is a wife,  a momma of two active boys and a creative.  She enjoys cooking, photography, calligraphy, writing, and traveling. She and her fellas have just moved to Atlanta, Georgia where she will head up the Georgia Women Bloggers! 

IG: kcreatives
Twitter: kd316
Facebook: Kimberly Davidson Campbell

Jeanetta Darley: Farmer’s Market Finds {Foodie Friday}

By Jeanetta Darley of The Splendid Things

In the dusky Saturday mornings, tables are unfolded and canopy tents are wrestled.  Crates and baskets of fresh grown offerings are unloaded while jars of jelly and local honey are stacked into pyramids.  Farmers stand anxiously waiting.  Waiting for us.

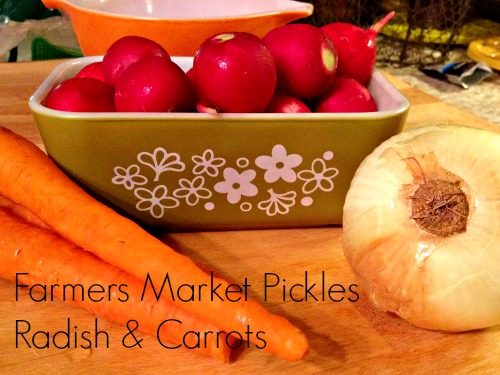
Most farmers markets are just beginning to roll out their wares.  And while you may not see much variety right now as the temperatures (hopefully) rise (as we know they always do) so will the selection.  Right now we are getting roots and leafy greens.  And one of my favorites.  Radishes.

radish1

I love the spicy crunch of the small red orbs.  And they can be delicious in so much more than sliced in your salad or dunked in a vat of ranch.  When in doubt, pickle it!

Pickling is a great way to save your farmers market (or your garden) bounty.  And a refrigerator pickle like this one is fast and easy and can be used with different vegetables.  Since there were radishes and carrots a plenty at the market that is what I am using in this recipe.  The color combination looks beautiful and would make a great hostess gift or contribution to any upcoming Memorial Day cook out.  

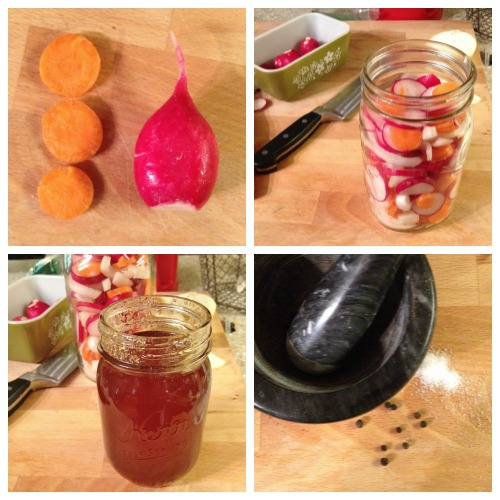
radish Collage


Farmers Market Pickle - Radish & Carrots
Write a review
Print
Ingredients
  1. 2 cup sliced radishes
  2. 1 cup sliced carrots
  3. ½ medium onion thickly sliced
  4. 4 sliced garlic cloves
  5. 1 cup water
  6. 1 cup vinegar
  7. 2 teaspoons kosher salt
  8. 1 tablespoon local honey
  9. ½ teaspoon crushed peppercorn
Instructions
  1. Slice all of your vegetables, toss them together and pack into a quart size jar. If you really want to make a presentation you could put the vegetables in layers.
  2. In a small sauce pan add the remaining ingredients and bring it just to boiling.
  3. Pour the liquid and spices over the vegetables. This will be easier to do with a wide mouth funnel or a measuring cup with a spout.
  4. Use a skewer or knife to help move any bubbles to the surface.
  5. Place the lid on the jar. Once the jar has cooled some then place it into the refrigerator and let it set for 24 hours
Arkansas Women Bloggers https://arkansaswomenbloggers.com/
smiling profile pic

 Jeanetta is a crocheter & coffee addict, chicken keeper & goat wrangler, a farmer girl & maker of drunk jellies.

You can find her online at www.jeanettadarley.com or on twitter, pinterest & instagram @jeanettadarley.


Janeal Yancey: Blueberry Burger {Foodie Friday}

By Janeal Yancey of Mom at the Meat Counter

Everyone loves hamburgers. They are easy to fix, tasty, kids love them, and they remind me of summer.

On the other hand, a good hamburger is usually high in fat. Everyone knows the best burgers are made from the fattest beef. They’re juicier, more tender, tastier… just better. So, if you are watching your weight, you indulge on fewer burgers. 

We all know that we can buy very lean ground beef. Ground sirloin is 90% lean and some stores offer ground beef as lean as 96%. If you buy that lean of beef for burgers, they turn out dry and tough.

When I was working on my graduate degree, I found some really interesting articles where berries were mixed with lean ground beef to improve the flavor, juiciness, and texture of the burgers. It worked so well that one state was mixing berries in the lean ground beef used for school lunches.

Now that I’m a mom of an almost-6-year-old, I am trying to figure out new ways to make healthy foods that a picky little girl will actually eat.  So, I decided to give the blueberry burgers a try.

Cooking with me is always a little bit of an experiment. My husband and I both have PhD’s in Meat Science, so we are always thinking of ways to try something new or use an ingredient in a novel way.

You can google ‘blueberry burgers’ and several recipes and articles come up. Basically, I just winged it based on my research in graduate school.

I decided to try my experimental cooking at work where I wouldn’t be interrupted by little helpers.

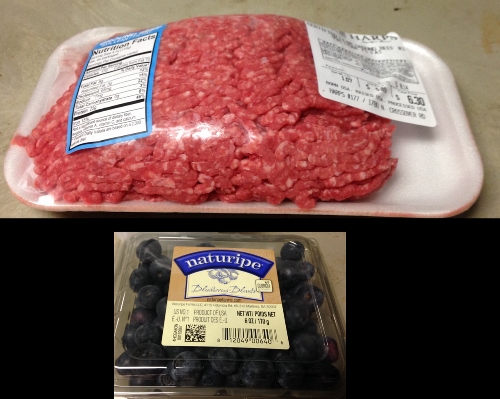
I bought some 93% lean ground beef and blueberries. 

beef and blue berries (500x399)

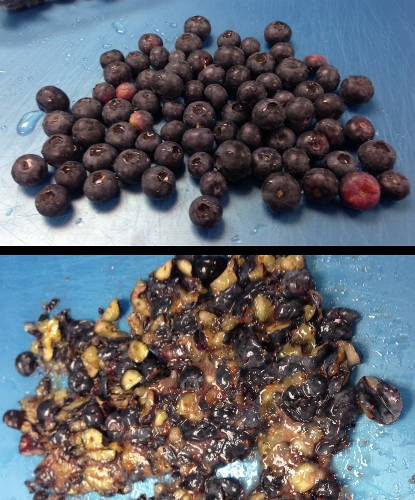
I bought exactly one pound of ground beef and the blueberries came in a 6 oz. package. I wanted to use about a 4:1 beef to berry ratio, so I very scientifically removed about 2/3 of the blueberries from the package to use. Then, I picked the stems off the berries and chopped them up until I was bored with chopping.

Blueberries chopped (415x500)


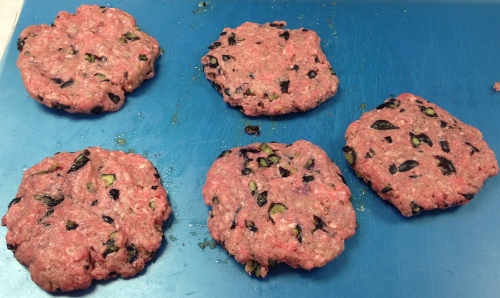
I added a little salt and pepper (not enough, I was later informed) and made 5 patties. The extra weight of the fruit extended my ground beef, so I could make an extra patty. They did look a little odd…chopped blueberry patties(500x298)

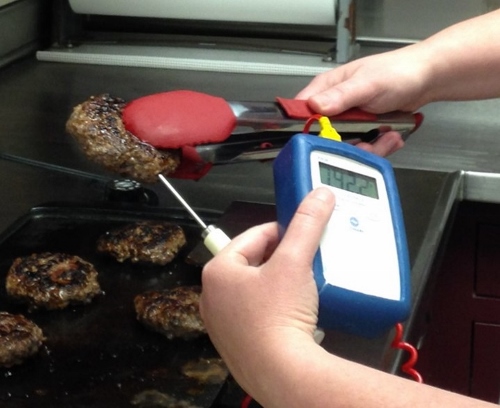
 I cooked the patties on a little electric griddle set to 400° F. I turned the patties every two minutes and used a meat thermometer to check the internal temperature. I made sure the patties reached 165° F, and removed them from the griddle. It only took about 8 minutes for them to cook.

checking burger temp (500x408)

When checking the temperature, you want to make sure you get to the center of the burger. I like to insert the thermometer from the side and check it twice. Ground beef needs to reach at least 160° F in the center to make sure it’s safe to eat. Checking the burger’s temperature also keeps you from overcooking your burgers and letting them dry out. You have to be careful with these lean patties, because the thermometer may cause them to crumble apart. It’s nothing a good piece of cheese can’t fix, though.

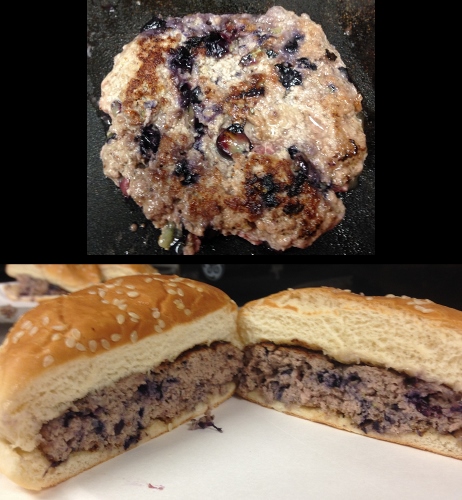
When I chopped the blueberries by hand, you could still see the pieces of blueberry in the cooked patty.

 chopped cooked (462x500)

My finished product was tasty, tender, and juicy. I took a plate of hamburgers around my office and let people try them. Only one person said he didn’t like them, and he just doesn’t like blueberries. When I told them that my burgers were made with 93% lean beef, they were very surprised that they tasted so good.

I was pretty pleased with my little experiment, but I wasn’t sure that kids would eat them if they could still see the berry pieces, so I decided to try a follow-up experiment. I used the food processor to puree my blueberries before I added them to the ground beef.

This time the raw burgers turned out a little purple. The pureed berries also made the patties feel wetter when I was making them, but they cooked up about the same as the chopped version.

Even cooked, the berries made the beef just a little bit purple, especially on the inside, and some people said that they could taste the blueberry flavor, but they still liked them.

 I made these on a Friday at my office, so we added cheese, cooked up some fries and had a little lunch. Everyone loved the blueberry burgers and were amazed at how good they tasted in spite of being so lean.

enjoying burgers (500x206)

Using 93% lean ground beef rather than 80% lean reduces the calories in one cooked patty from 210 to 154. The blueberries also add fiber, vitamins, and antioxidants to the burger. So they are healthier!

The antioxidants in the blueberries should also help make the burger taste better if you keep them as leftovers. The offensive flavor that develops in leftover ground beef is caused by oxidation, and the blueberries prevent it from happening. Unfortunately, I didn’t have any leftover blueberry burgers to sample.

Blueberries aren’t the only fruit that would work in burgers. I’ve seen examples of people using cherries, raspberries, elderberries, and dried plums (also known as prunes). Just mix them in at about 20 to 25% of the ground beef. With drier fruits, like prunes, you may need to use less. Fruits in meat should work in other dishes, too, like meat loaf, sausage, even chili. Don’t be afraid to experiment.

professional picture (405x500)Janeal Yancey

grew up in the small town of Cross Plains, Texas and attended Texas Tech University. She became interested in meat science through FFA and collegiate meat judging teams and decided to go to graduate school in meat science at Kansas State University. At Kansas State, she received both her Masters and PhD in meat science. She is currently at the University of Arkansas where she conducts research on many aspects of meat quality, from beef tenderness and ground beef color to the textural properties of bacon.

In 2011, Janeal entered the world of blogging with her Mom at the Meat Counter Blog. From this platform, she writes about meat and the meat industry from her point of view. As a mom, she knows that all moms have lots of questions about what they feed their families and as a meat scientist; she can answer a lot of their questions. Her posts range from topics about food safety and meat handling to the beef product known in the media as ‘pink slime’ and antibiotics in the meat supply.

Janeal and her husband, Ed, also a meat scientist, live in Huntsville, AR where they raise two wild daughters, Vallie and Wyn, and gentle Simmental cattle.


Whitney Sutherland: Made for Mom {Foodie Friday)

By Whitney Sutherland of Running with Whit

 Whitney

 Gloria and Whitney Sutherland… when it comes to recipes, this apple didn’t fall far from the tree!

It is a fair to say that I learned how to cook and appreciate food from my awesome Mom! Growing up, I remember looking through her worn selection of recipes in the shoe box sized recipe box that she kept. The recipes within were on all different types of index cards. Some were written out in my mom’s handwriting, while others were just torn out magazine recipes taped to a card. Without fail, most of the cards in this box had a short note handwritten on the card and then the month/year that my mom had first prepared the recipe.

Even though there were 100’s of recipes within her recipe box, I still as a grown adult crave a few of my mom’s most signature dishes. As a kid, the most special meal of the year was always your birthday dinner because my mom would let you select your menu… mine usually was fajitas or meat loaf. For mom though, her extra special day and meal should be on Mother’s Day! It’s her chance to be pampered and spoiled! While you are spoiling  mom, why not do so with her with her favorite recipe! With my mom now living in Arizona it is a little hard to cook for her but just the same I’ll be preparing one of her signature and favorite recipes this weekend =Taco Salad with homemade French dressing.

My mom received this dressing recipe in the late 60’s before she and my father were married. Her future mother-in-law connected her with a woman  named Margaret Simpson who was living in California near where myNavy father was stationed . My mom went to visit my father and stayed with Mrs. Simpson. She still recalls that Mrs. Simpson introduced her to artichokes and avocados during that spring break trip. She also served her meals on fine china which began my mom’s love of china and a well set table. It’s true…my mom loves to have a beautifully set table for family meals and always includes a floral Ikebana arrangement!

This recipe can still be found in my mom’s recipe box. It is on a yellowed and stained index card in Mrs. Simpson’s handwriting. But much to my surprise this is one recipe that my mom forgot to write the date on! I hope you have a chance to spoil the mom’s in your life this weekend with some of their favorite recipes because sometimes the recipe is just so much better when it is made for you!

Trail Race - All Done


Whitney Sutherland blogs at Running with Whit  about the fun and adventure of an everyday athlete.  Whitney works full time playing with numbers and products and unwinds by training for races.  She loves triathlons and has completed two half ironman distance races.  She completes many races each year and initially discovered blogs while researching different races.  Whitney spends her free time with Sidney her runner dog and her family where she gets to be the cool aunt to three awesome kiddos. 


 ecipe Card

French Dressing
Write a review
Print
Ingredients
  1. 1/8 teaspoon garlic powder
  2. 1 cup sugar
  3. 1 teaspoon dry mustard
  4. 1 tablespoon. salt
  5. 1 teaspoon black pepper
  6. 1 teaspoon celery seed
  7. 1 can tomato soup
  8. 1/2 cup red wine vinegar
  9. 1 cup salad oil
Instructions
  1. Mix ingredients together until emulsified.
Notes
  1. Definition: Emulsify means combining two liquids together which normally don't mix easily. The ingredients are usually oil or a fat like olive oil or egg yolks, and another liquid like water or broth. Acidic liquids like lemon juice help the process by changing the pH of the mixture. The liquids are combined very slowly, usually drop by drop, while beating vigorously, which suspends drops of liquid throughout each other. Bearnaise, hollandaise, and mayonnaise are examples of emulsified foods.
  2. Pronunciation: ee MULL sih fi • (verb)
  3. Also Known As: blend
  4. Source: http://busycooks.about.com/library/glossary/bldefemulsify.htm
Arkansas Women Bloggers https://arkansaswomenbloggers.com/

You can follow Whitney on Facebook
Pinterest
Instagram
Twitter 


Lindsey March: A Way With Wontons Olé

By Lindsey March of A Dollop of My Life
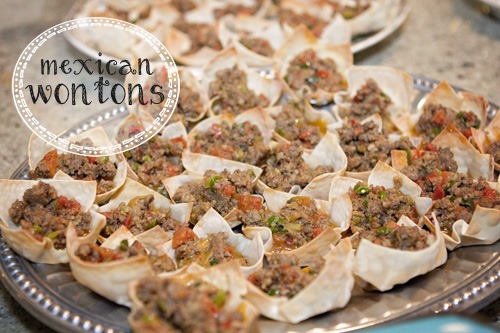
lindsey mexican wontons 500px wide

A little well known fact about me is that hosting is not one of my strong points.

Yes, it’s true. I am many things, but being hostess with the mostess is just not one of them.

Which is why I am a big fan of easy-peasy throw together appetizers that scream, “I’m DELICIOUS eat me now!” without having to break your back in the kitchen. (I also abhor dish cleaning, and this recipe pays favors in that regards as well. You can thank me later.). These Mexican Wontons are the perfect blend of melt in your mouth salty yum with a crisp wonton holding it altogether to give you that crunch. It’s perfection… trust me.

A friend of mine actually introduced me to this recipe several years ago during a little shindig where we all were asked to bring an appetizer and/or drink. This pairs nicely with your favorite daiquiri or margarita (lime, frozen, salted rim – thank you), and is brought to you just in time for you to try it out for your Cinco de Mayo fiesta. Or just for your friends coming over to have a little picnic on the back porch. That works too.

Without further ado, I give you…. Mexican Wontons.


Mexican Wontons
Write a review
Print
Ingredients
  1. 1 package of wonton wrappers (typically found in the refrigerator section of the produce department) I‘ve always found mine near the Tofu in the produce section at Walmart)
  2. 1 pound pork sausage
  3. 3 stalks green onions, chopped
  4. 1 can Rotel, drained (any variety is fine, but I like the Mexican variety best).
  5. 1 cup shredded sharp cheddar cheese
  6. 1.5 Tablespoons ranch dressing
Instructions
  1. Preheat oven to 350 degrees.
  2. Line a regular sized cupcake pan with the wonton wrappers, using your fingers to evenly form them to the pan.
  3. Bake for about 4-5 minutes.
  4. This is where I tell you that cooking wontons is like broiling your bread for dinner. DO NOT STEP AWAY. Otherwise you may end up with black wontons, which tends to deter the crowd away from actually eating your masterpiece.
  5. Once your wontons are evenly toasted to a slightly golden appearance, remove from the oven and set out to cool.
  6. Once cool, these can be stored in a large Ziploc bag until ready to be used (I would make these the day that you plan on eating them, as they taste best when freshly toasted).
  7. In a large skillet, brown the pork sausage until completely cooked. Drain well, and pour into a large mixing bowl.
  8. Combine the sausage with the green onions, Rotel, cheddar cheese and ranch dressing. (Sidenote: I tend to go a little overboard on the cheese and put more than 1 cup, because… CHEESE. If you tend to not like things extra super cheesy, then you’ll probably just want to stick with the recommended 1 cup. But I promise you, you’re missing out on life.)
  9. Once everything is well mixed, simply scoop and place evenly into the toasted wonton wrappers, serving warm.
Notes
  1. The sausage mixture can be set aside and stored in the refrigerator until you are ready to serve the wontons, which makes it a perfect make-ahead dish to bring to a party. If you refrigerate the mixture, simply reheat in a microwave set on high, for several minutes. Enjoy
Arkansas Women Bloggers https://arkansaswomenbloggers.com/

A Dollop of My Life 
lindsey headshot500pxTwitter:
Instagram
Facebook
Pinterest

Lindsey is a self-professed Sonic Happy Hour addict and lover of all things Southern (though far from a Southern Belle). Lindsey is the writer behind A Dollop of My Life, where she chronicles life as a wife to Drew and a mama to the three sweetest, most ornery boys that God has ever created. Lindsey has a pension for putting her foot in her mouth, coming across too blunt and not being afraid to be honestly truthful about the hard parts of life. You can find Lindsey on various social media platforms (Twitter, Facebook, Instagram, Pinterest).

Rural Foodies Do Exist and We Want More

by Julia Malinowski, ARWB friend and Director, Helena Advertising & Promotion Commission

I live in Helena, Arkansas – population 12,000. I moved to Helena for a job and stayed because of the community I found. I didn’t realize it before I moved here, but in every place I’ve lived I’m been searching for a sense of connection and family, and this is where I’ve found it. Helena is the kind of place where people actually do bring you homemade soup when you’re sick or chocolate pie if you’ve had a nasty break-up.

As a southern town, most of life’s critical moments are marked with the cooking and sharing of food. The Delta region in which Helena is located is particularly known for its soul stirring, make you want to slap yo’ mama, good food: charred and chopped BBQ, fried chicken, turnip greens, sweet potatoes shiny with sugar, fried catfish, and the list goes on. There are plenty of small locally owned storefronts where all this good food and more can be purchased from someone’s granny, auntie or cousin. I love this food. I love it probably more than I should given the increasing rates of type 2 diabetes.

However I have a confession to make…any time I go out of town I seek out a different type of restaurant. I crave an atmosphere more appropriate for a date night with my husband. I crave a greater variety of dishes: Indian, Thai, Italian. I crave fresh salads, menus described as “New American”, more complex pairings, and sometimes even a more restrained use of sugar, salt and vinegar. And the thing is, I’m not alone. According to an ESRI data report from 2010, a retail gap of approximately $4.6 million exists in the sector of Food Services and Drinking Places. At the same time, Clarksdale, MS has a surplus of $7.2 million and Southaven, MS has a surplus of $49.6 million. I may not be a data analyst, but the numbers seem to clearly show that not only is Helena’s local demand for dining and drinking experiences not being met, clearly our population is going other places in the region to get what they’re looking for.

jason-and-shane-2

The hard thing is that facts don’t always sway decision makers as decisively as emotional reactions and qualitative observations. After seeing this data, I had conversations with chefs and restaurateurs about the opportunity that exists in Helena and it became clear that doubt exists that a rural community could support a “nicer” restaurant. Doubt exists that rural folks actually care about things like presentation, atmosphere and culinary experimentation.

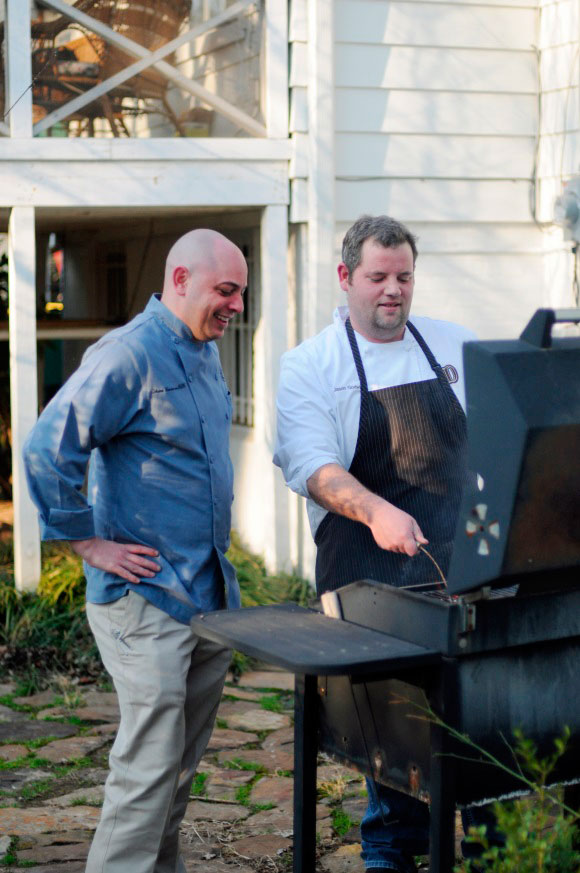
Not willing to take no for an answer, we started talking with chefs about pop-ups, with the idea that if we can’t get a chef to open up a full-time restaurant, at the very least we should be able to get a chef to open up a one day or two day pop-up. I’m excited to share that this coming Saturday, May 10th, we’re partnering with Shane Henderson (Executive Chef with Ben E. Keith but most known for starting Argenta Market with Jody Hardin) and Jason Godwin (Executive Chef for Eurest at Acxiom but most known for starting Dogtown Coffee and Cookery) to launch our first one-day pop-up restaurant in an empty storefront in historic downtown Helena.

Entitled Interstate Grocery, after the company that initially sponsored the world famous King Biscuit Time radio show, the pop-up’s menu will highlight the products and flavors of the Arkansas Delta, in coordination with this year’s Arkansas Heritage Month theme, “Come to the Table.” The menu features items such as “Duck Bacon, Ancho Sorghum, and Pickled Vegetable” and “Strawberry shortcake with angel biscuit and basil syrup.” The four course prix fixe menu will be offered at $30 per person, with adult beverages available for purchase. We’re excited that Four Roses Bourbon has come on as a sponsor, with well-known Memphis bartender Chris Ferri crafting a couple signature cocktails. All proceeds from the event will benefit the historic downtown through our partnership with the Main Street Helena program.

interstate-flyer-FNL
This pop-up is part of an effort to demonstrate a real demand for dynamic food in the Helena and the Arkansas Delta region. While we love the homey cooking we’re known for, our local community and our burgeoning influx of tourists are looking for a range of dining experiences from down home to date night. This is an effort to show that rural foodies do exist and we’re ready to support a chef or restaurant adventurous enough to give us shot. If the May 10th pop-up is successful, we hope to develop it into a series of pop-up restaurant events.
 

Simply Sushi with Sarabeth Jones {Foodie Friday}

by Sarabeth Jones of The Dramatic

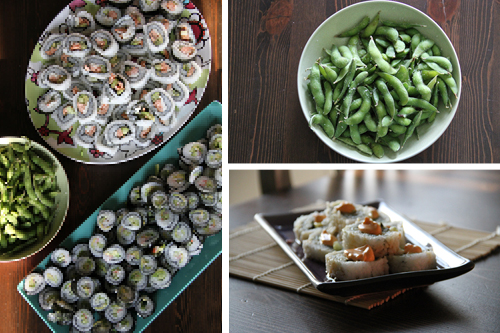
I love to eat sushi, and so do most of my friends. It’s tasty, exotic, beautiful…sadly, it’s also expensive. I remember feeling flabbergasted when I realized that there were actually people who made their own sushi at home, but friends, I have become a believer. While I will always enjoy eating sushi out, making it at home is less expensive and super fun to do with a group of people. In fact, it’s become one of my favorite things to do when I’m getting together with friends.

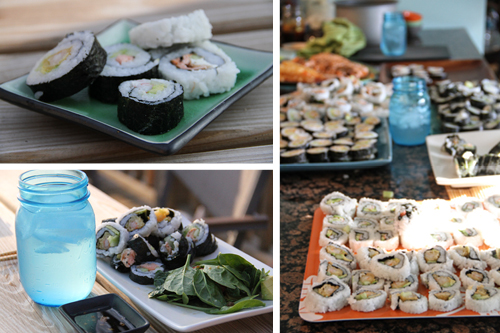
sushi for days

There are plenty of wonderful step-by-step tutorials out there on the internet (the Pioneer Woman, for instance), and there are also plenty that will make you feel like you can’t make sushi unless you’ve trained under a chef. I’m going to tell you what you need to get started on your own sushi adventure, and give you the best piece of advice I have: don’t be intimidated. You’re not trying to be a sushi master, just have some yummy fun at home. Get a group of friends and get going!

sushi-18

You need a few things to get started. Fortunately, most of them are inexpensive:

· Bamboo sushi mats

· Sushi rice paddles

· Chopsticks

· Optional: sushi dishes & a rice cooker

Now, some of you that know what you are doing in this department are already gasping at me. I can hear you, aghast that I would say a rice cooker is optional. Here’s really what I mean: rice cookers can get pricey and I don’t want you to run out and buy one just to try making sushi. You can make sushi rice in a regular old pot. Try that first, or better yet, find a friend with a rice cooker and invite them to the sushi party. I do think the rice is better out of a cooker, but I am not going to complain if someone hands me sushi with rice from a pot. My mouth will be too full.

sushi-6

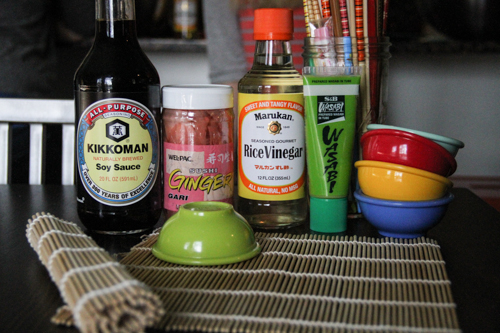
You will also need some condiments that you might not have in your pantry already:

· Rice vinegar

· Soy sauce

· Pickled ginger

· Wasabi

· Optional: Spicy mayo, Eel sauce

Wasabi is available as a paste or as a powder that you can mix yourself. You can buy pickled ginger and spicy mayo and eel sauce or you can make your own. You can get all of these things at an Asian market (they are usually cheaper here) or the international/Asian section of a larger grocery store.

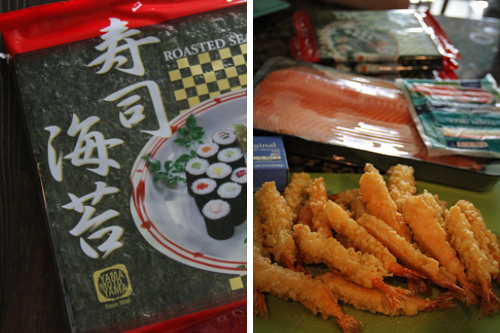
seaweed salmon shrimp for sushi

Finally, you need the sushi ingredients:

· Roasted seaweed sheets (or nori)

· Sushi rice

· English cucumber (the long skinny ones)

· Avocado

· Salmon, imitation crab, tuna, or tempura shrimp

Let’s pause here because I know this looks overwhelming. If you’re just starting out, get a couple of mats and paddles, and divvy up the ingredients/condiments with your group. Maybe you just want to make one type of roll the first time; I would suggest grilling some salmon with a little olive oil, salt, and pepper, and rolling it with avocado and cucumber. Do some with just salmon and rice if you have kids around.

If you want to go bigger, get a couple of different types of seafood. For my last sushi party, we had grilled salmon (about a 3 lb slab from Sam’s), a package of imitation crab, and 2 boxes of tempura shrimp (from the frozen fish section). We rolled those with a combination of avocado, cucumber, and cream cheese. We also cooked 9 cups of sushi rice, because that’s the most our cooker will hold, and used about 25 sheets of seaweed. We ran out of rice first, but I actually like that, since it leaves some extra salmon and shrimp for those who might not like rolls as much.sushi on the porch

Now it’s time to make sushi!

Prepare the rice: well before you want to roll, cook your rice, dump it into a large bowl and sprinkle it generously with rice vinegar. As you roll, keep that vinegar handy. We usually sprinkle it several times – you just want to make sure your rice has that slightly sour taste.

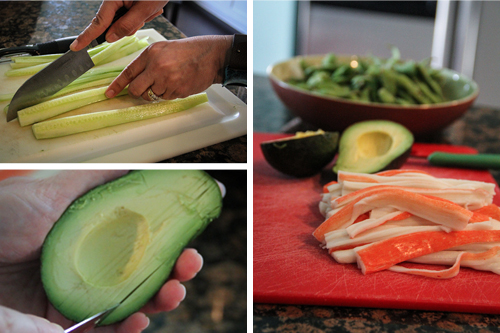
avocado cucumber for sushi

Prepare the fillings: grill your salmon, heat your shrimp in the oven, etc. Slice avocado and cucumber very thinly. Remember how fun this is for a group? There’s a job for everybody!

sushi-10

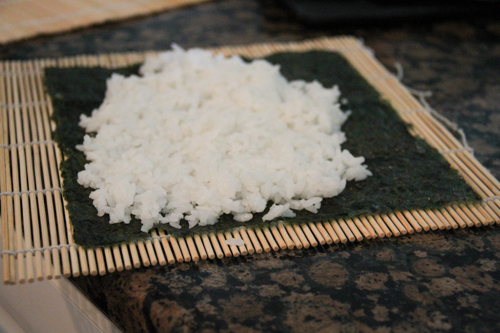
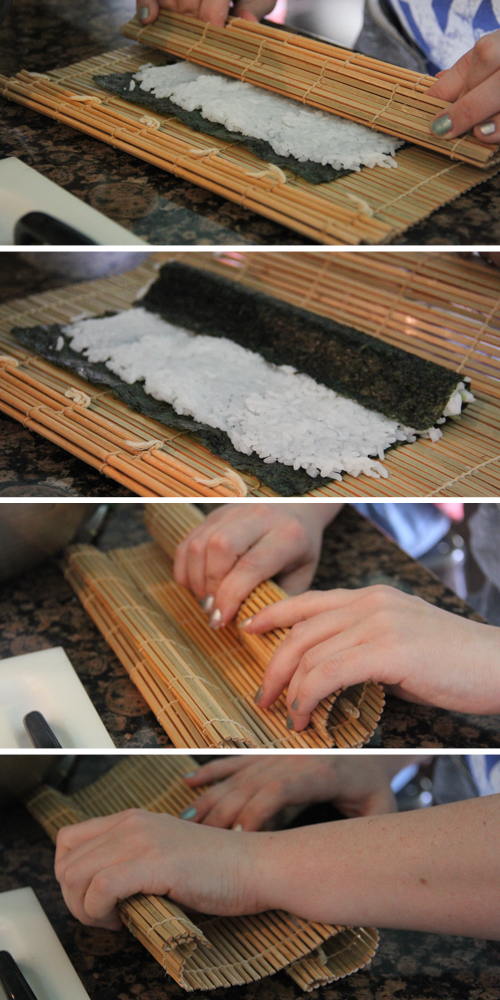
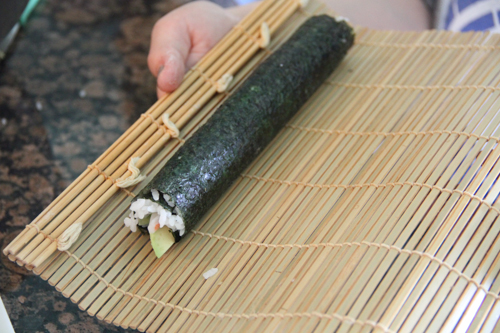
Roll: lay your seaweed on a mat, rough side up. Spread sushi rice on it with a paddle (or your fingers if you’d rather) and place your fillings in a line close to one side at the bottom of the mat. Then, bring the edge of the roll and mat up and over, and keep rolling the mat over the top of the sushi like this:

how to roll sushi

When you roll the mat all the way over, your roll will close, like this:

sushi-15

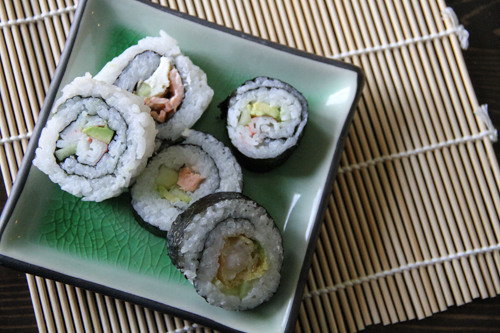
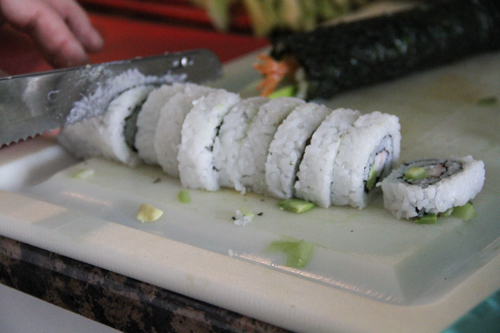
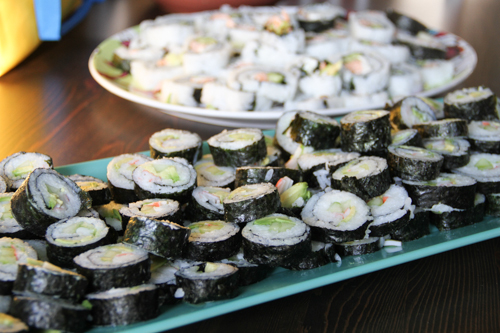
Cut: I find this works best with an electric knife. Arrange your beautiful rolls on plates. Eat the ends as you go. Bonus!

sushi-17

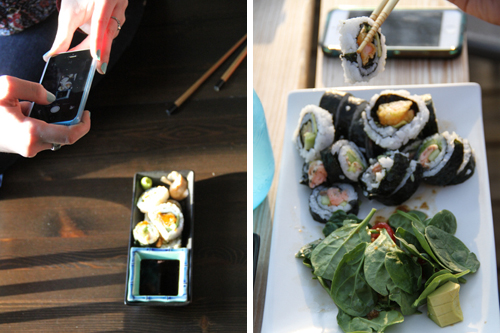
Eat: Make a beautiful plate complete with soy sauce, pickled ginger, spicy mayo, and wasabi. Be sure to instagram your fun and then enjoy!

instagram and eat sushi

If you’re still reading this post, here’s a fun fact for making it all the way through. At the gathering where I took these pictures, we fed 9 adults, 8 teenagers, and 3 younger kids – all of whom ate their fill – for about $15 a family (about $75 total). We even had 2 large Ziploc bags of leftovers for lunches the next day. We always have a great time, everyone in the kitchen cutting and rolling and laughing – I hope you’ll try a sushi party soon!

sushi-20


Sarabeth Jones

Sarabeth Jones is a creative at Fellowship North who enjoys all kinds of artistic work; her latest project is bringing the national live-reading show Listen To Your Mother to Little Rock. She lives in Sherwood with her husband, Bryan, and their kids, Elizabeth, Jonathan, and Will.  She loves to write about they way they make her laugh on her blog, thedramatic.com.

Facebook

Twitter

Instagram

Meatless Monday on a Friday {Foodie Friday}

terra collageBy Terra Maples of Ahoyfriend

This is vegetarian, pretty dang good for you, and oh so easy! So let’s get that Meatless Monday party started with this easy-to-adapt recipe. 

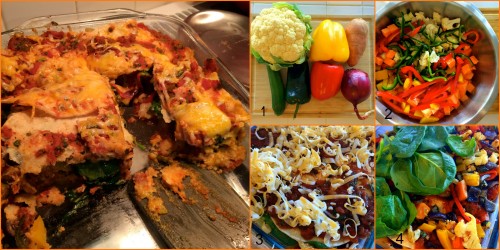
Roasted Vegetable Enchilasagna
Serves 8
Write a review
Print
Ingredients
  1. 1 poblano chile, cut into matchsticks
  2. 2 bell peppers, cut into matchsticks
  3. 1 head of cauliflower, cut into 1/2-inch chunks
  4. 1 medium sweet potato, peeled and cut into small cubes
  5. 1 medium onion, chopped
  6. 1 zucchini, cut into small cubes
  7. 3 tablespoons olive oil
  8. 1 1/2 teaspoons ground cumin
  9. 3 garlic cloves, minced
  10. salt and black pepper
  11. 1/2 cup chopped fresh cilantro
  12. 2 cups salsa
  13. 2 loosely packed cups fresh baby spinach leaves
  14. 9-10 corn tortillas, halved
  15. 2 cups shredded cheese of your choice
  16. Sour cream or plain Greek Yogurt (optional)
Instructions
  1. Preheat the oven to 425 degrees.
  2. Take whatever vegetables you choose and get to chopping.
  3. Throw all the cut up goodness (exclude the spinach) into a medium sizedmixing bowl.
  4. Douse with the olive oil and toss.
  5. Spread the oiled up veggies on a lightly oiled cookie sheet and sprinkle with the cumin, salt and pepper.
  6. Bake them in the oven for about 30 minutes, shaking the pan every 10 minutes or so.
  7. You will know they are ready when the edges begin to brown.
  8. While the veggies are roasting, chop the cilantro and add it to the salsa. Stir.
  9. When the veggies are done, remove them from the oven and reduce the oven temperature to 350 degrees.
  10. Spray a 9x12 baking dish with nonstick cooking spray
  11. Put a layer of the salsa mixture in the bottom of the dish.
  12. Now put down a layer of tortillas, a layer of veggies, a handful of spinach and a sprinkle of cheese.
  13. Repeat the layers two additional times.
  14. Cover the pan with foil and bake for 20 minutes; uncover and bake an additional 10 minutes.
  15. Let the dish rest for about 5 minutes
  16. Serve to hungry friends and/or family.
  17. Serve with sour cream, if desired.
Notes
  1. Please note that you can pretty much use whatever vegetables you have in your fridge.
  2. You can add corn, use jalapeno, leave out the cauliflower-do what you need to do.
Adapted from Pettys Plate
Arkansas Women Bloggers https://arkansaswomenbloggers.com/

 Terra 6I am a music loving, wine drinking, book reading, art making, dancing fool who transplanted to the hills of Northwest Arkansas from Kansas City in 2011 with my man and my mutts. Ahoyfriend is where I share my story and occasionally get on my soap box.  It is also, and perhaps most importantly, home to daily photo posts from my best friend and me.  I hope you will stop by!

If you don’t want to commit , you can just stalk me on Instagram (ahoyfriend) , Twitter and/or  Pinterest.


Dinner in a Box {Foodie Friday}

By Stacy McBryde Valleyof  An Awesome Amazing Life

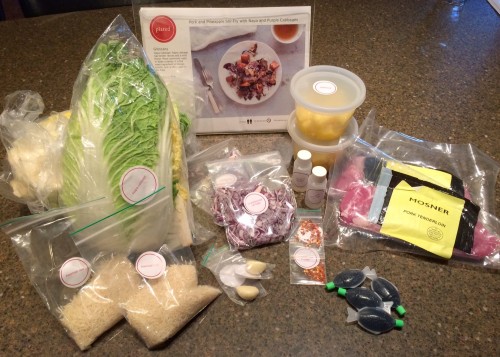
stacy ingredients


A few months ago, I subscribed to Plated, a grocery delivery service. Each Monday, I pick from seven meal options (four meat and fish options, three vegetarian options) for delivery the following week. I usually order two servings of two different meals for Wednesday delivery. It’s such a time-saver. All the fresh ingredients for a delicious home-cooked meal are delivered to my doorstep, and I get to do the fun part — COOK!

Last night, I made four servings of the Pork and Pineapple Stir-Fry with Napa and Purple Cabbages and Basmati Rice.

Dinner in A box: Pork and Pineapple Stir Fry
Serves 4
Write a review
Print
Provided
  1. 1/2 cups basmati rice
  2. 1 1/2 cups basmati rice
  3. 2 cups diced pineapple
  4. 24 ounces pork tenderloin
  5. 2 cloves garlic
  6. 1 head Napa cabbage
  7. 1/4 teaspoon crushed red pepper (optional)
  8. 1 cup shredded red cabbage
  9. 4 tablespoons soy sauce
  10. 2 teaspoons rice wine vinegar
Needed from home
  1. 2 tablespoons canola oil (I used peanut oil)
  2. 2 1/2 cups water
  3. salt and pepper
Instructions
  1. Cook Rice -- In a small pot, bring basmati rice, 2 1/2 cups water, and a pinch of salt to a boil over high heat. Stir once, cover, reduce heat to low, and cook for 12 minutes. Remove pot from heat and allow to stand, still covered, for 10 minutes. Uncover, flush with a fork, re-cover and set aside.
  2. Prepare Ingredients -- Meanwhile, drain diced pineapple. Rinse pork, pat dry with paper towel, and cut into 1-inch cubes. Mince garlic. Rinse Napa cabbage and cut crosswise into 1/4-inch slices.
  3. Cook Pineapple -- Heat a large pan (I used a wok) over high heat. When pan is just smoking, add pineapple and cook, stirring, until golden brown, about 2 minutes. Remove from pan with a slotted spoon and set aside.
  4. Cook Pork -- Add 1 tablespoon canola oil to pan from pineapple over medium-high heat. Season pork on both sides with salt and pepper. When oil is simmering, add pork and cook, stirring occasionally, until browned on outside and cooked through, about 8 minutes. Remove from pan and set aside.
  5. Cook Cabbage -- Add garlic and crushed red pepper, if desired, to pan from pork over medium heat. Cook until garlic is golden, about 1 minute. Add Napa and red cabbages and cook until soft, about 2 minutes. Return pineapple and pork to pan and stir to combine. Add soy sauce and rice wine vinegar, stir, and simmer until liquid is absorbed, about 1 minutes.
  6. Plate Stir-Fry -- Taste stir-fry and add salt and pepper as needed. Divide rice evenly between four plates and top with stir-fry. Serve hot.
Adapted from Plated. com
Arkansas Women Bloggers https://arkansaswomenbloggers.com/
image

My name is Stacey Valley. I’m a wife, mother, and public health professional with a horrible sweet tooth. My life is quite beautifully ordinary and at the same time more than I could have ever imagined. I blog to express my feelings, share photos and recipes, and occasionally rant about health issues or the craziness of juggling motherhood, marriage, and making a living. My life’s motto is “Live big. Love deep.

If you’d like to try Plated for yourself, here’s a link for TWO FREE PLATES: at Plated Com.  It is kind of expensive, but considering the time savings, I think it’s totally worth it. If you try it, please let me know what you think”

Instagram: staceyvalley