I tore this recipe from a Better Homes and Gardens magazine years ago before recipes were published on the internet. That’s how long I’ve been making this Spicy Vegetable Soup which is easily one of the most requested recipes in my family. With a slice of hot cornbread it’s perfection on a cold winter day.
And bonus—it’s simple.
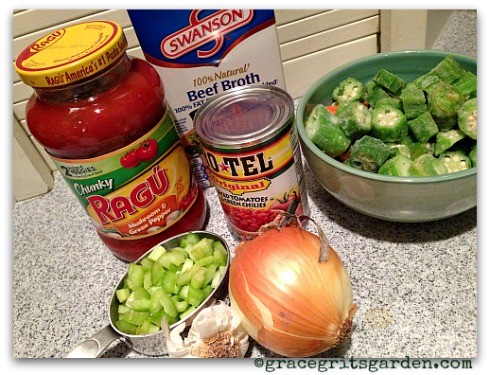
I call this a cheater recipe because the base ingredients include Ro-tel and Ragu Chunky spaghetti sauce. Everything you’ll need for this yummy soup is probably already in your pantry or freezer. Dump everything in a pot, give it a stir and go watch those episodes of Downton Abbey you’ve recorded. It’s almost that easy.
(Now if you are one of those people who never eats anything from a can, go ahead and substitute homemade tomato sauce, etc. Sometimes I feel the same way, but I’m telling you there is beauty in a can of Ro-tel…)
1 24 oz jar Ragu chunky green pepper and mushroom spaghetti sauce
1 10.5 oz can low-sodium beef broth
2 cups water
1 tsp sugar
1 tsp salt
½ tsp pepper
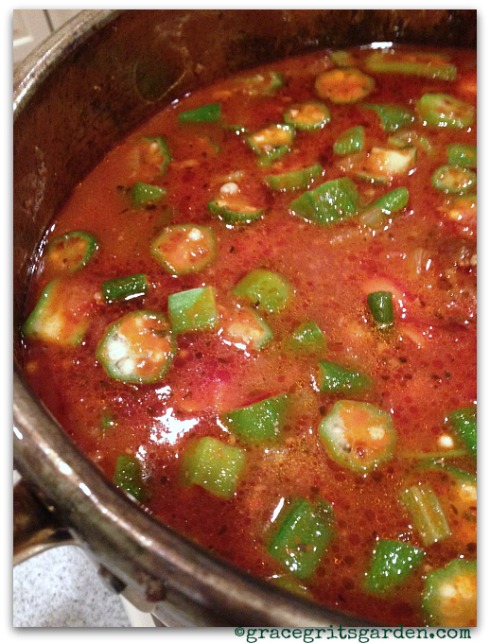
1 can Ro-tel Diced Tomatoes & Green Chiles
2 cups frozen mixed veggies (I use whatever I have in my freezer—corn, carrots, green beans, lima beans, etc.—and I always make sure there is okra in the mix.)
Instructions
In a Dutch oven or large soup pot brown ground beef, onion, celery and garlic. Drain oil.
To the meat mixture add Ragu, broth, water, sugar, salt and pepper. Bring to a boil. Reduce and simmer for twenty minutes.
Add Ro-tel and mixed veggies. Return to a boil. Reduce to simmer and continue simmering 30 minutes or so (stirring occasionally) until veggies are soft.
By Talya Boerner of Grace, Grits and Gardening
Adapted from Better Homes and Gardens
Adapted from Better Homes and Gardens
Arkansas Women Bloggers https://arkansaswomenbloggers.com/
Talya was raised on acotton farm in Northeast Arkansas where her family still farms. She and her husband along with their two miniature schnauzers, Lucy and Annabelle, live in Dallas.Follow her tales of farm, food, garden and life on her personal blog Grace Grits and Gardening.
This recipe for chicken pot pie was adapted from my friend, Julia. She made it for us in her home during a Greys Anatomy Watch Party years ago. I never had a homemade potpie until that night at her house. Now, I compare every potpie I try to hers! She was sweet enough to share her recipe with me years ago via email and now I get to share it with you.
Chop up one cup each of chopped carrots, potatoes, onions, and celery. Add 3-4 tbsp. butter to chopped veggies in a heavy pot, and sauté veggies over medium heat until onions are white and soft. Be careful that they don’t get brown.
Sprinkle in the flour and mix until all the pieces look coated and gummy.
Combine the cream and chicken broth in a separate bowl and pour slowly into pot of vegetables.
Add four cups of chopped chicken (a pre-made rotisserie chicken creates just the perfect amount).
I also toss in some salt and pepper to taste.
Bring to a simmer and let it cook for about 10 minutes.
I buy the Pillsbury box of 2 pre-made crusts, and put the bottom crust in a greased pie pan, fill it full of the mixture, and then add the top crust
The filling is overflowing in my 9-inch Pampered Chef pie pan, but as long as I seal the bottom and top crusts together along the edge, it doesn't spill over while in the oven.
Because no one likes to clean the oven, I bake mine on a jellyroll pan to be on the safe side.
Cut some slits in the top for venting, and bake at 350 for 45-50 minutes. It will be a Chicken Pot Pie Perfection for this cold January!
By Brittany Little - Ramblings of a Little Wife
Arkansas Women Bloggers https://arkansaswomenbloggers.com/
Brittany blogs over at Ramblings of a Little Wife. She loves to cook, DIY projects, read, travel, and spend time with her friends and family. Those are the exact same things she blogs about! She lives with her husband in Northwest Arkansas.
It may seems strange to you that someone retired should write about STARTing anything. That’s certainly understandable, I suppose. For many of you just starting your career as a teacher or musician or marketing guru or whatever it might be, the idea of retirement is as foreign as learning to read and write Sanskrit perhaps. Maybe you’re newly married or newly a mom and the start of both still seem to be a grand adventure, with all of the complexity and confusion brought on by both and you can’t even begin to think past the beginning of either.
However, you should. Because it truly won’t be long before those fleeting moments are forty years in the past. And what will you do then? Will you be sad or mad that your beginnings now seem to be endings? Will you look upon your life as a series of lost or misplaced opportunities or mistakes? Will you mourn the loss of your youth and look upon age as a dreaded misfortune? Or will you START living your life today and do so in such a way that that negativity doesn’t happen?
In her column dated December 2, 1979 and reproduced in her book Eat Less Cottage Cheese, one of my favorite humorists, Erma Bombeck, penned these words of advice that might just help you avoid the failure to START living your life now. I encourage you to print them up and put them in a place where you will read over them once a day, once a week or at least once a month. You’ll be glad you did.
“Someone asked me the other day if I had my life to live over would I change anything. My answer was no, but then I thought about it and changed my mind.
If I had my life to live over again I would have waxed less and listened more. Instead of wishing away nine months of pregnancy and complaining about the shadow over my feet, I’d have cherished every minute of it and realized that the wonderment growing inside me was to be my only chance in life to assist God in a miracle. I would never have insisted the car windows be rolled up on a summer day because my hair had just been teased and sprayed. I would have invited friends over to dinner even if the carpet was stained and the sofa faded. I would have eaten popcorn in the “good” living room and worried less about the dirt when you lit the fireplace. I would have taken the time to listen to my grandfather ramble about his youth. I would have burnt the pink candle that was sculptured like a rose before it melted while being stored. I would have sat cross-legged on the lawn with my children and never worried about grass stains. I would have cried and laughed less while watching television … and more while watching real life. I would have shared more of the responsibility carried by my husband which I took for granted. I would have eaten less cottage cheese and more ice cream. I would have gone to bed when I was sick, instead of pretending the Earth would go into a holding pattern if I weren’t there for a day. I would never have bought ANYTHING just because it was practical/wouldn’t show soil/ guaranteed to last a lifetime. When my child kissed me impetuously, I would never have said, “Later. Now, go get washed up for dinner.” There would have been more I love yous … more I’m sorrys … more I’m listenings … but mostly, given another shot at life, I would seize every minute of it … look at it and really see it … try it on … live it … exhaust it … and never give that minute back until there was nothing left of it.” Eat Less Cottage Cheese and More Ice Cream: Thoughts on Life From Erma Bombeck.
I don’t believe that there is failure in not finishing. Instead, I believe that the real failure is in the not STARTing. For how can you accomplish anything if you fail to START? And there are still lots of STARTs waiting on me in retirement because each and every day is a new opportunity to begin living life now, and I plan to seize every one of them.
And that, my friends, is a very good thing.
Debbie is a co-administrator of Arkansas Women Bloggers and blogs at Dining With Debbie. A native Arkansan, she spends much of her time traveling between the central area where she lives and the northwest area of the state where she plays with her perfect grandchildren . She hangs out with her Hubby of 44 years in both places.
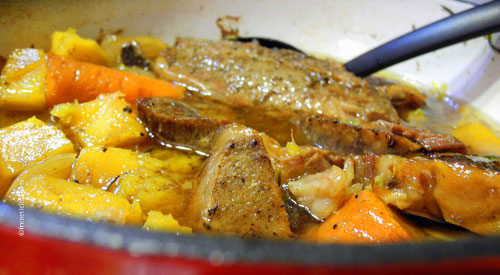
My family loves braised short ribs and I have a collection of short rib recipes like this one from Better Homes and Gardens. Braising uses a combination of high dry heat searing with a long moist cook. Many people use slow cookers for braising and recipes like this one have been adapted for the ease of using a slow cooker but if I’m going to be home I prefer to use my 3 qt. Lodge Enamel Dutch Oven.
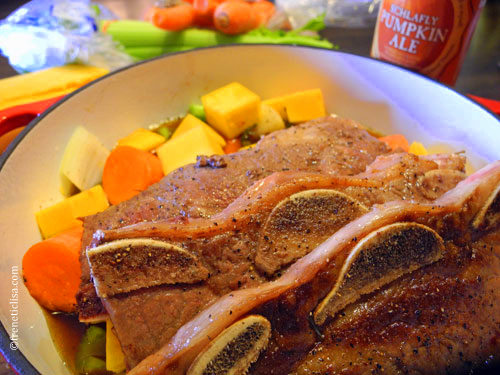
I’ve used enough braised rib recipes that I have a pretty good idea of ingredient combinations that I like. I discovered a bottle of Samuel Adams Harvest Pumpkin Ale in my refrigerator. I remembered that it was a little sweet and thought it would be a perfect beer for braising my ribs so I decided to make up a recipe with ingredients I had on hand. Short ribs are a fatty cut so I used butternut squash and carrots to give the dish a slightly healthier twist while keeping a hearty texture, plus I thought the combination of the pumpkin ale and the butternut would be nice. I scaled the recipe to fit my three member family and my Dutch oven dimensions.
Heat oven to 300 degrees and heat a frying pan with the vegetable oil for searing.
Salt and pepper the ribs to taste and dredge in flour.
Sear ribs in vegetable oil over high heat.
Place vegetables in the dutch oven and mix.
Place the seared ribs on top of the vegetables.
Mix the molasses, beer and broth in a small bowl then pour the mixture into the Dutch oven.
Bake at 300 for 5 hours.
Notes
This recipe could be done in a slow cooker on high heat for 4 to 5 hours or low heat for 7 to 8 hours.
Serve over mashed potatoes or noodles.
By Lisa Mullis of Frenetic Lisa and Arkansas Outside
Arkansas Women Bloggers https://arkansaswomenbloggers.com/
My name is Lisa, I love to cook for and eat with my family. I run, lift heavy stuff and cycle to make room for more food. When I’m not looking at tiny things under a microscope at work, I write about my cooking, running, lifting and cycling and my friends who do all those things too at Frenetic Fitness and Arkansas Outside.
Here in the south we have a lot of traditions — or superstitions, if you’re less charitable — surrounding the turning of a new year. There’s kissing at midnight and making lots of noise, like everywhere else, but we also have food traditions, the most well-known of which include eating black-eyed peas (and often collard greens and ham hocks) on the first day of the year.
I have no idea why black-eyed peas are better than any other kind of bean, though my colleague Amanda at About.com Little Rock says they became symbolic of good luck when Union soldiers cleared out southern storehouses leaving only the peas, which were considered fit only for animal consumption.
Whatever the reason, I’ve embraced black-eyed peas as a party dish for New Year’s Eve in the form of black-eyed pea hummus. This is like traditional hummus with a couple of yummy twists that will keep guests guessing. Just make sure you save some to eat after the clock strikes 12 to ensure good luck in the coming year. I usually make a double batch, just in case.
1 can black-eyed peas, or about 2 cups freshly cooked peas (save some of the liquid)
2 tablespoons peanut butter (natural is better)
1 clove garlic, chopped
2 teaspoons apple cider vinegar
salt, pepper and cayenne pepper to taste
Instructions
Put all ingredients in the food processor and pulse until a paste begins to form. Add bean liquid as needed to loosen it up to a hummus consistency.
Notes
I like to serve it with pita chips (homemade or storebought) but you can use whatever dippers you like.
By Sarah White of Our Daily Craft
Adapted from Passionate Vegetarian, Crescent Dragonwagon
Adapted from Passionate Vegetarian, Crescent Dragonwagon
Arkansas Women Bloggers https://arkansaswomenbloggers.com/
Sarah E. White is a crafter, knitwear designer, blogger and mom of one super-busy 4-year-old. She blogs at Our Daily Craft— where she writes about crafting with and for kids, the craft of blogging, parenting and more — and writes the knitting websites for About.com and CraftGossip.com. She’s the author of two knitting books, the latest of which, Quick & Easy Baby Knits, was published this year.
Jerusalem shares special memories of food and family on Christmas morning.
When I was less than a year old, my father left the U.S. Air Force in order to finish his college education and then to attend seminary. As far back as I can remember, my father has been a Southern Baptist pastor in some capacity, and during my middle childhood years, it was his only vocation; but at heart he is an introverted poet, scholar, and musician, and he never sought the role of senior pastor of a mega-church, never climbed the church leadership ladder. This also meant that our bank account did not climb any ladders, either. For herself, my mother chose to be a stay-at-home mother as her vocation, homeschooling all four of us for a large chunk of our education and creating an amazing environment for creativity. But even though this was what she wanted, what she chose—it was still work, and even though she wasn’t bringing in a paycheck, she still had financial responsibilities. So, the task to find ways to stretch one paycheck as far and as wide as the Atlantic Ocean fell to her.
Despite our cheese-and-crackers budget, we always had gifts under the tree—maybe not many, but there was always something lovely: something my mother had stayed up and sewn through the night; something she had saved pennies or Green Stamps to purchase. Once, during the Cabbage Patch Kid phase, she even took a night sewing class in order to make me an extra-large soft-headed Cabbage Patch knockoff doll, just what I had wished for (curiously I had wanted only a boy doll and that Christmas I got two—one my mother made and one off-brand doll that my grandmother bought me. Talk about foreshadowing!). Even my father, who loves to shop for gifts almost as much as his father, got in on the thrifty gift-giving, and my most favorite gifts from him were always things that were given with more thought than cash.
The big family gift that first Christmas in Juneau was a videocassette recorder. Months before Christmas, my parents had purchased and hidden it in my father’s office at the church. During those weeks leading up to Christmas, Daddy secretly videotaped television shows and movies for each of us, wrapping up the videotapes and putting them under the tree, so that come Christmas morning my three siblings and I would each have something special to watch. My tape was filled with the PBS Anne of Green Gables series, based on the books by Lucy Maud Montgomery, and within five minutes of viewing I knew had found a bosom buddy for life in Anne. I am sure there were many things on my Christmas wish list that year that I was convinced I needed, that I spent nights dreaming of and hoping for. But I have no idea what they were, and chances are I will never remember, but I will remember Anne of Green Gables forever—she became a huge part of my identity. As dramatic as it sounds to say, I would not be who I am today if it had not been for Anne, and I have my daddy and his thrifty thoughtfulness to thank for that.
I wonder now, a parent myself, trying to scrimp and save in preparation for Christmas gifts and decorations, staying up late to put the final stitches in a gift, juggling the electric bill with the boys’ wish lists, if my parents ever second-guessed their choices. If they ever felt that homespun gifts and home-taped videos were second-rate gifts. If they ever wondered if they had made the right choices, traveled the right path. I wonder those things about myself all the time—isn’t that part of parenting? The never knowing if you are getting it right? You hope you are, you want to desperately, but you never know for sure. “Please Lord, just let the good stuff stick,” I pray.
I take some solace in the fact that despite how I acted then, what matters now, what has stayed with me all these years about our family’s Christmas, was not when or how our tree was set up, or what presents I didn’t get, or how odd the gifts I did get might have turned out to be. What I am grateful for now, even as I put my own children’s inadequate gifts under the tree, is that regardless of whatever was not enough, what was always in full supply on Christmas Day was my parents’ love and presence. Come Christmas morning our home was full of merriment, laughter, and kisses; there was always hot food on the table, a dry roof over our heads, plenty of books to read, and music to dance to. We had each other, despite whatever other brokenness our lives encountered.
Christmas morning can cause a hiccup to menu planning if your big meal is later in the day, and especially if the budget is tighter than normal. Here are two easy recipes that will make any crowd happy, won’t break the bank, but will feel indulgent and can be eaten at everyone’s convenience throughout the morning.
Since I was a little girl, my mother has made the most wonderful hot chocolate mix, even when the budget was especially tight. It was always one of our little luxuries. Some of my favorite Christmas memories are of sitting underneath our family Christmas tree, giggling and sharing cups of cocoa with my childhood friend Tracy. To this day I can still lure friends over for a visit with the promise of a hot cup of Mrs. Jackson’s Cocoa. The recipe will make quite a bit of cocoa, and like Mrs. Jackson , you can give jars and repurposed coffee canisters of it away as gifts throughout the holidays (the mix will stay fresh for many months if stored in an airtight container. )
In a very large bowl, mix together the following ingredients
2 25.6-ounce boxes of nonfat dry milk
1 16-ounce jar of nondairy creamer
3 16-ounce cans of quick chocolate drink mix
2 8-ounce cans of Hershey’s unsweetened cocoa
1 2-pound bag of confectioners’ sugar
Instructions
Mix all together and store in an airtight container.
To serve in a standard 8-ounce mug: Measure 1/3 cup of the mix into mug, fill with hot water, stirring thoroughly for a few seconds.
Top with fresh whipped cream and sprinkles.
Notes
(You may not find these items packaged in these exact amounts. Use a measuring cup or weight scale to get the amounts you need.)
By Jerusalem Jackson Greer
Arkansas Women Bloggers https://arkansaswomenbloggers.com/
Crepe Bar
The very first time I ever had a crepe was at my friend Carrie’s house around the age of sixteen. I watched in awe as her mother flipped paper thin pancake after paper thin pancake Crepes are a great Christmas morning treat because family members can add toppings according to their taste – be it savory or sweet!
Ingredients
2 cups flour
3 eggs
¼ teaspoon salt (I love fine sea salt for this recipe)
1 tablespoon sunflower oil
2 cups plus 1 tablespoon whole milk
Directions
Mix ingredients together in a blender; mixture will be very thin. Cook these in a non-stick skillet or a crepe pan that has been lightly greased, on medium heat.
Crepes can be served as a savory or sweet dish, depending on how you fill or top them. My favorite crepes are filled with a creamy chicken mixture and served over a bed of sticky rice.
On Christmas morning, try creating a “crepe bar” by putting out lots of different fillings and toppings. Let each person create his or her own unique savory or sweet crepe at their own speed. Keep crepes warm in a low temp oven or crock-pot (make sure to coat the bottom and sides of your crock-pot with butter if you go this route.)
Some filling ideas for the crepe bar are:
Ricotta cheese
Shredded cheese
Plain or vanilla yogurt
Fresh fruit, sliced thinly
Shredded chicken
Sautéed mushrooms
Sour cream
Maple syrup
Nutella® spread
Butter
Powdered sugar
Fruit jam
“Juggling songs of praise with cries for help. Her words and works inspire..” – Publishers Weekly
Jerusalem Jackson Greer is a writer, speaker, retreat leader, former pastor, nest-fluffer, urban farm-gal, and author ofA Homemade Year: The Blessings of Cooking, Crafting and Coming Together. Jerusalem lives with her husband and two sons in a 1940s cottage in Central Arkansas at the crossroads of beauty and mess with an ever-changing rotation of pets, including a hen house full of chickens and a Hungarian Sheep Dog mutt. As a family, they are attempting to live a slower version of modern life. She blogs about all of this and more at http://jerusalemgreer.com
Narrative and recipes excerpted from A Homemade Year:The Blessings of Cooking, Crafting, and Coming Together by Jerusalem Jackson Greer
Welcome to our #ARWB #Virtual Cookie Swap hosted by Tiffany. Be sure to add your favorite cookie posts to our Linky. Which new ones will you try?
Today, I want to share with you a recipe that I sometimes make with my goddaughter. They’re simple to make so it’s a perfect activity to make with kids. They’re also really colorful and super tasty; it’s a win-win.
Christmas Tree Sugar Cookies
You’ll Need:
1 cup powdered sugar
1 cup vegetable oil
1 teaspoon cream of tartar
1 teaspoon baking soda
2 Tablespoons vanilla extract
1 1/3 cup sugar
1 cup butter
2 large eggs
1 teaspoon salt
5 cups all purpose flour
1 tube of icing (your choice of color)
your choice of food colorings
(optional: various colors of sugar sprinkles)
How to:
Cream sugar and butter together in a large bowl Beat in eggs and oil. In a separate bowl, mix the cream of tartar, baking soda, powdered sugar, salt and flour together.
Add the dry ingredient mixture to the butter/sugar mix then stir in the vanilla extract.
Next, split up the dough into sections depending on how many colors you want to make. I usually do at least 5 so that there’s some variation but you’re welcome to do more or less as you see fit.
Blend the food coloring into your separated bowls until you’ve gotten the color you want.
Proceed to roll each color into 8-10 balls of dough, decreasing the size as you go.Flatten your dough balls into circles and then sprinkle with granulated sugar or coordinating sugar sprinkles.
Using a small star-shaped cookie cutter, cut out as many stars as you’ll need to top your cookie trees.
Bake the cookies at 350 degrees for 8-10 minutes, starting with the largest cookies first and decreasing the cooking time as the cookie sizes get smaller.
Remove cookies from baking pan and cool on wax paper. Once the cookies are cool, stack them starting with the largest on bottom, graduating to the smallest size on the top, adding a small circle of frosting between each layer to hold them in place.
Finish the cookie trees by topping them with a star and lightly dust with powdered sugar so that they resemble snowy trees.
I’ve created a printable recipe card so that you can take this recipe with you, if you like. Just right click and save, then print your desired size.
Tiffany blogs at Life Of A Lost Muse. She shares posts dedicated to things that inspire, lovely photos, creative drawings, tasty recipes, affordable fashion, and blogger love, travel, entertainment, fun tutorials and decor. You can find her at there or at her other blog, Fashion In the Forest.
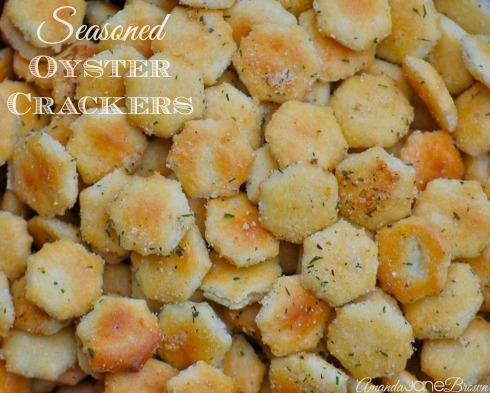
It is such a joy to be here today for Foodie Friday all the way from our new home in Oxford, Mississippi! At Christmas, we all love to prepare our tried-and-true family recipes…everything from hot drinks to appetizers to cornbread dressing, or stuffing if you’re not from the South;).
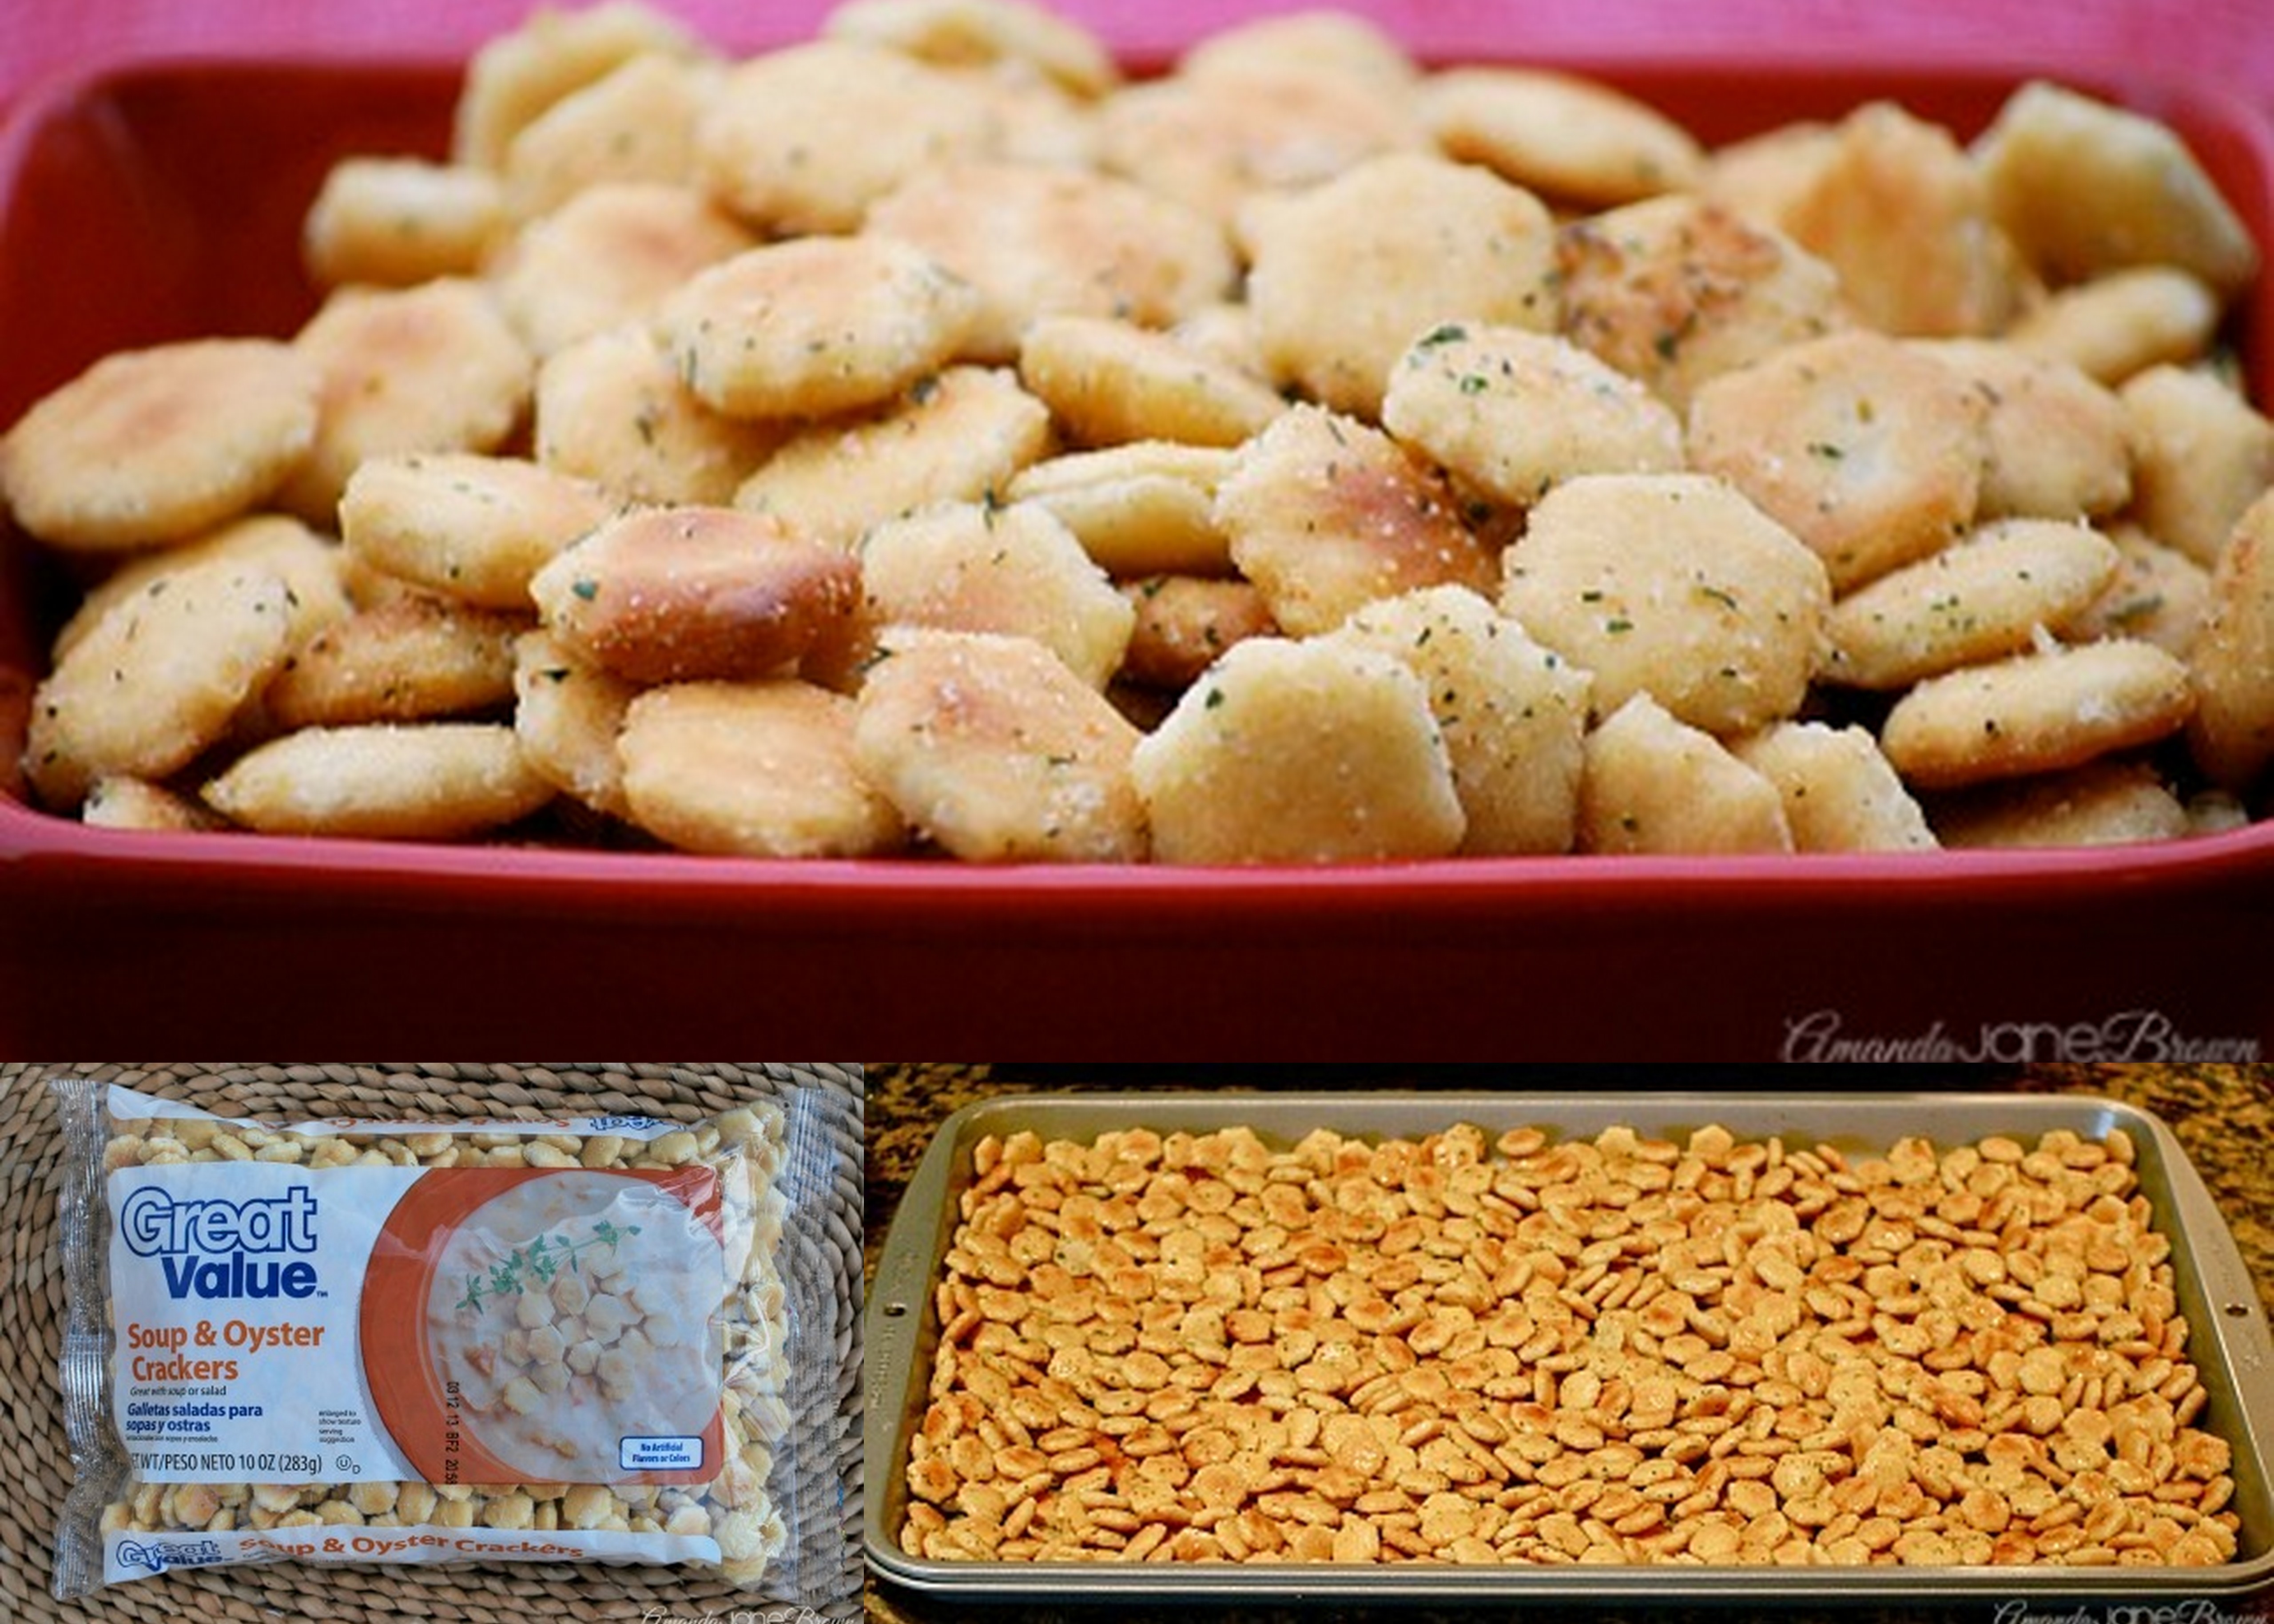
Today, I am sharing one of our family’s favorite snacks for the Holiday season…Seasoned Oyster Crackers. These flavor-packed treats are perfect for Christmas party snacks or as an addition to your favorite soup or chili. Also, these crackers make great gifts for neighbors and friends. Seasoned Oyster Crackers are a cinch to make, too! Enjoy!
In a large bowl, whisk together the oil, Ranch packet, dill, lemon pepper, and garlic powder. Add oyster crackers to the bowl and gently stir, coating the crackers well. Place the coated crackers in a single layer on a large cookie sheet or jelly roll pan.
Bake for about 15 minutes or until crackers begin to brown slightly.
Remove from oven and transfer to a paper towel-lined plate. Cool completely and store in an air-tight container.
By Amanda Jane Brown of Amanda Jane Brown.com
Arkansas Women Bloggers https://arkansaswomenbloggers.com/
Be sure to stop by Amanda Jane Brownfor other recipes for the Holidays!
Amanda is a blogger and writer at AmandaJaneBrown.com. She shares affordable ways to create memories using simple seasonal décor, everyday recipes, and family traditions. She writes about living intentionally in the little–and big–stuff and tells real-life stories from a far-from-perfect perspective. Visit her at www.amandajanebrown.com to follow along!
It’s the day after Thanksgiving and not many of us want to spend any more time in the kitchen since that’s probably what most of us have done all week! Perhaps you’ll spend the day shopping the Black Friday sales. Not me. But I have family members who were up and off at the crack to do just that.
Or, perhaps you’ll be among the hundreds of thousands who will be traveling back home from “over the river and through the woods.” Be safe. I hope you make all of your plane connections or have clear highways.
Will you be continuing the family football game with a post-Thanksgiving bowl or heading out to watch your favorite team at the real thing? I hope your team wins.
Christmas decorating plans? For many of you, this is the day the tree goes up. I wonder, will yours be covered in precious handmade handprints and clothespin reindeer? Or will it be one of designer dreams? Whichever you choose, it will be beautiful.
For me, I’ll be spending the day sharing time with family. I won’t be decorating or traveling, and I’ll not be cooking much This pasta dish is the perfect choice for allowing me the time to create a gingerbread house with my little artist-to-be 6 year old granddaughter. Or maybe we’ll make a handmade Christmas surprise for her parents. Or cookies. Those are always a favored option.
For Perfect Boy, my 8 year old all boy grandson, there has to be a ball involved. There could be Legos. I expect to find NYC replicated in Legos one of these days. How does he do that so easily?
And while we are finding opportunities and ways to share and be thankful for our thanksliving time, we’ll be sharing some of the corniest jokes ever. It’s always a challenge to find one they haven’t yet heard or told. We sometimes get a serious case of the giggles just trying to one-up one another. I am blessed.
Need a little laugh today? Here are some both of the Perfects shared with me today.
Blessings on you and yours. (If you need any more jokes, we’ve got ‘em!) Now go enjoy your day then make this easy pasta. You’ll be glad you did.
1. What do hippies put on their Thanksgiving potatoes?
A. Groovy
2. Why was the quarterback crying during the game?
A. Because he was playing footBAWL.rom
3.. Why don’t you eat fish on Thanksgiving?
A. Because Thanksgiving never falls on a FRYday!
4 Rich people eat what on Thanksgiving?2
A. Eighteen Karats
5. Why IS Plymouth Rock so brave?
A. Because it’s a little boulder
6. On which holiday do you play a lot of jokes on people?
A. PRANKSgiving
7. How much did the Mayflower weigh?
A. A PuriTON
8. What is big and green and goes “gobble-gobble?”
A. A Turkeysaurus Rex, of course!
9. What do monsters have on their Thanksgiving tables?
A. Knives, forks and goons!
10. What do policemen eat on Thanksgiving?
A. Corn on the cop!
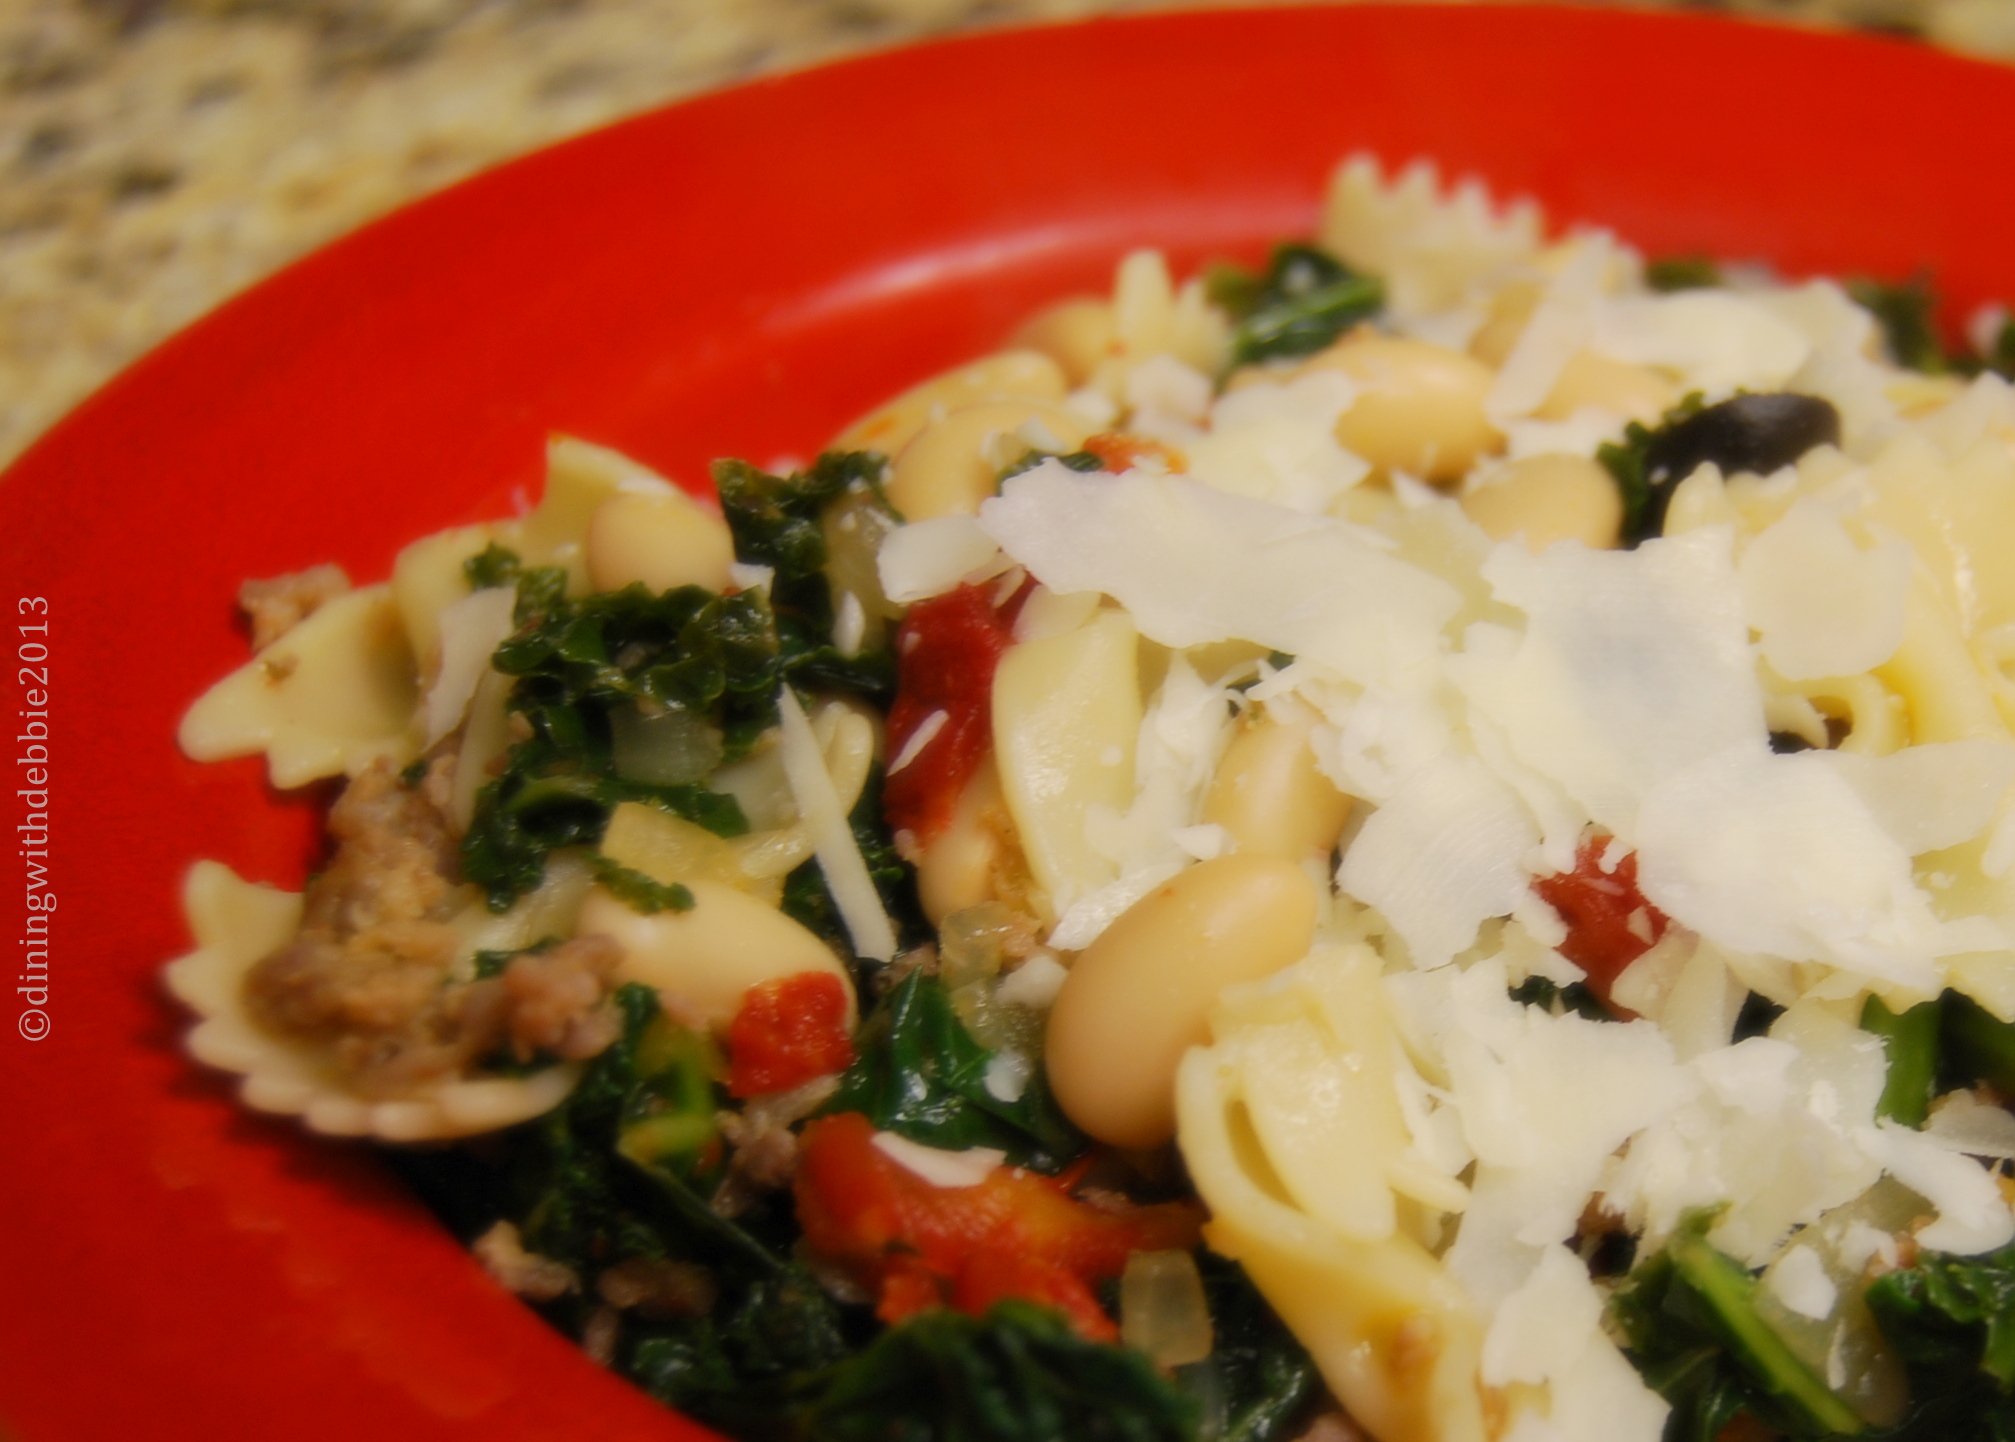
1 15-ounce can cannellini beans, drained and rinsed, set aside
1/4 cup sliced black olives
freshly shaved Parmesan
salt and pepper to taste
Instructions
Bring a large pan of salted water to boil.. Follow package directions for cooking the pasta. Drain and set aside. Reserve 1 cup of the pasta water.
While the pasta is cooking, crumble and partially cook the Italian sausage in a large skillet. When the meat is mostly done, drain it in a sieve and rinse with warm water. Return it to the skillet.
Add the tomatoes and onions to the sausage and cook until the onions are soft; add in the roasted garlic and Italian seasoning. Cook 10 minutes, stirring well to incorporate.
Add the kale to the sausage mixture and pour the broth over. Cover and simmer for approximately 5 minutes. Stir in the beans and black olives. Stir in the cooked pasta. Add pasta water as needed to create a little sauce. Add salt and pepper to taste.
Serve immediately sprinkled with some of the shaved Parmesan.
Notes
*Turkey sausage may be substituted.
By Debbie Arnold of Dining With Debbie
Adapted from Cooking Light, November 2007
Adapted from Cooking Light, November 2007
Arkansas Women Bloggers https://arkansaswomenbloggers.com/
Debbie is in her second year of retirement from a 30-plus career in education primarily as a PreAp and Regular English teacher at the middle school level. While she enjoyed teaching and interacting with students and staff, she is thoroughly enjoying this time in her life. She has been married to her husband for almost 44 years, and they have one child, a daughter who lives in Fayetteville with her husband and her two perfect grandchildren who are 8 and 6. Debbie and her husband spend lots of our time traveling back and forth to NWA in order to spend as much time with them as they can and the Perfect Ones will allow.
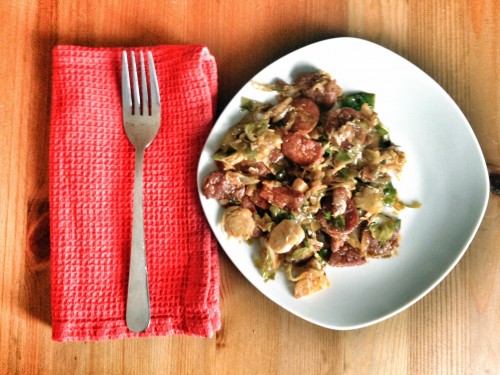
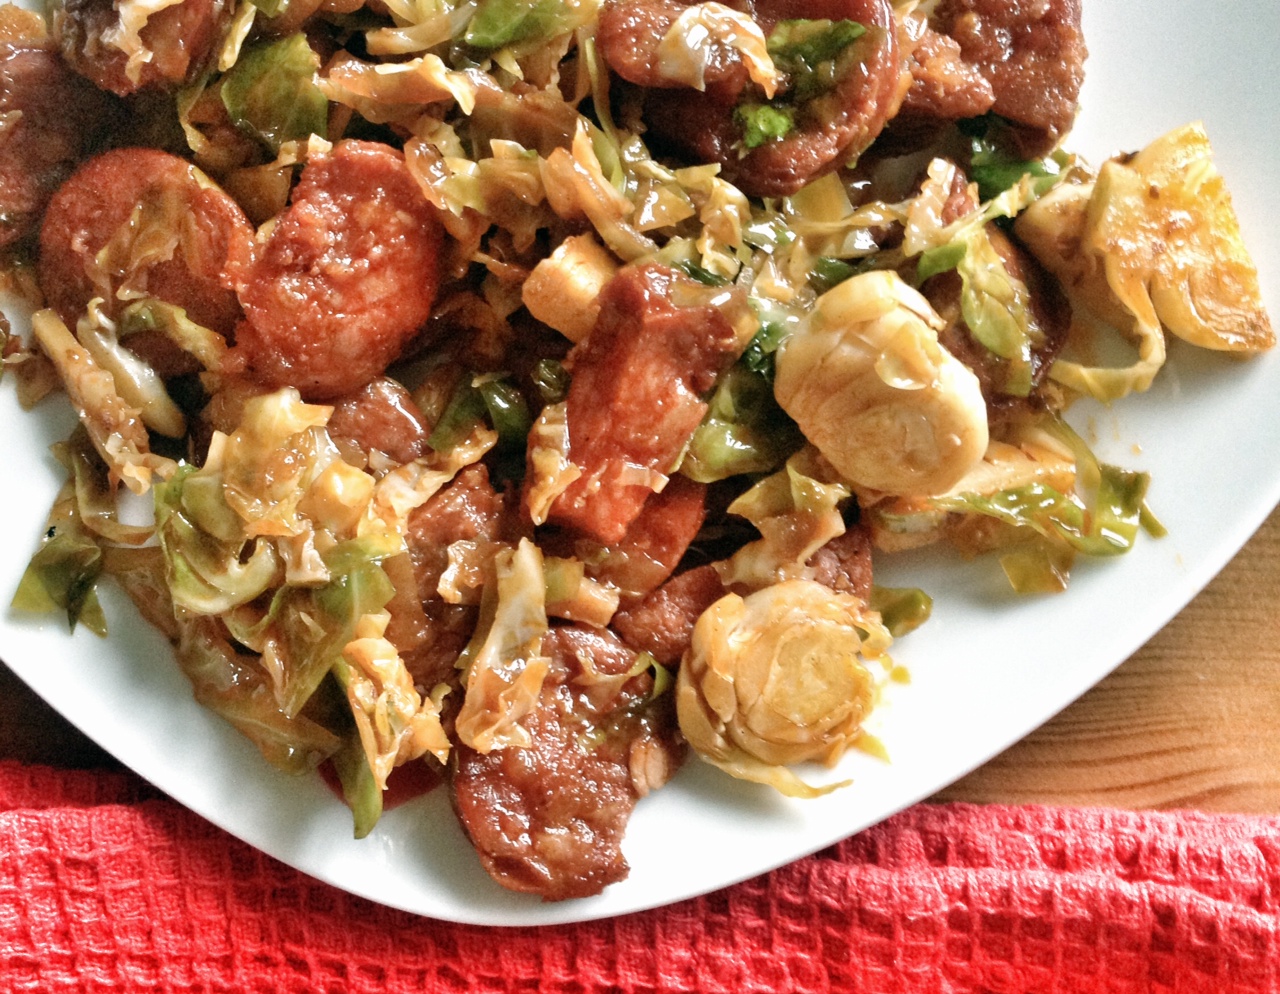
I’m always looking for new ways to get my kids to eat green veggies. None of them appreciate roasted Brussels sprouts the same way I do, but I’ve recently found that they go over much better when thinly sliced and sautéed. Add some sausage and you’ve got a side dish not many can turn down.
There are just a couple of tricks to making this dish perfectly. The first one is to slice the Brussels as thinly as possible. You can do this in the food processor with a slicing attachment. Secondly, after you add the Brussels at the end, watch them carefully to keep from overcooking them. Ideally, you want a little crunch left in them when you pull them off the stove and serve them.
If you’re in charge of bringing a side vegetable this year to Thanksgiving, you can’t go wrong with these! Plus I would think you would be in no danger of bringing the same dish as someone else!


 Talya was raised on a cotton farm in Northeast Arkansas where her family still farms. She and her husband along with their two miniature schnauzers, Lucy and Annabelle, live in Dallas. Follow her tales of farm, food, garden and life on her personal blog Grace Grits and Gardening.