Category: Foodie Friday

Mom’s Favorite Sides for Thanksgiving: Banana Pudding and Fruit Salad {Foodie Friday}

By Connie Kay Ash of Scrapbook Wife

Thanksgiving is my favorite holiday – it is a time to spend with family and friends.  Even as a child, growing up in Texas, I loved Thanksgiving. The holiday always consisted of family, friends, good food, the Thanksgiving Day Parade and football.

Moving to Arkansas 25 years ago was an adventure.  The adventure has not stopped. I met and married the love of my life, referred to as the Big Man.  Collectively the Big Man and I have six adult children.  Thanksgiving Day at our home means feeding a minimum of 15 people. The usual number of people at the table is 20 to 25.

Used for Thanksgivng Blog

This picture was taken 7 years ago – before we added dining room furniture and a couple of new family members.

Like most Arkansans our meal contains the usual meats – turkey and ham.  It is the side dishes that make the meal.  We have cranberry sauce, green beans, sweet potato casserole and potato salad. There are always chips, dips, veggies and cheeseballs to hold everyone till the meal.

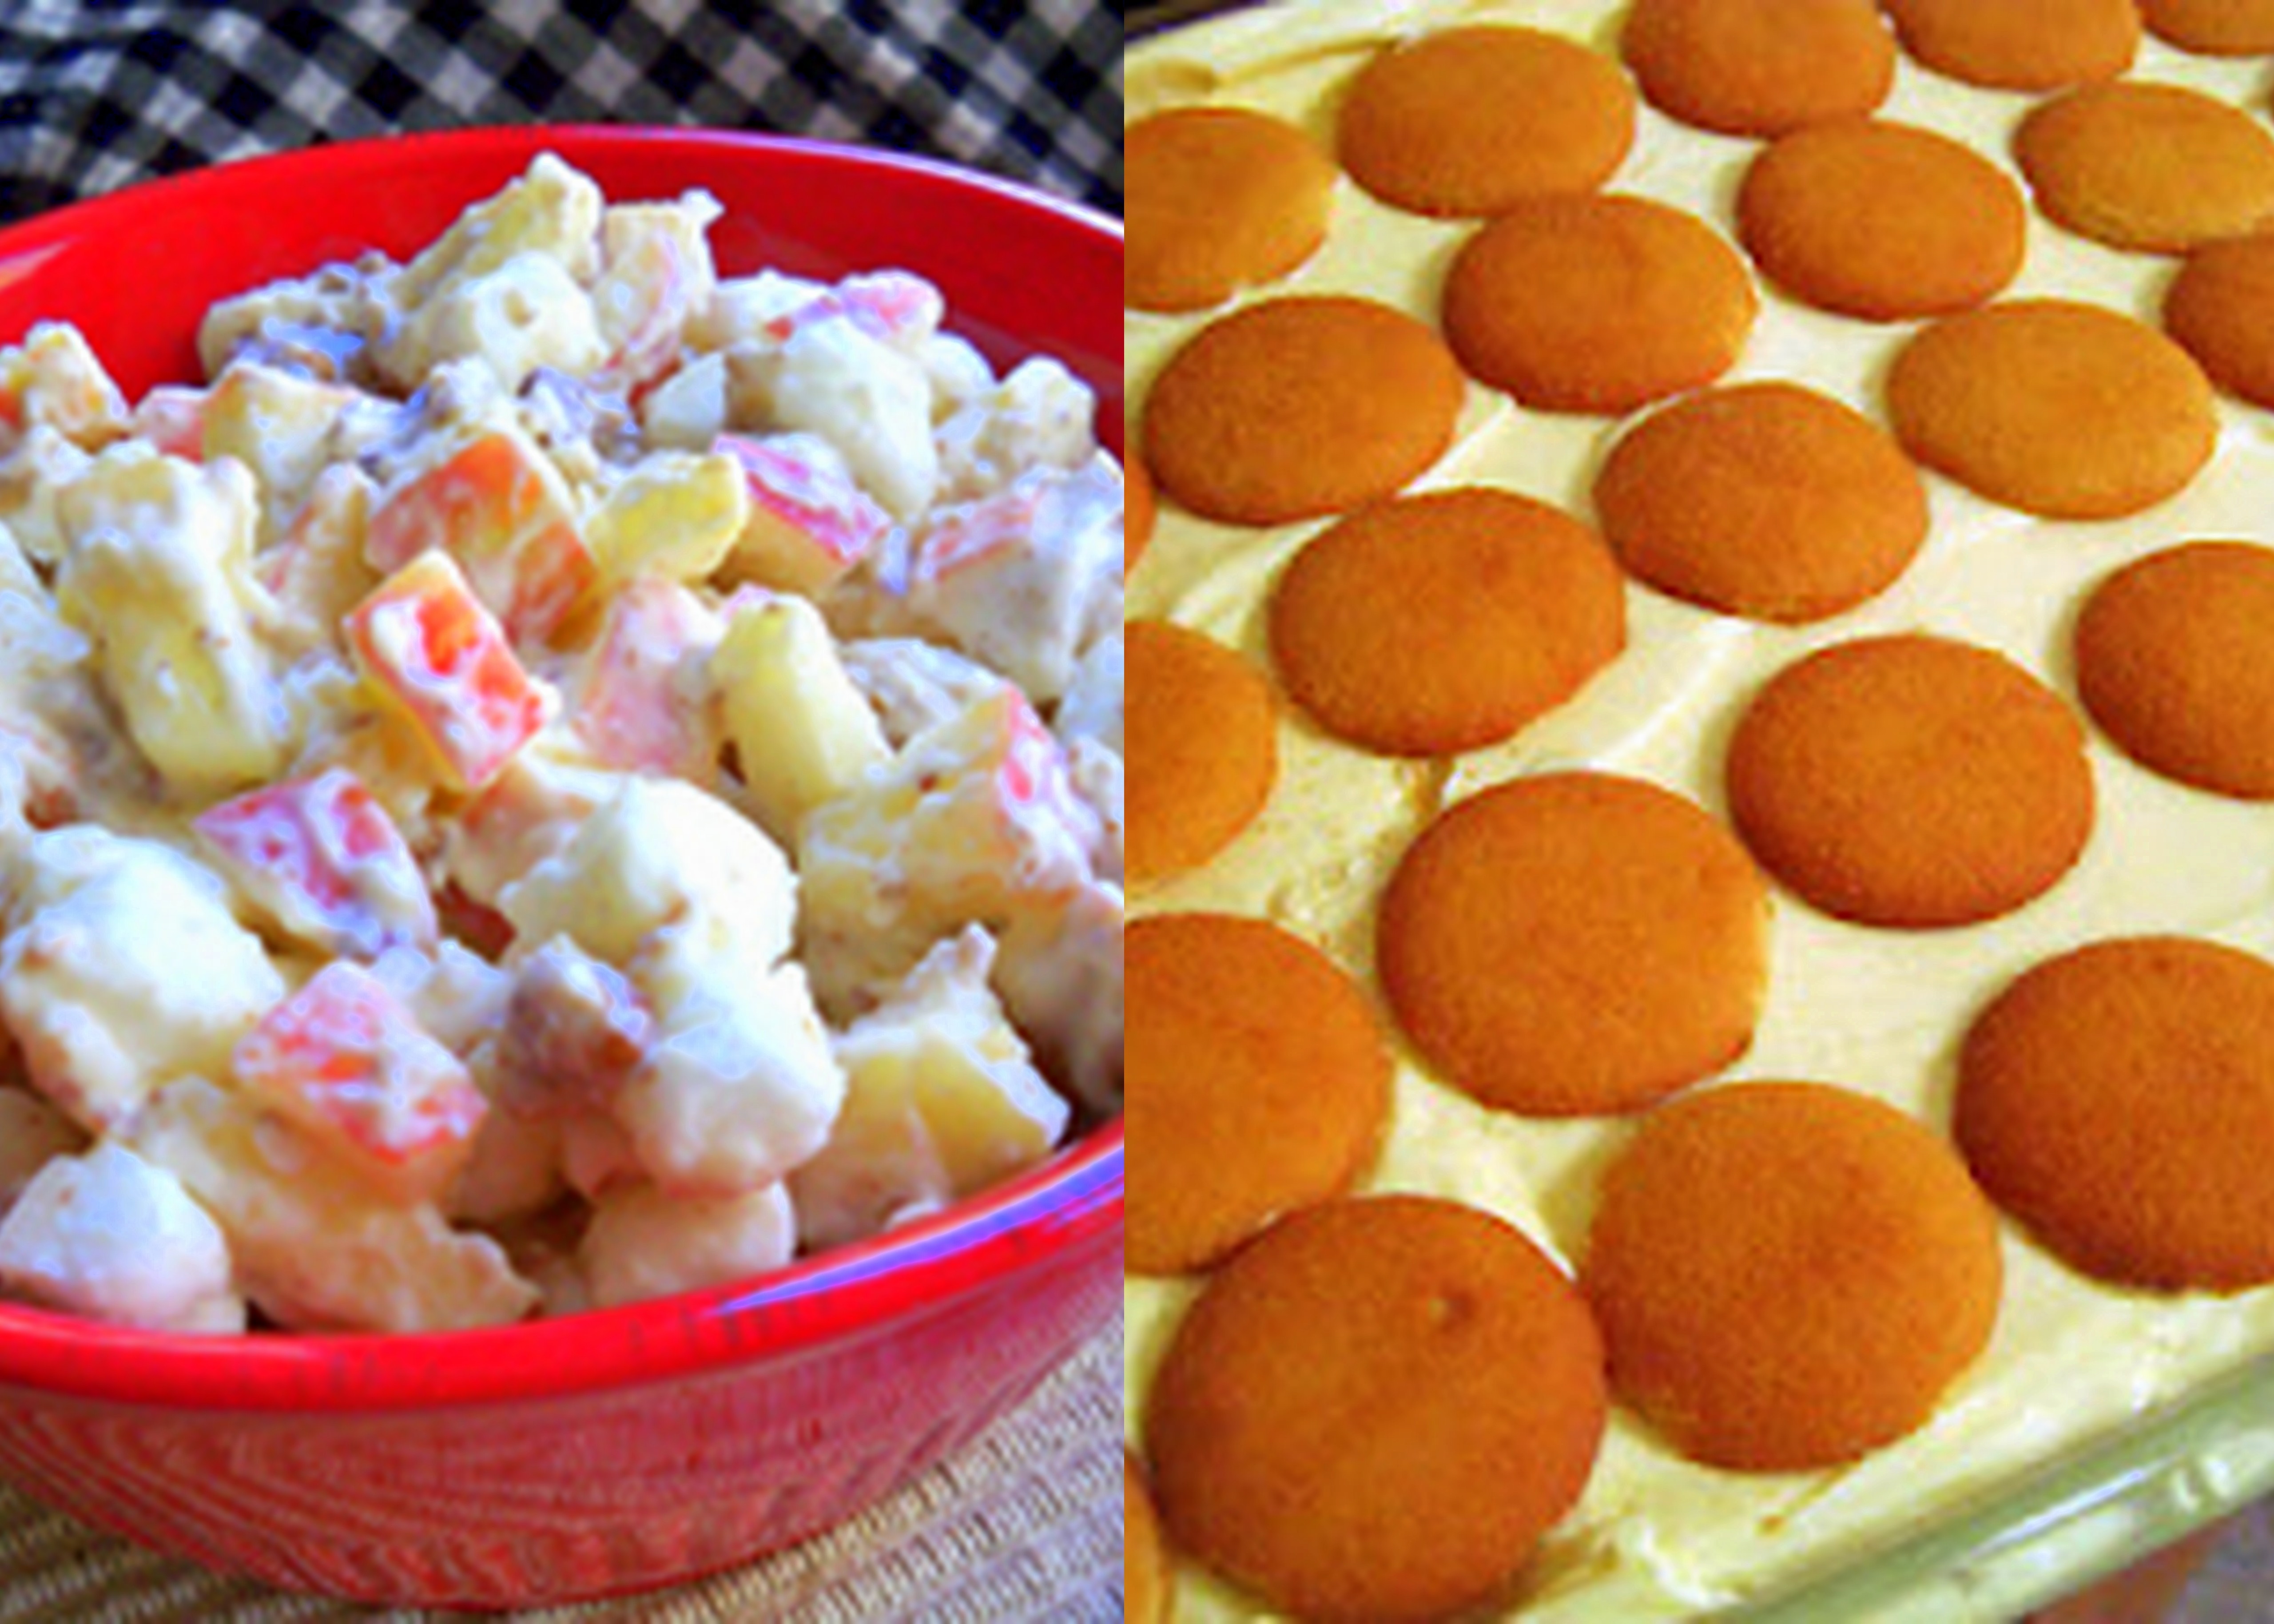
Mom’s very special fruit salad and Mom’s Famous Banana Pudding are those dishes that everyone grabs first and wants to take home with them.  Both of Mom’s specialties come from an old cookbook – A Book of Favorite Recipes Complied by the United Methodist Women of The Jewett Texas published in 1988.


recipe cookbook


The Fruit Salad
Serves approximately 10
3 bananas, sliced
3 apples, chopped, unpeeled, seeds and stems removed
1 smajar maraschino cherrie, halved
2 small cans  mixed fruit cocktail, drained
1 cup small marshmallows
½ cup nuts (I like walnuts or pecans)
½ cup whipping cream
2 teaspoons lemon juice
1 Tabloespoons flour
1 egg, beaten
¾ cup pineapple juice
1/3 cup sugar
Combine the fruit and the 2 teaspoons of lemon juice; set aside. Combine the flour and sugar in the top of a double boiler; stir in beaten egg. Add pineapple juice and stir until thickened. Chill (I put it in the freezer while I finish the recipe).  Whip cream; fold into cooled sauce. Fold this mixture into the fruit and add the nuts. The recipe says serve at once, but I usually make this early in the morning and keep it in the refrigerator till meal time.

collage connie ash


Mom’s Famous Banana Pudding

(The most sought after dish at our house.)
Warning – do not eat unless you have room to add to your belt.

2 packages large vanilla instant pudding (I use the FF.)
3 cups milk (I use skim.)
3 cups Pet Milk (I use FF.)
1 can Eagle Brand (I use the FF.)
1 large container of Cool Whip (I use low fat.)
3 ounces of Carnation Coffee Creamer (I use FF.)
8 bananas
1 large box of vanilla wafers

Mix Coffee Mate and Cool Whip and set aside.  Mix the instant pudding mix, milk, Pet Milk and Eagle Brand.  Fold in 1/3 of the Cool Whip mixture.  Layer pudding, vanilla wafers, and bananas. Put reserved Cool Whip mix on top.  Serves approximately 10 people.

This year we are unsure of our Thanksgiving plans.  But, the one thing I am sure of is, there will be Mom’s Famous Banana Pudding with the meal.

Happy Thanksgiving

Connie head shotI am 50-something wife, mother, Nana, vegetarian, nurse, teacher, volunteer clinic administrator and student (soon to be Advanced Practice Nurse), living in the small community of Blytheville, AR. located in the far northeast corner of the state. I share a home with my husband of 19 years and our 13 four-legged rescue children. Collectively we have six adult near-perfect children and five perfect grandboys and two awesome granddogs.

I love learning.  My goal is to learn something new every day.

I like to challenge myself physically by calling myself a runner.  I love to practice yoga, knit, and scrapbook. I am teaching myself to quilt.  On long weekends when time allows , we trout fish at Mammoth Springs, AR.

I can honestly say, I am living a blessed life in Northeast, Arkansas

DIY Fall Burlap Centerpiece {Foodie Friday}

By Amanda Fiveash of  The Frugal Greenish Mama

Amanda 1

Growing up in Arkansas I always loved autumn.  The air was crisp, the beautiful leaves started turning rich colors and the house always smelled delectable.  What is it about the cool weather that inspires us to want to cook and bake again?  It just feels right.

When I think of fall foods I think of warm bowls of chili, chicken and dumplings or thick and creamy potato soup.  While they were always favorites, it’s what was in the oven that I became more excited about!  Sometimes we would be blessed with a warm pecan pie, apple pie or something pumpkin that would get us all excited.

Fall just seems to bring us all together.  It is a favorite time to have bonfires, hayrides and lots of family and friend get-togethers.

While I enjoy cooking, baking and eating, I enjoy crafting just as much.  (Slight confession, maybe not quite as much as eating!)  With a new season rolling around, it means time to give our décor a bit of an update.  The bright colors of summer are now being replaced with deep, rich hues.  Since I am all about being frugal and reusing items I start to see what I have that I can repurpose or update.

The kids picked out a bunch of silk fall flowers on a recent trip to Michaels and although I am not usually a fan of silk, I decided it would be nice as a centerpiece.  Now we just needed a vase.  I don’t buy vases but usually repurpose something I have on hand.

Amanda 2

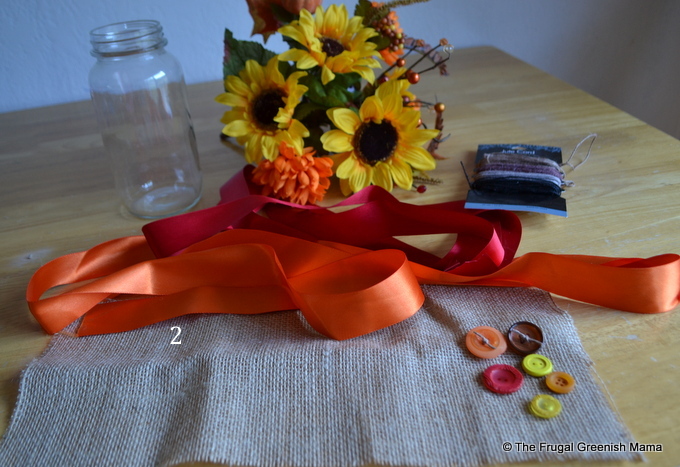
In the spirit of fall  we needed something with more of an earthy feel, which is why I love burlap!  I collected some ribbons in fall colors as well as some buttons, burlap and my glue gun.

Amanda Fivash

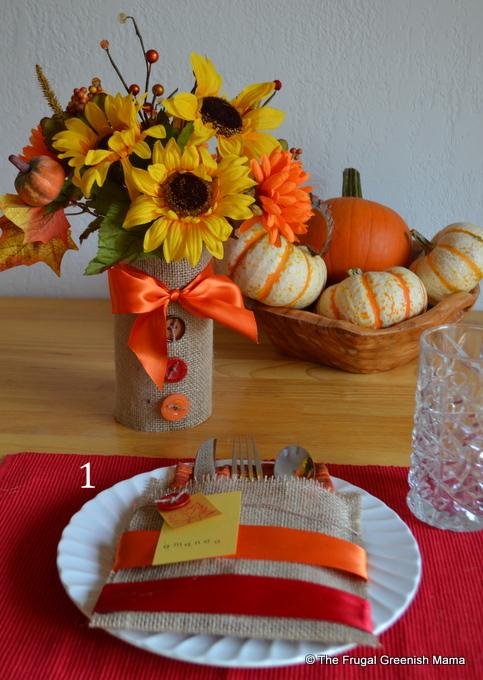
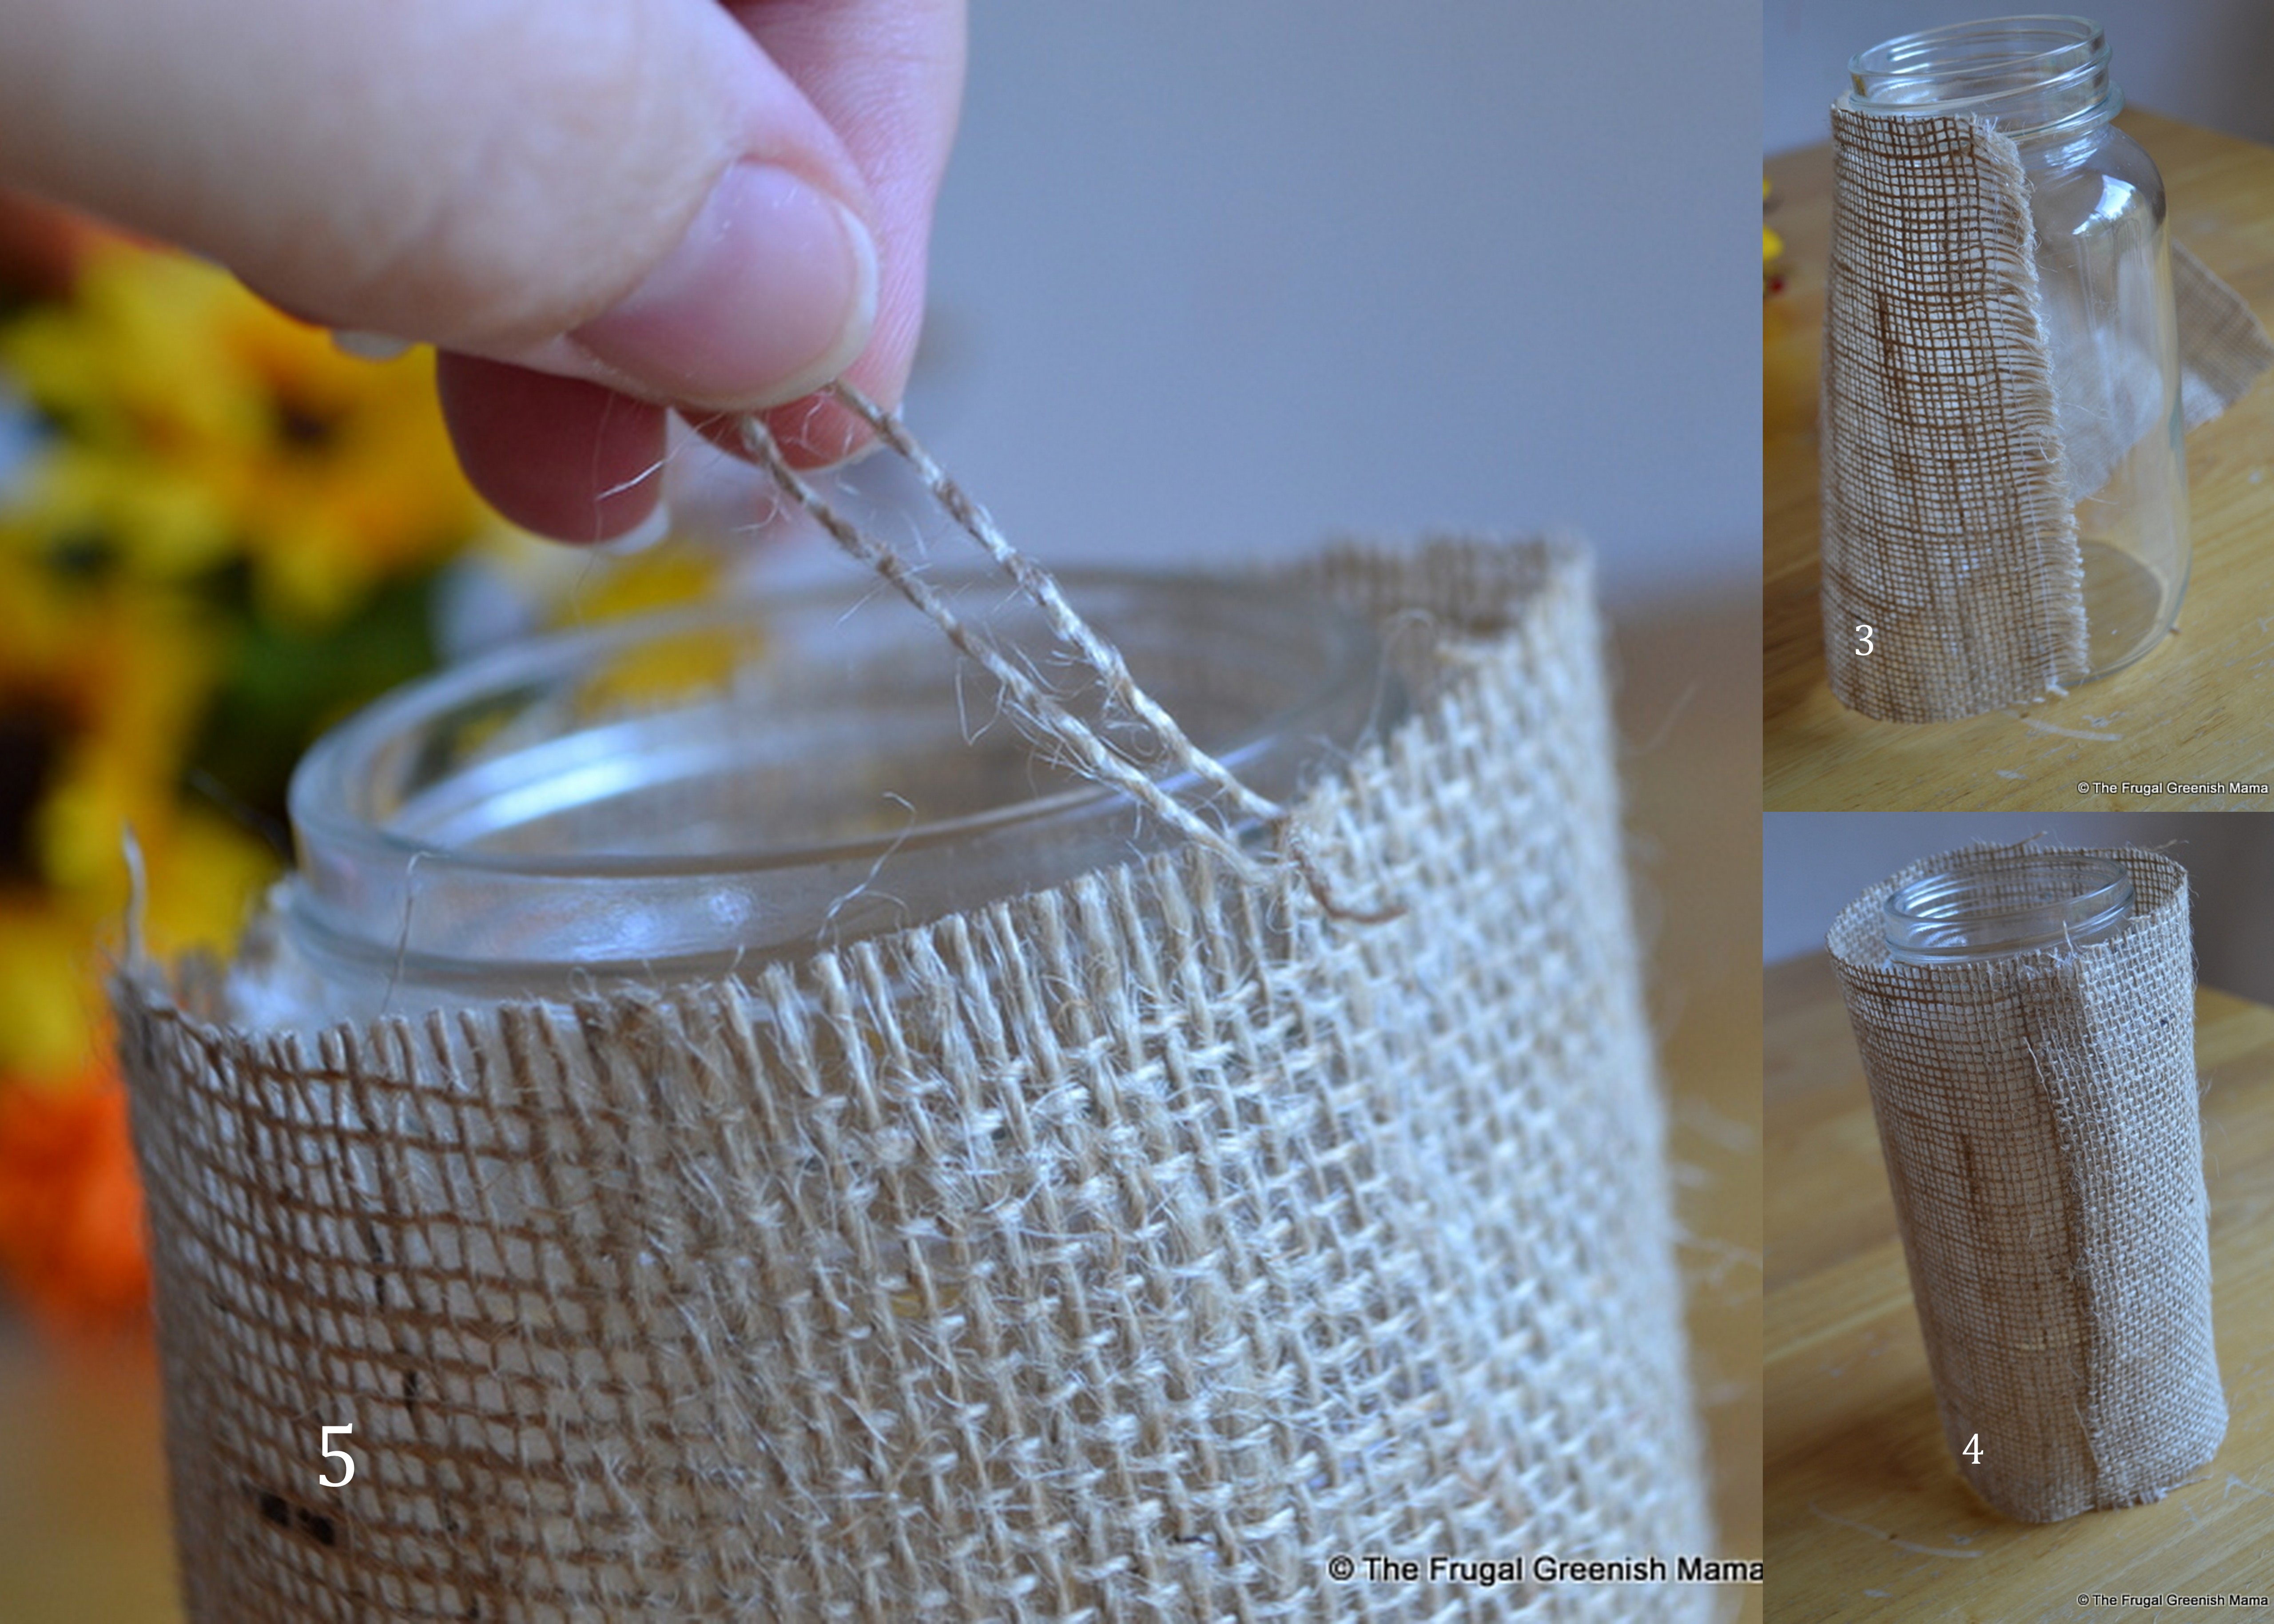
3.  To begin, cut your burlap so that it wraps around the entire vase, overlapping the edges just slightly.  Cut the top of the burlap just at the top of the vase.

4.  Using your hot glue gun, glue the burlap to the vase and then wrap it around tightly and glue the loose edges down.

5.   Along the top edge of the burlap, remove one to two cords so it is slightly frayed.

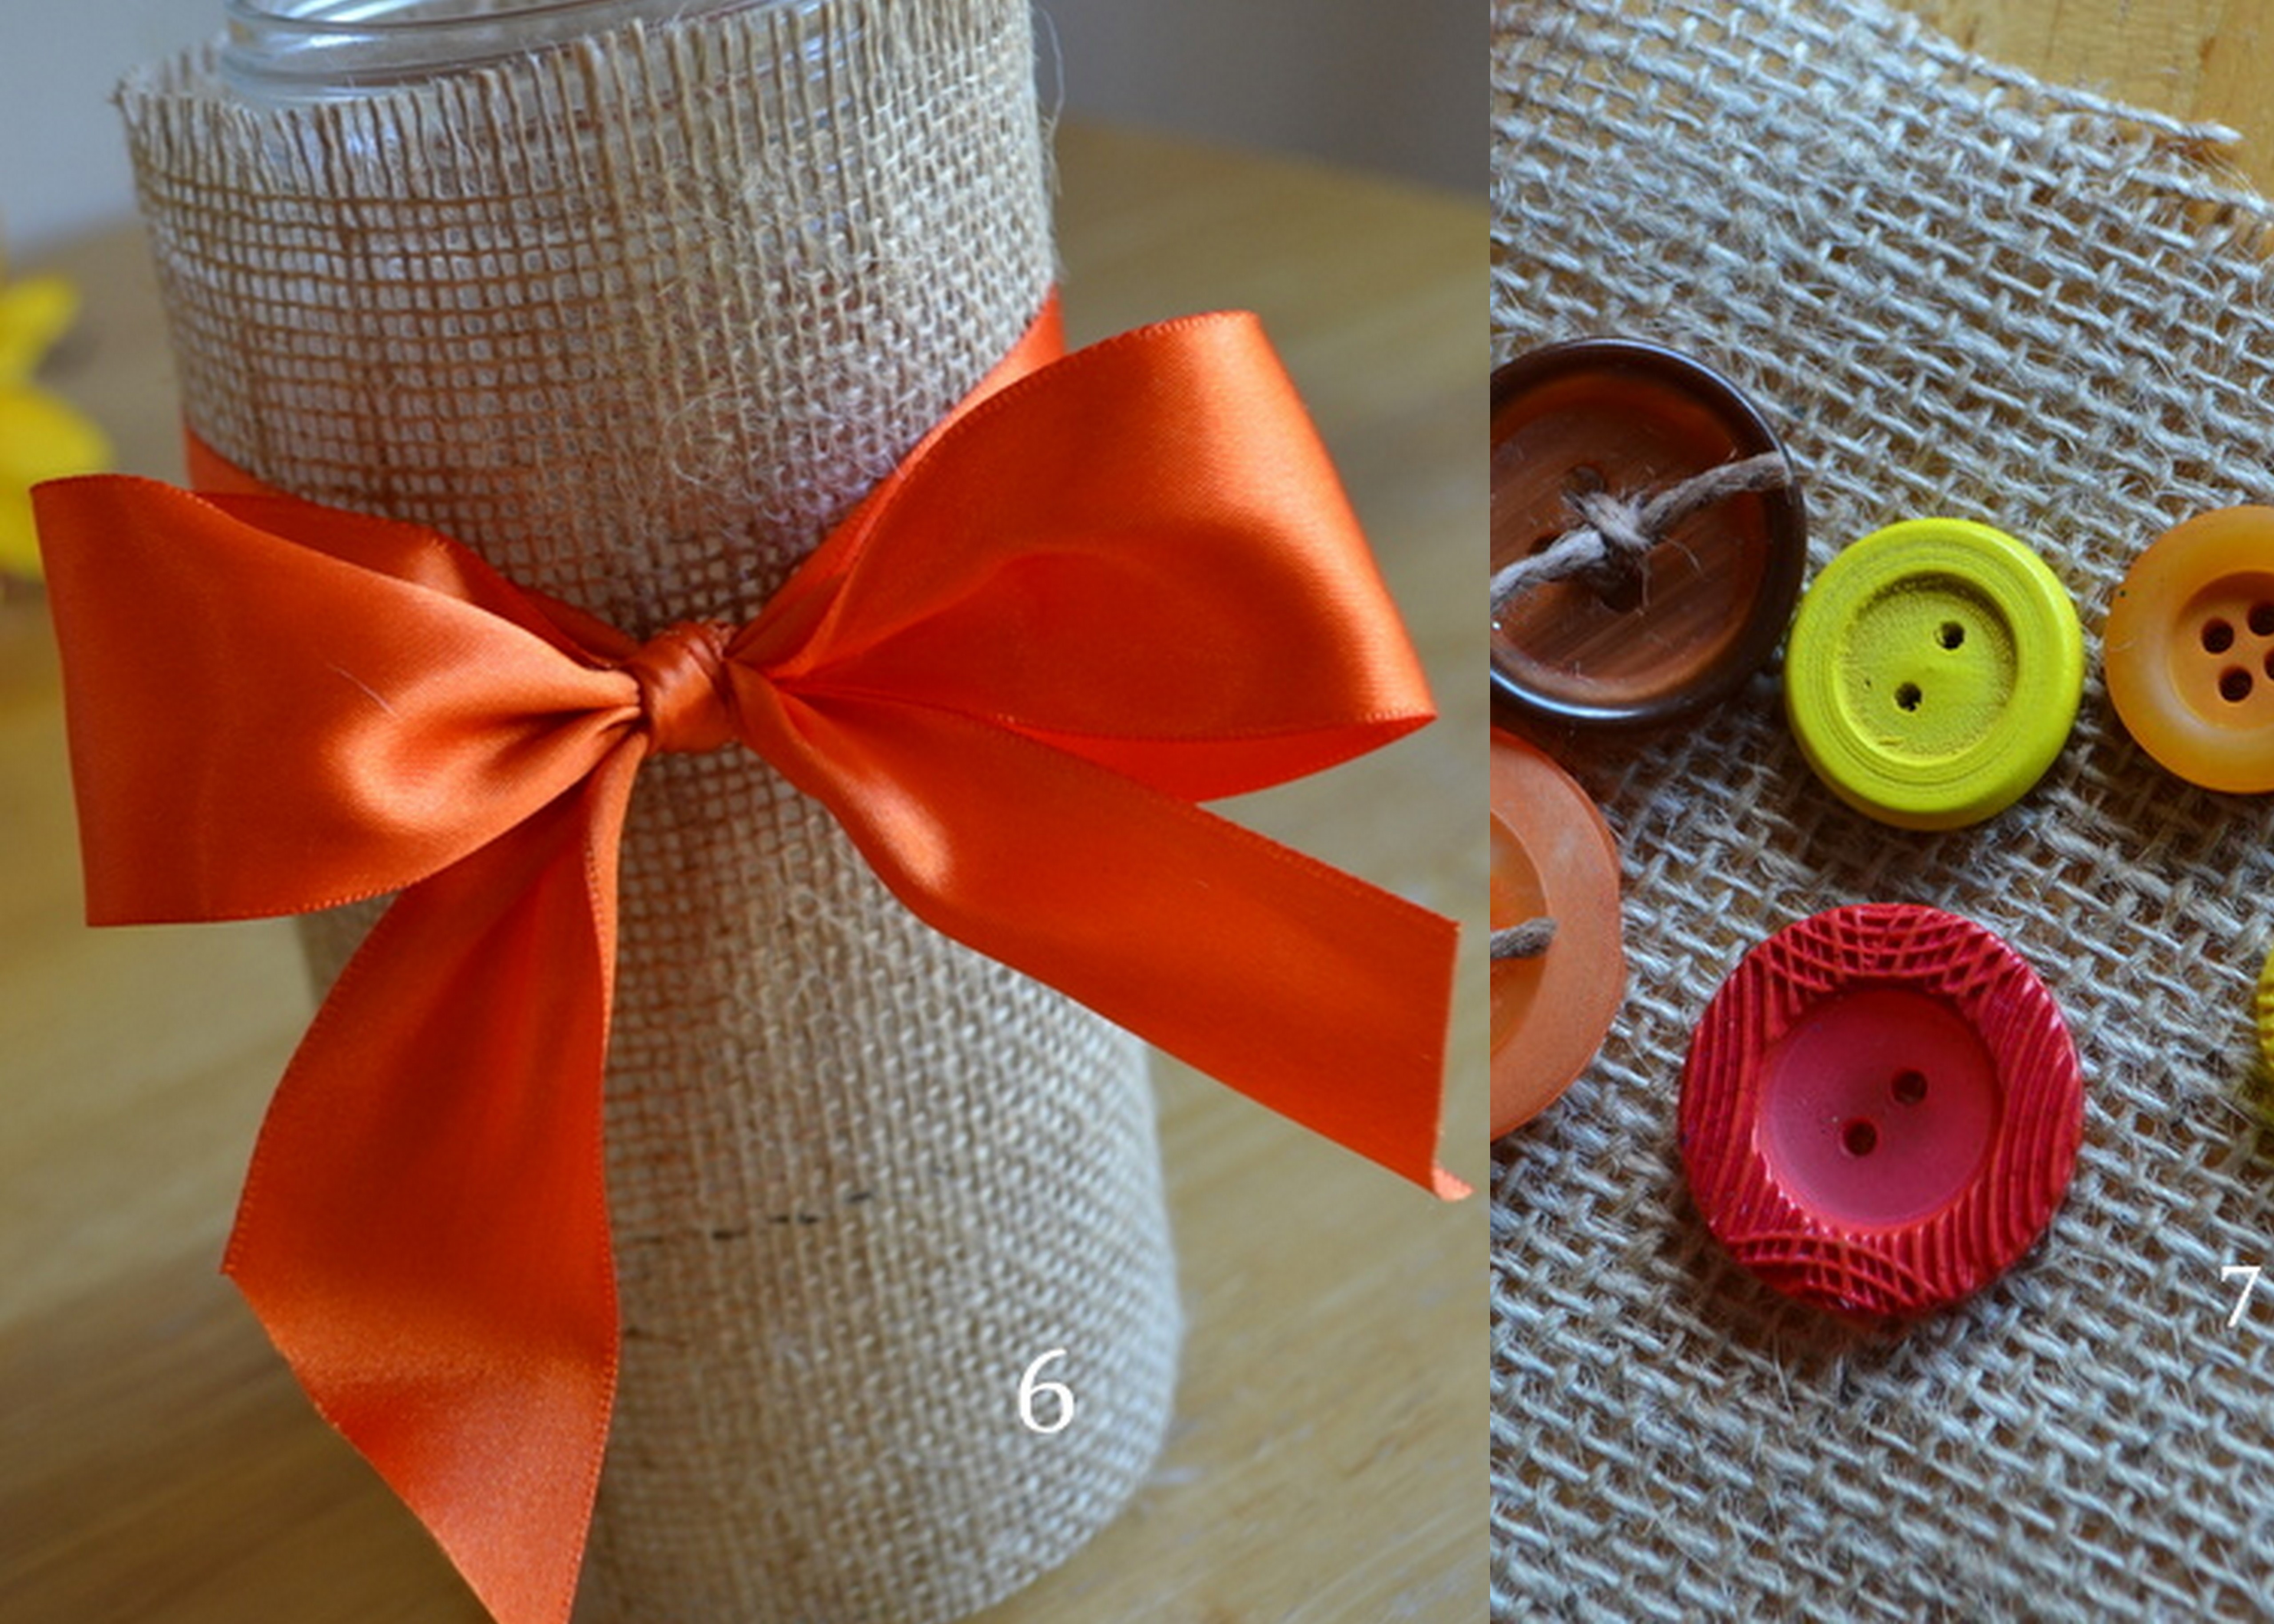
6.  Add a ribbon of yo ur choice and tie a bow for the front of the vase.

Amanda collage

 7.  Then take a piece of jute or cord and thread them through your buttons, knotting them.  Use your hot glue gun to glue them in place.

Amanda 8

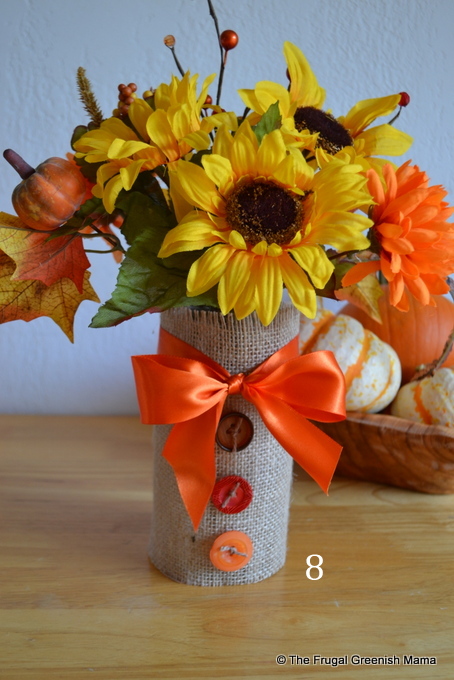
Now you have created the perfect vase for your centerpiece!  Next up is the menu of delicious food!

headshot
Amanda was born in Arkansas and although lived in several other states, returned home to put down roots before starting her own family.  She is now a Mama to three beautiful children living in Northern Arkansas.  Her blog, The Frugal Greenish Mama is an outlet to share her adventures in  motherhood from homeschooling, attempting to feed her family more natural foods and her love of crafting.
Paige’s Adventures in Preserving Summer {Foodie Friday}

By Paige Ray of Approaching Joy

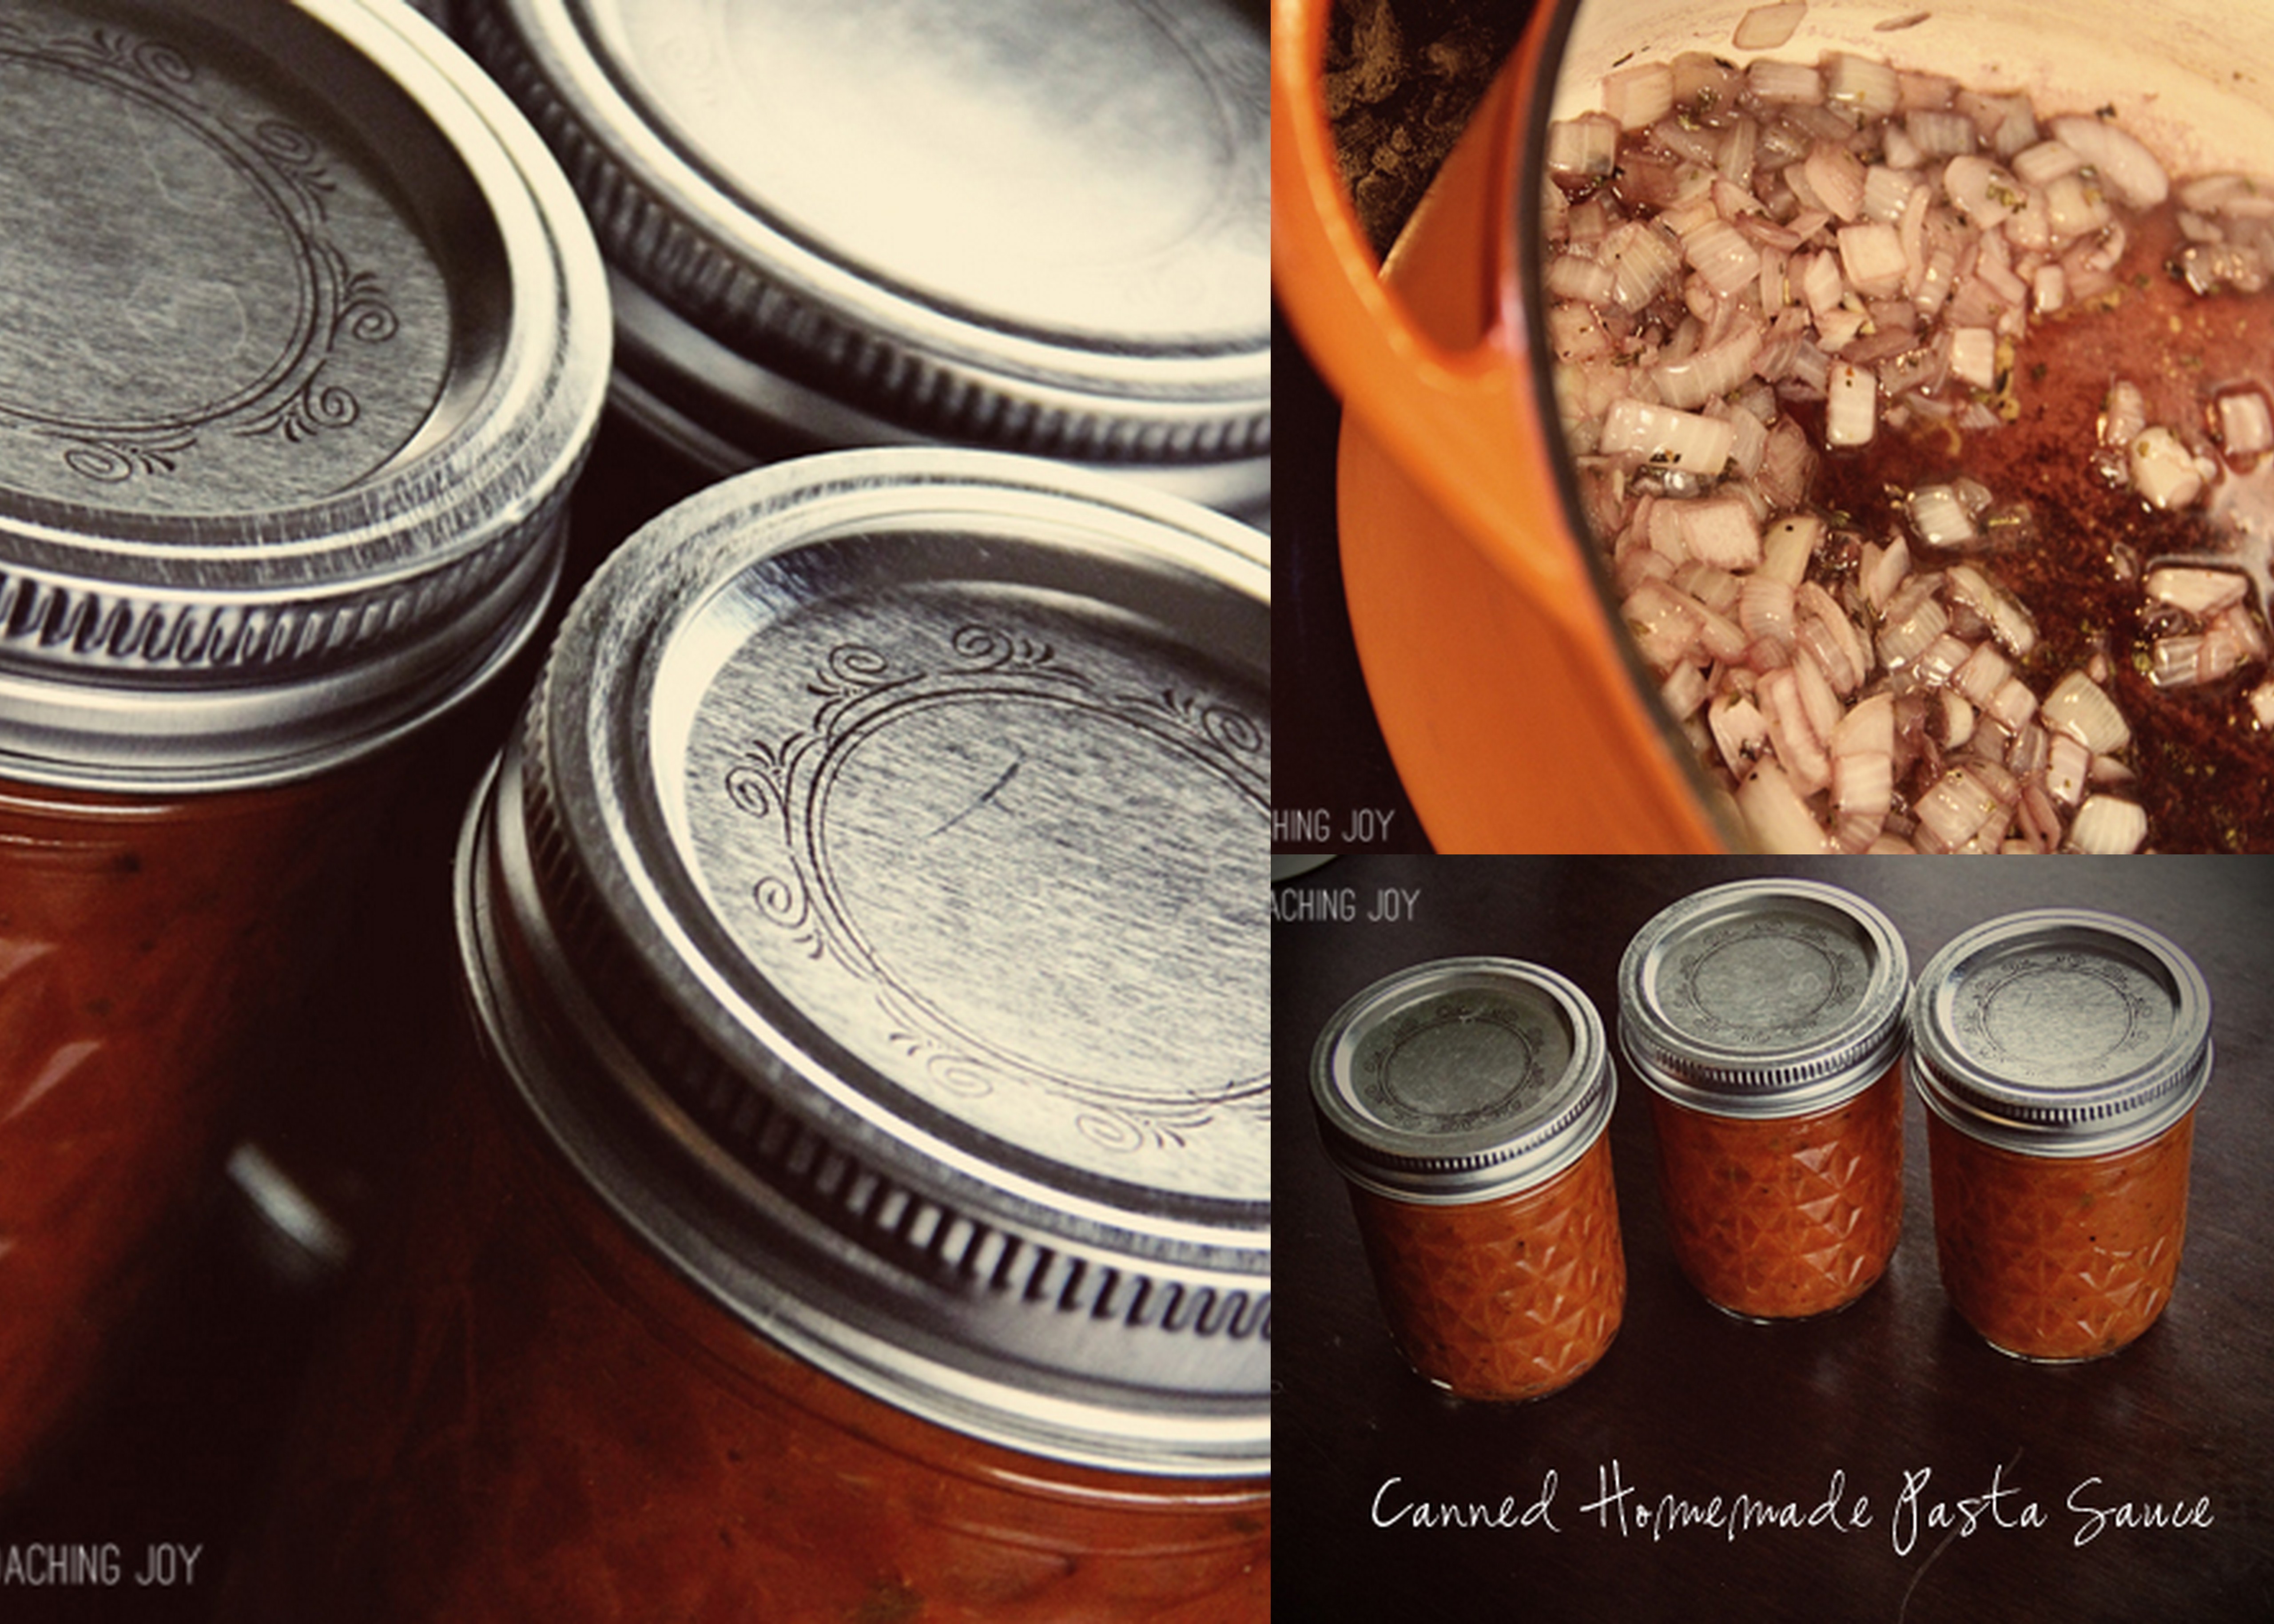
 how-to-can-tomato-sauce-01


As soon as school started after the summer break, my younger brother and I would figure out which bus line we were supposed to be in and load up for the 30 minute ride to our grandparents’ house in the country.  We were jostled down no less than five bumpy country roads only to be unceremoniously dumped off on the side of the dusty lane that led to their house a quarter of a mile away.  But at the end of the driveway lay glorious food of all sorts.

Peanut butter sandwiches, cheese and crackers, or simple slices of summer sausage were the components of a normal snack, while ice cream with chocolate sauce was reserved for special days.  But there was always food cooking.  Sauces would be boiling in pots.  Doughs would be rising underneath kitchen towels worn thin. And specifically at the end of summer into the beginning of fall, fresh produce would be on the counter ready to be canned.

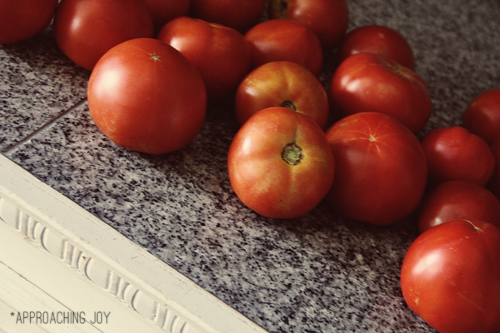
It was my memory of canning that got me super excited… and a little scared… when the Mister told me he wanted to use the tomatoes that we got at the farmers’ market to make homemade pasta sauce and then can them so we could have some to eat later on in the fall and winter.

I was comfortable with the pasta sauce: this is something we do fairly often.  The thought of making a batch big enough to feed thirty people?  Slightly intimidating but doable.  It was the actual canning part that freaked me out:

“Isn’t that something that only kitchen pros do?”
“We don’t have any special equipment!!”
“What happens if we do it wrong and die of botulism?!?!?!?!” 
(As you can tell by my use of exclamation marks, I got more concerned the more I thought about it.)

He convinced me that this was doable so we went about making something similar to this Tomato Sauce recipe.  (Remember the other day when I mentioned that the Mister regards a recipe as a suggestion?)

Search results for paige

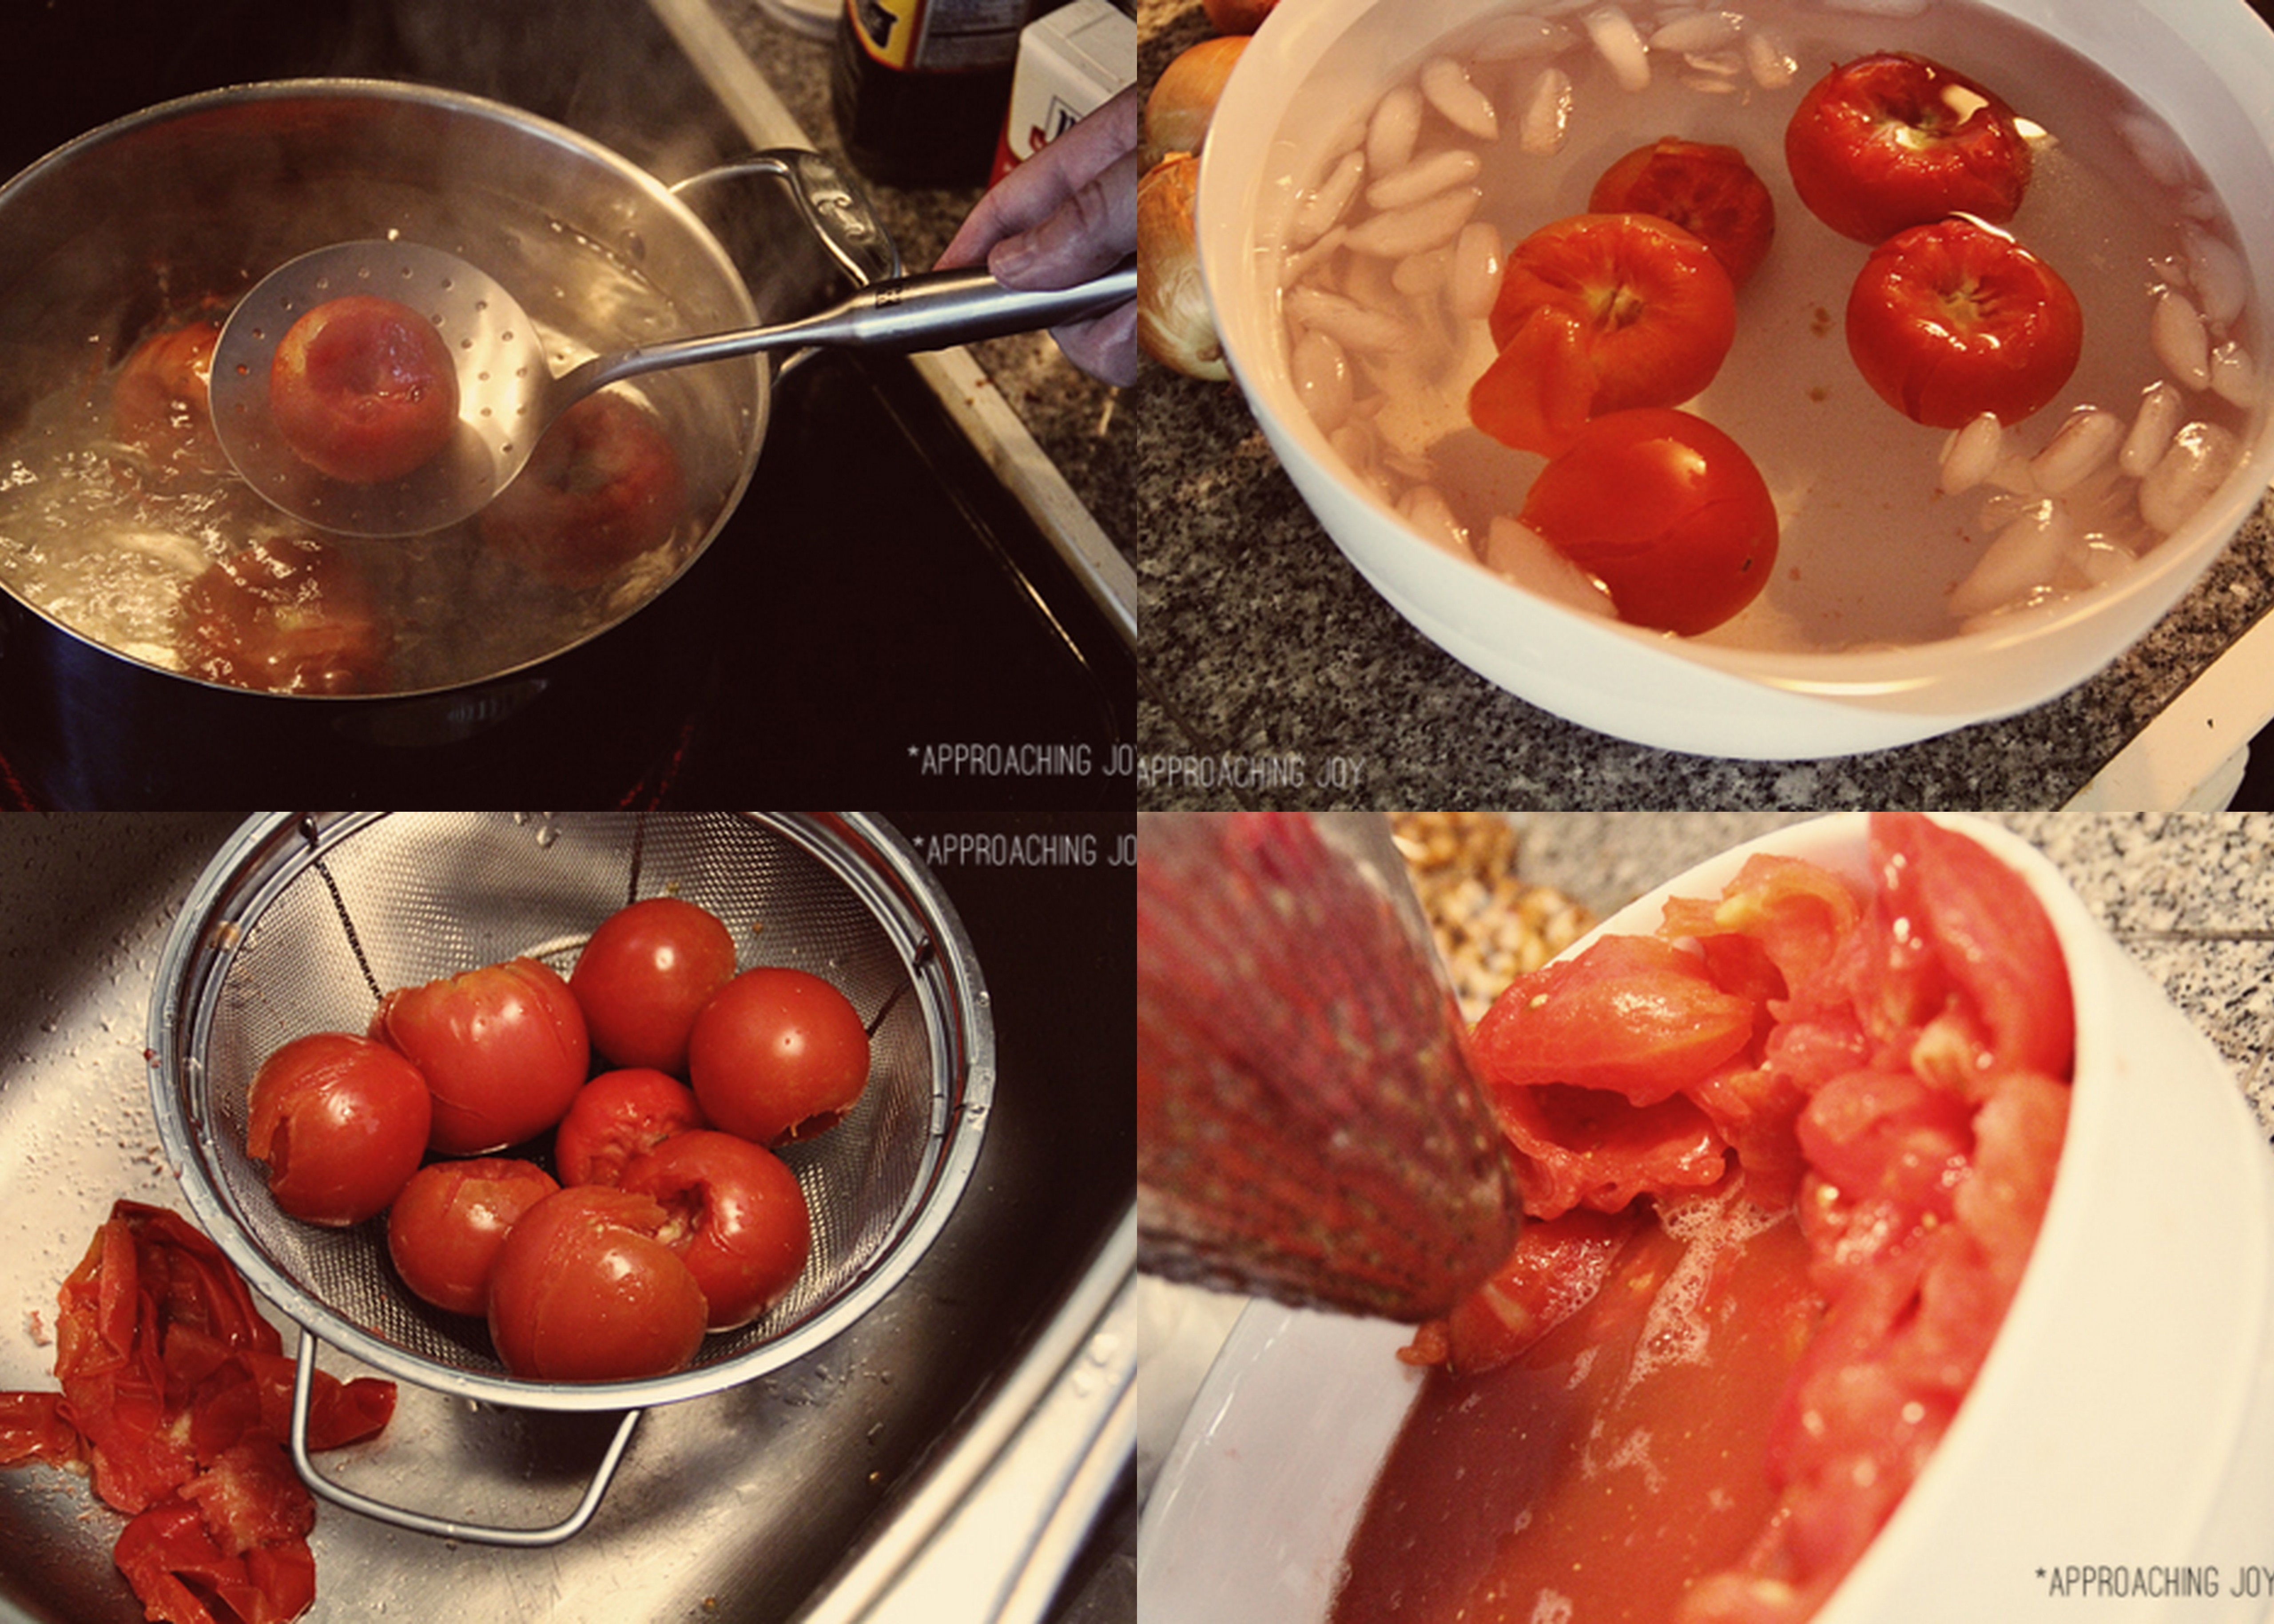
This was the first time I had ever poached tomatoes (is that the right term?) so the “boil quickly, throw into ice water, watch the “skin” come off the tomato” process was kind of amazing.

Then we squeezed the tomatoes into the fancy French sieve (a chinoise, if you’re taking arduous notes) so that all the juice went through (and could be used with the fruit of the tomato) but the seeds stayed behind.

I think it’s kind of beautiful.

After that we started the actual tomato sauce process… at which point I went to another part of the house to do blog work and stayed busy until the Mister let me know that he was ready to can.

Here’s the thing about the canning process: It’s fairly straight-forward procedure.
You stick whatever you want in a can, place the sealer lid (it’s got something resembling a wax ring) on top, and then loosely screw on the outer lid.  You then stick the cans into a boiling pot of water until the can “cooks” (i.e. seals), and then you take them out.

What isn’t so straight forward is the fact that while “cooking” the cans sound like a space ship before lift-off. (Scariest kitchen noise ever.)  Also scary- botulism exists.  The phrase “killer cans” still frightens me out.  Check out these two links if this is something you’re interested in:

Canning 101: Home Canned Tomatoes

How to Can Tomatoes At Home Safely

After carefully taking the jars out of the pot and placing them onto the counter, we sat and waited.  I was so proud of my Mister when we head the “pop” of the jars sealing and telling us that these were good to go.

Paige1

Have any of you guys ever tried canning anything?
(I’m going to assume no one reading has ever gotten botulism and survived, but if you have please share!)
What’s the most adventurous you’ve been in the kitchen lately?

paige head shot

Paige Ray blogs at Approaching Joy where she focuses on living local,  sharing inspiration and telling her story.  Hailing from the south Arkansas town of Hope, she currently resides with the Mister in Northwest Arkansas where she works as Director of Membership and Marketing a The Jones Center in Springdale.  Not only does she can tomatoes and shop the Farmers Market, she takes some pretty awesome photographs as well.

Doodling With Pumpkins at the Fayetteville Farmers Market {Foodie Friday}

By Ceri Wilkin of Recipe Doodle

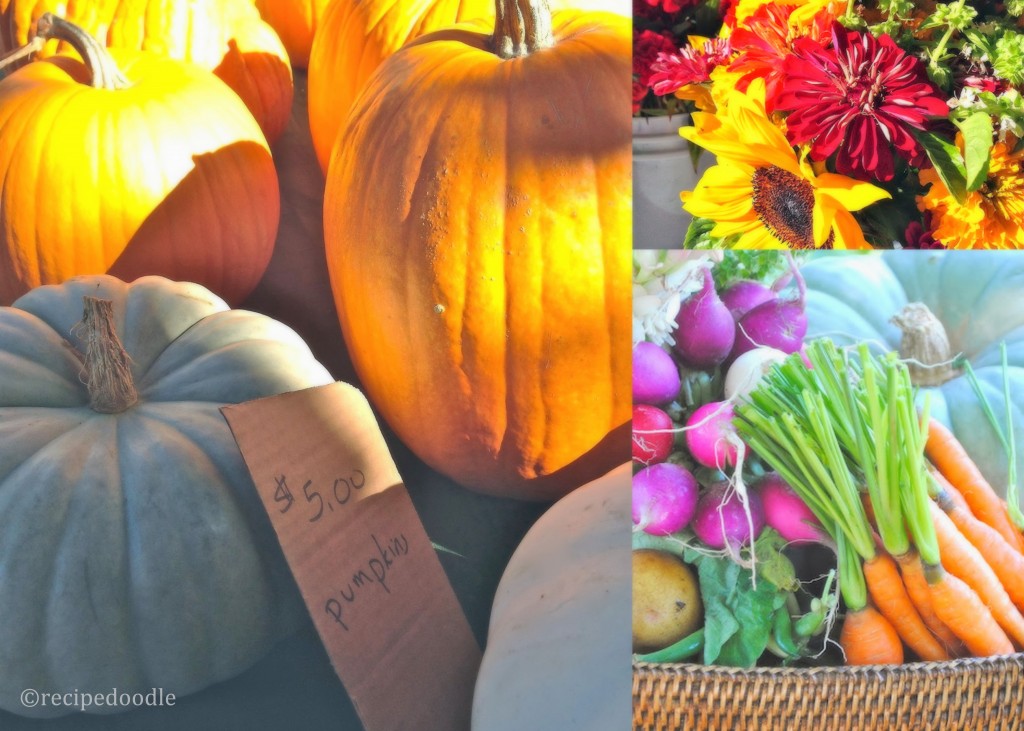
ceri-collage-490 349

 We have visited many Farmers Markets in cities around the world – Lisbon in Portugal, Napa Valley, Hamilton in New Zealand, Reykjavik in Iceland, Cincinnati, and all over North India. When we travel, we are always fascinated to explore the produce and products offered locally.

However, The Fayetteville Farmers Market in the fall remains a steadfast favorite and a must see.  On a recent stroll around the downtown square, where the market is held, I was surprised at the wide range of produce still available.  Late summer peaches and salad greens, as well as the more typical fall harvest such as pumpkins and winter squash.

The first time I saw a pumpkin I recognized from home was at the Fayetteville Farmers Market, and I was absolutely thrilled! We don’t so much decorate with fresh pumpkins in New Zealand as eat them, and usually in more of a savory dish than sweet, but the orange skinned specimens were unfamiliar to me.  Seeing the familiar grey fruit, I could not contain my excitement, and the following recipes reflect my love.

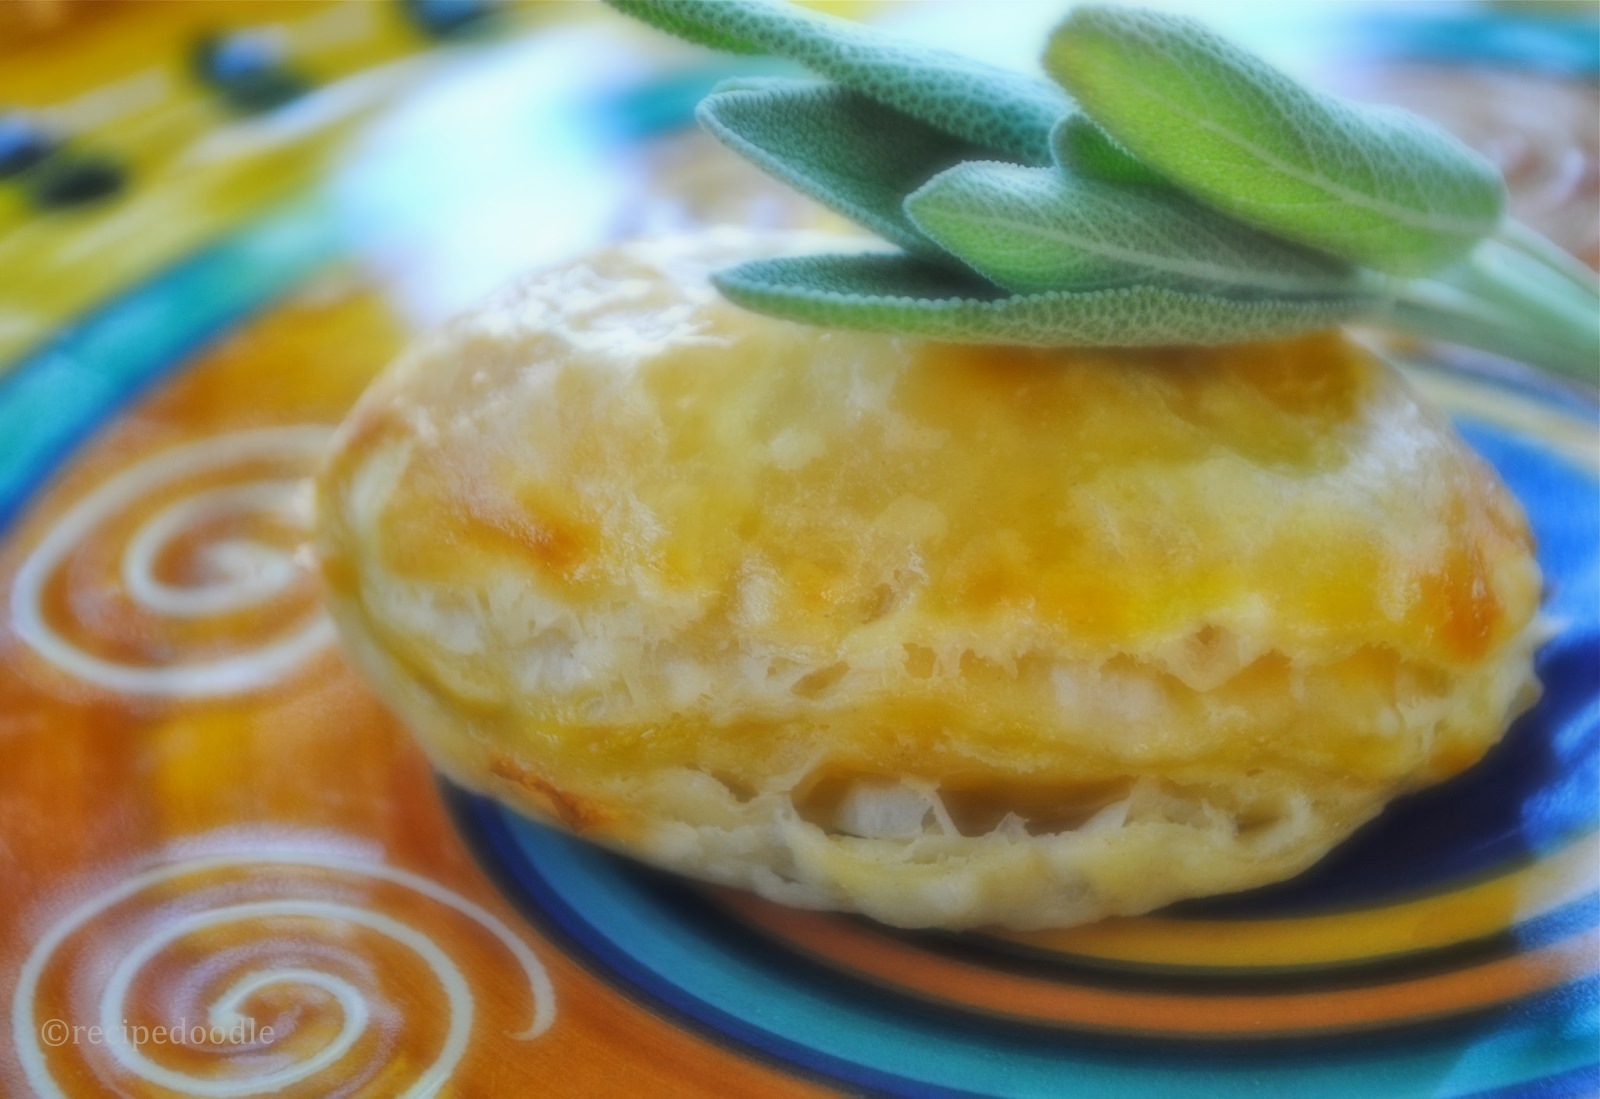
savory pumpkin goat cheese tarts 3

Savory Goat Cheese and Pumpkin Tart

1/2 cup navy beans
1/2 cup pumpkin puree
3 ounces of goat cheese
2 ounces of cream cheese
1 tablespoon of fresh sage, chopped
salt and freshly ground black pepper to taste
a pinch of cayenne pepper
1 17.3 ounce package of puff pastry
1 egg
1 tablespoon of water

Heat the oven to 400F.

In a food processor, puree the navy beans, pumpkin, goat cheese, cream cheese and sage. Season with the salt, pepper and cayenne pepper.  Roll out the puff pastry, one sheet at a time. Using a 3 inch cookie cutter, cut out 18 to 20 circles of dough from each sheet.

Whisk together the egg and water, to make an egg wash. Brush the egg mixture around the edges of each circle of dough. Place 1 tablespoon of filling in the middle of each round, and pinch the edges shut around the filling.  Place on a cookie sheet and bake for 10 to 12 minutes, until the dough is puffed and golden brown.

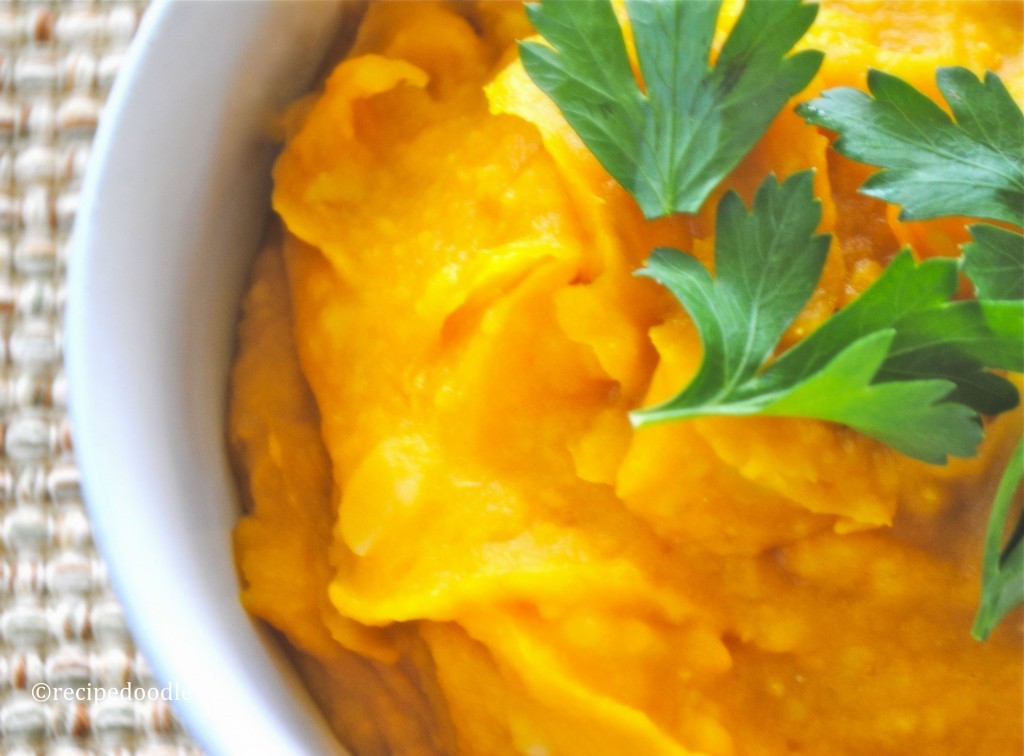
pumpkin soup 2

Pumpkin Soup

4 cups pumpkin, peeled, seeded and diced
2 potatoes, peeled, seeded and diced
4 cups of chicken stock (I like my soup thick, so you may want to add more stock)
1 onion, peeled and diced
6 cloves of garlic, minced
1 tablespoon of fresh ginger, minced
salt and freshly ground black pepper

In a large pot, add all of the ingredients, bring to a boil, cover and simmer for 20 to 25 minutes, or until vegetables are tender.  Season to taste with salt and freshly ground black pepper.

Cool, then puree with an immersion blender.  Reheat, adding more chicken stock if a thinner consistency is desired.

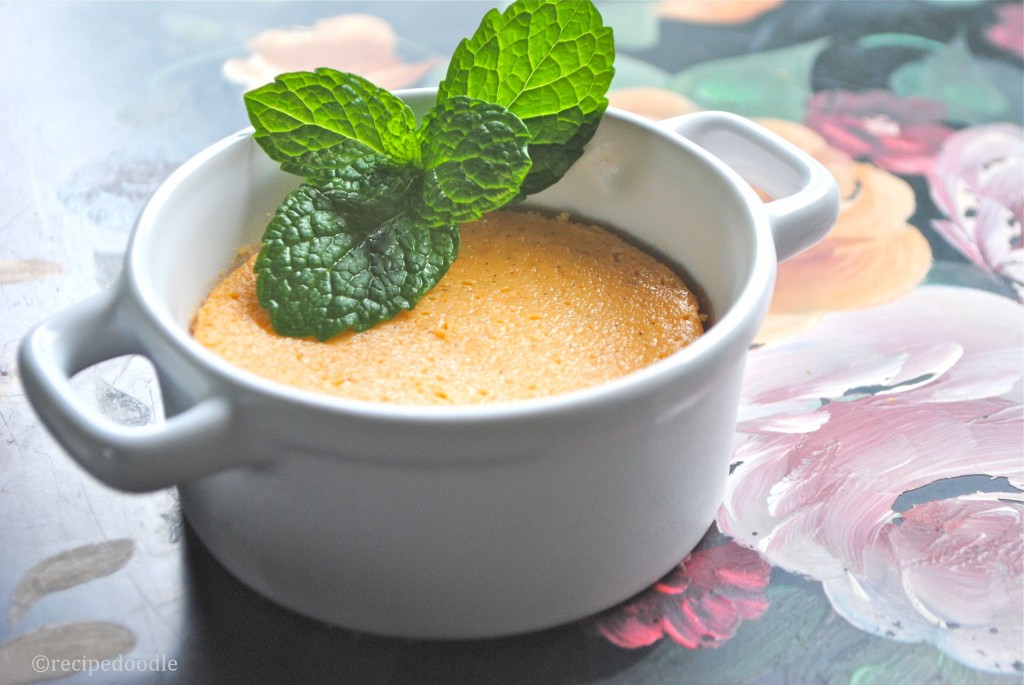
 pumpkin white chocolate pots de creme 2

 Pumpkin White Chocolate Pots de Crème

4 eggs, separated
1/3 cup sugar
2 cups of cream
1 vanilla bean
200 grams of white chocolate, chopped
3/4 cup pumpkin puree

Heat oven to 350F. Beat the egg yolks and sugar with an electric mixer until thick.

Split the vanilla bean in half, and bring the cream and vanilla bean to a boil over medium heat. Remove from the heat, add the white chocolate and let sit for 2 minutes. Add the pumpkin and whisk together until smooth.

Pour the mixture into ramekins and place in a roasting pan. Pour boiling water into the roasting pan until it reaches half way up the sides of the ramekins. Place roasting pan into oven and bake for 30 minutes. Remove from the oven, and when cool enough to handle, remove the ramekins from the water. Cover and place into refrigerator at least 2 hours before serving.

Enjoy!

me by noel

Ceri Wilkin of Recipe Doodle is wife, mother and recipe follower. For years she has tackled one new recipe a day – some are fabulous, some are not. In a past life she was an ccupational therapist, a rugby and a n etball player, a belly dancer,  and a lesson taker of golf, tennis and wine appreciation.  Her  husband owns izzerias, her  father was a butcher and her mother a caterer.  Her older brother, a butcher by trade, makes the absolute best birthday cakes and desserts you will ever taste, and her younger brother owns restaurants in New Zealand.  Her kids love to eat.  She is thrilled to share Her recipes with you.

.


Rhonda Bramell Halloween Trick or Treat? {Foodie Friday}

By Rhonda Bramell at Bramell, Party of Five

I spent some quality time in the kitchen with my kids last Saturday, on the first day we’ve had some genuine fall temperatures, working on our first Halloween themed treats. Doing so taught me a couple of things. For one, I realize why I’m not a food blogger or photographer. And two, doing anything in the kitchen with three helpers takes twice as long as it should.

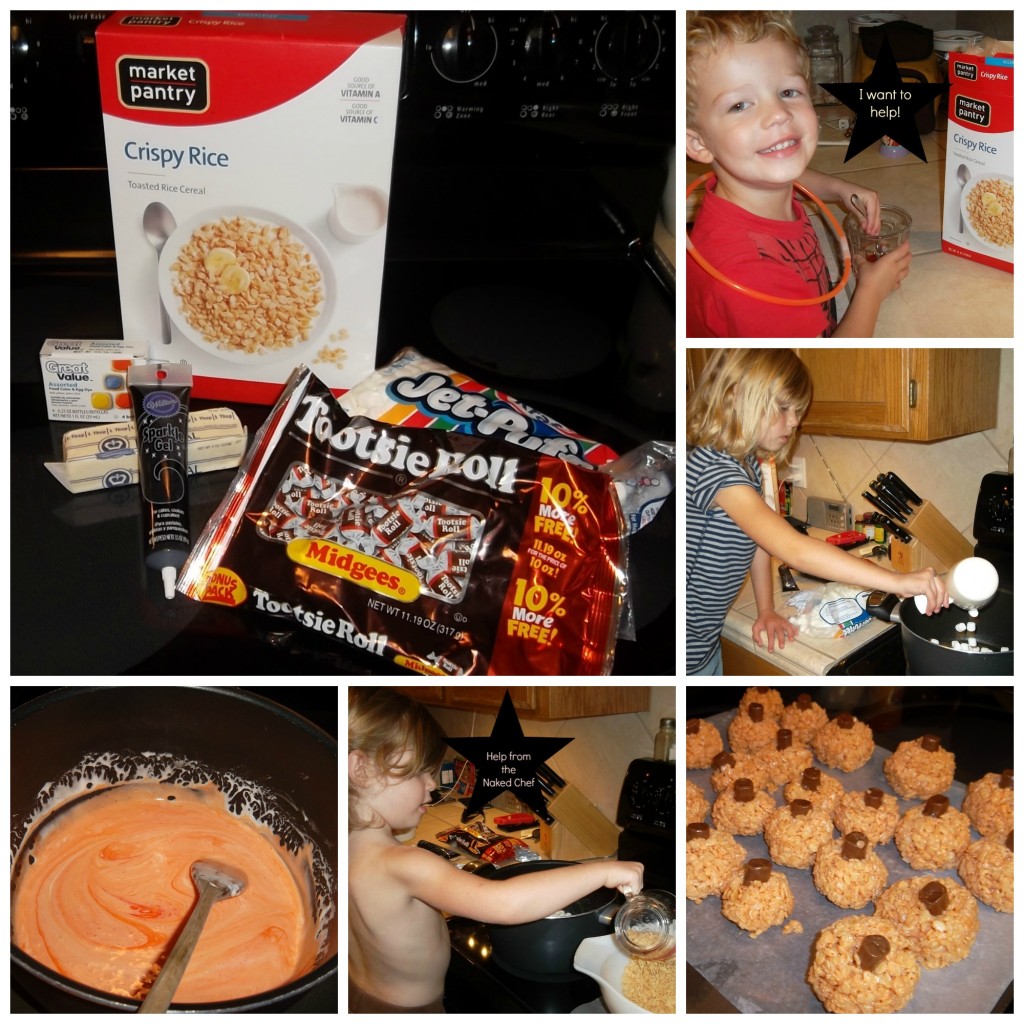
With so many eager helpers, I had to choose our recipe wisely. It had to be something fairly easy and with enough steps that everyone could pitch in. After searching my pins on Pinterest, we decided on the Pumpkin Rice Krispies.

The ingredients are mainly those for making traditional Rice Krispies Treats, with a little Halloween flair. (Recipe originally appeared on With Sprinkles On Top.)

3 Tablespoons butter
1 pkg mini marshmallows
6 cups Rice Krispies cereal
Orange food coloring (I mixed red and yellow)
Black Icing
Mini Tootsie Rolls

Halloween Rice Krispee Treats

Over medium heat, melt the butter in a large saucepan. Then add in the marshmallows and melt together. Once smooth, remove the pan from heat. Add in the food coloring to tint marshmallow mixture orange. Immediately stir in the cereal and mix thoroughly.

When it’s cooled enough to touch, form the cereal mixture into 3” balls. Here’s the tricky part: it works best to wet your hands before shaping into the pumpkins; otherwise, the cereal will stick to your hands. Thanks, mom, for teaching me this trick many years ago.

We cut the Tootsie rolls in half, and inserted one half into the top of each treat to look like a stem. I placed the formed treats onto waxed paper to cool. Once completely cooled, I decorated the faces with black gel icing. Then I turned into a wicked witch because I made my kids wait until after dinner to eat them!

Rice Kripie Pumpkins

Rhonda Brammel

Rhonda Bramell lives in Springdale with her family and middle-aged, spoiled dog. In the daytime, she works as the Marketing Manager at the Northwest Arkansas Mall in Fayetteville. At night, she spends a lot of time doing laundry, cooking dinner and doing first grade homework. You can find her blogging at www.bramell.blogspot.com to see how being OK at something is good enough.

Join us for a FALL FAVORITES Roundup! {Blogger Challenge}

Good morning, Arkansas! The weather people are telling me that, along with a little rain, that cool fall weather is finally supposed to start moving in today.

I don’t know about you but when the weather starts to cool I start thinking about chili and cornbread, pumpkin pie and hot apple cider. All those delicious “fall foods”!

I also start to think about all the beautiful colors of fall and I can’t wait to purchase pumpkins and gourds and start decorating up my house.

AND, I love fall fashion. I love long sleeves, scarves, long flowing skirts and cute boots.

So, we have a little fall challenge for you! We are going to do a FALL FAVORITES Roundup!

Here is how it works:

1. Choose a current or previous post on your blog from one (or all) of the following categories:

  • Fall Recipes
  • Fall Fashion
  • Fall Decorating and DIY

2. Email me at julie@arkansaswomenbloggers.com using the following format:

    Subject: Category from above

    Body of Email:
    Title of Blog Post
    Link to Blog Post

    Attachments: ONE photo from your post (photo must be original!)

Of course we can’t have a blogger challenge without a few rules!

  1. You may submit to all three categories.
  2. Only ONE submission per category. (Multiple submissions will be discarded.)
  3. You MUST be a registered member of ARWB. (You can register here.)
  4. You must get you links to me no later than October 19th.
  5. You must include one photo of your finished product.

Once I have collected all of the links, I will put together a special post with everyones links! I hope this will be a great way for you to share something from your blog or even inspire you to create something new and post about it!

Giving up canned pumpkin and making some great muffins to boot! {Foodie Friday}

By Shellie Morettini of  Blueberry Acres, also a member of MOWomenBloggers

Giving up canned pumpkin and making some great muffins to boot!

Pumpkins! It’s the call of fall in our household. Our little Blueberry can sniff out a pumpkin patch like some kids know when you are hiding chocolate in the house. As a result, we find that we enjoy many pumpkin-centric treats at this time of year. But while we long ago gave up canned pumpkin, I have discovered that a great many home cooks still rely on canned when fresh is so much more amazing!

If you are thinking about trying to be a little more conscious with your food, finding fresh local produce from small farmers like us is a fantastic way to not only get to know your neighbors but it’s also a smart way to help your kids better connect with the food they eat.

To start, pick out some midsize pumpkins. If you have a choice, I recommend sugar pumpkins. They are typically easy to find and available both at farmer’s markets and your local mega mart.
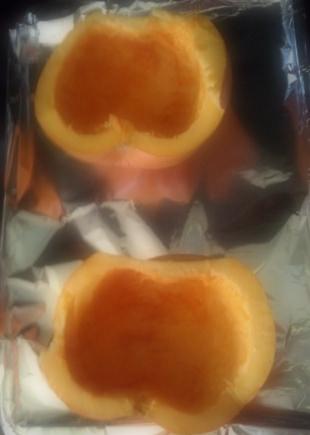
Slice off the tops and then scoop out the interior. Once clean, bake flesh side up in a 350 degree oven for 20-35 minutes. Some recipes will suggest oiling them or seasoning them. I like to just roast them dry.
Shellie pic 1
Just keep an eye on the pumpkins after 20 minutes to ensure that they don’t burn. A little bit of carmelization is a good thing but you don’t want them to look like the crazy tanning lady.
Once they have cooked and cooled, you can scoop out the flesh and discard the skin, or if you are like me, make some happy little Berkshire piggies happy by giving them the leftover pumpkin.
Piggiepalooza!
I just love those piggies and will use any excuse to show pictures of them: Wilbur, Spot, White Fur, Stinky and Hubert (he’s French), our baby barrow Berkshire piggies. I love them. And yes, I will eat them toobut I digress.

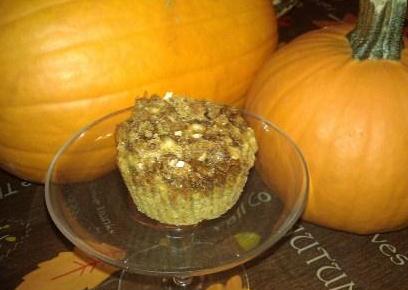
From there, you can freeze the flesh or use it right away. I’m more of an instant gratification kind of gal, so I made muffins with my freshly cooled pumpkin. And when I say muffins, let’s be honestI mean cupcakes that I call muffins so I feel a little better about myself.

Blueberry’s favorite Pumpkin Muffins
For the muffins:
1 cup room temperature butter
1 ½ cups pumpkin puree
1 to 2 teaspoons ground nutmeg
2 cups brown sugar
1 teaspoon salt
3 large eggs
1.5 teaspoons vanilla extract
1 teaspoon baking powder
3 large eggs
¼ teaspoon ground cloves
1 teaspoon baking soda
¼ teaspoon ground ginger
2 ½ cups AP flour
½ to ¾ cup instant rolled oats
For the topping:
1 teaspoon ground cinnamon
3 tablespoons butter
1 cup brown sugar
3 tablespoons AP flour

Preheat your oven to 350 degrees. Cream the butter, sugar and pumpkin together with an electric or stand mixture. Then add eggs and mix until thoroughly incorporated. In a separate bowl, mix all dry ingredients.

After you have mixed your dry ingredients, slowly incorporate them into your wet mixture. The dough should be wet but not overly wet. Think cookies versus cake. From there, scoop into muffin cups-about 2/3 full. From there, mix all of your topping ingredients in a separate bowl and spoon generously on top of your muffins before baking for about 20-25 minutes.
shellie pic 5I’ll be honest; this isn’t a great shot of the muffins. By the time I took this, I had downed several of themin the name of research, of course! However, all of that sugar made me a little jumpy. Sigh. The things I do for blogging.

While you can absolutely buy pre-ground spices, I strongly recommend that you invest in one of these cool little things:
shellie pic 3
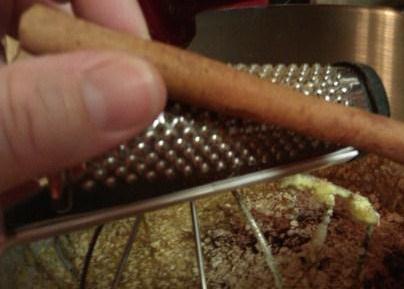
I cannot tell you how much I love this little grater. And if you are wondering what the heck that is in my needing to be manicured hand, its nutmeg. Once you have smelled freshly grated nutmeg, you will want it on and in everything. The little plastic jars of spices cannot hold a candle to this. In addition, this little grater can also help you discover the joy of freshly grated cinnamon
shellie pic 4
I was trying to be so cool and give you an action shot here of me grating fresh cinnamon into the mix. However, shortly after I snapped this, I managed to grate about half of my finger into the mix. You will note that I didn’t include that in the ingredient list. You are welcome.

What I really love about these muffins is that they are idiot proof, and frankly, living my life, I need more things that are idiot proof. The first time I made this recipe, I forgot the baking soda and powder but they still turned out like rock starsor rocks, but at least tasty rocks. If you wanted to riff on this recipe, you could substitute applesauce for some or all of the butter. You could also swap out whole wheat flour for all-purpose flour. In addition, you could omit some of the sugar. Bottom line is that there are many ways to make and remake this recipe..just get in the kitchen and bake!
shellie head shotShellie Morettini, a member of ARWB and MOWomenBloggers, is a Mom/Wife/Farmer/Consultant whose daily life screams “portfolio career” whether she likes it or not. Her family is sharing their journey from a hectic city life to a more bucolic life on their little farm, Blueberry Acres where they raise heritage chickens and turkeys, Berkshire pigs, Belted Galloway cows, organic produce and one 5 year old nicknamed The Blueberry. To help support her husband’s livestock obsession, Shellie maintains a virtual practice where she offers outplacement, resume writing, job search and recruitment consulting to both individuals and organizations. She rants blogs about job search and recruiting topics at Looking2Landed.
Shellie has been featured on MSNBC, Modern Homesteaders and her mother’s fridge among other places. She always welcomes an excuse not to clean chicken yards, so feel free to connect with her on LinkedIn, Twitter or Facebook.

Purple Puddin’ {Foodie Friday}

By Susan Anglin of Spotted Cow Review

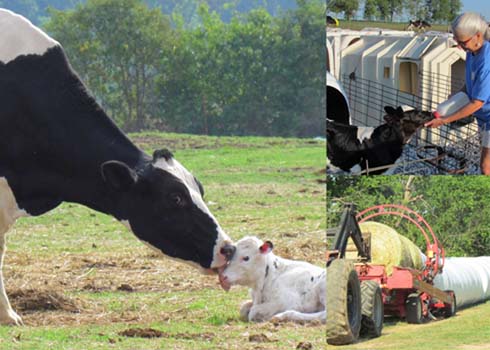
At Triple A Farms, also known as Anglin Dairy, dairy farming is much more than a job for my 4th generation dairy farming family–it’s a commitment to producing wholesome, quality dairy products for you and your family. For us, conservation of natural resources and being good stewards of the land and animals which we oversee is a way of life and fundamental to the economic survival and success of our dairy operation. 

Every day of the year, we milk 300 Holstein  cows twice daily, raise our own replacement animals and grow crops to feed our cows. Our cows enjoy eating in a well-ventilated covered feed barn that is equipped with fans and sprinklers , access to plenty of fresh water and pastures to rest in between milkings.

susan anglin collage a

As members of Dairy Farmers of America Cooperative, our milk is transported to the Hiland Dairy Plant in Fayetteville for pasteurizing and  bottling.

Over the years, our family has managed our land using conservation principles. We are permitted by the Arkansas Department of Environmental Quality that allows us to utilize the manure that is produced by the cows to fertilize our land for crop production, protect our environment, and enhance the economic sustainability of the farm.

As we mooove into fall, we’re extra busy with harvesting the silage crop, baling hay and caring for a new crop of baby calves. As ‘dairymom’, my duties also include providing food for the farmers. One of my family’s favorite dairy  dessert recipes is perfect for busy days. Purple Puddin’, (also known by adults as Raspberry Delight), can be prepared quickly for any occasion or season.  My mother-in-law always seemed to know when we needed a perfect sweet treat!

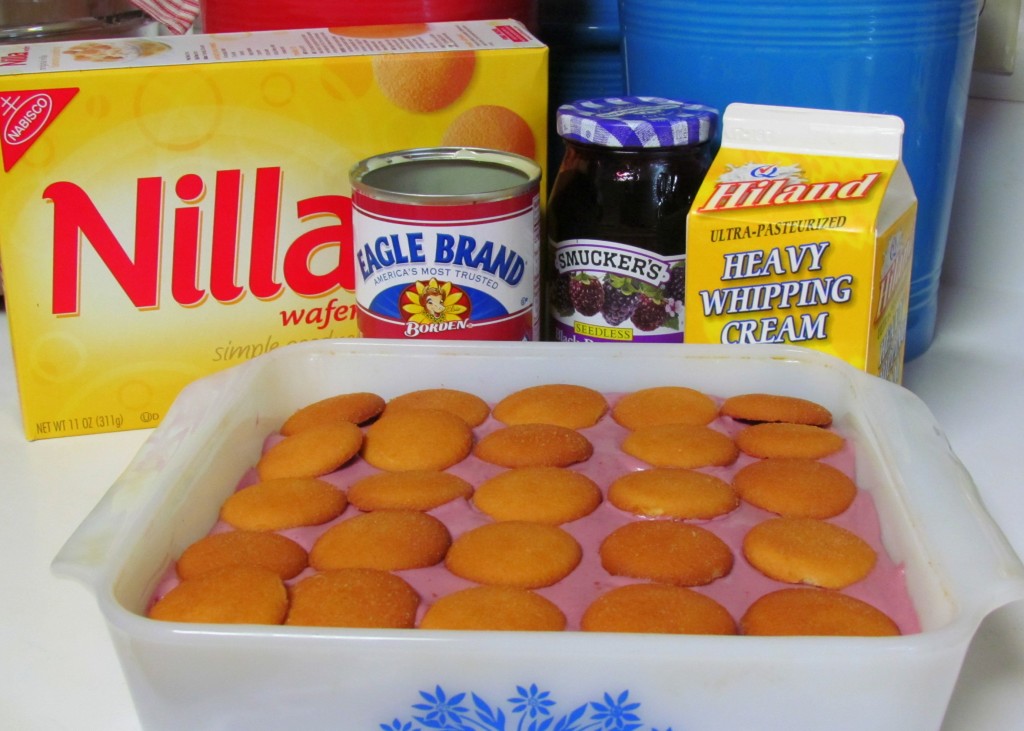
susan anglin purple stuff


Purple Puddin'
Write a review
Print
Ingredients
  1. 1 can sweetened condensed milk
  2. Juice of 2 lemons
  3. ½ pint heavy cream, whipped
  4. 4 tablespoons seedless Black Raspberry jam
  5. 1 box vanilla wafers
  6. 1 cup chopped pecans or walnuts (optional)
Instructions
  1. Mix the sweetened condensed milk with the lemon juice, set aside. Whip the cream, fold in the jam. Stir whipped cream mixture into milk mixture. Add nuts, mix well.
  2. Place a layer of vanilla wafers in the bottom of 9 x 9 in. dish.
  3. Cover with half of the pudding, top with another layer of wafers, and pudding. Finish with wafers on top.
  4. Chill and serve.
Arkansas Women Bloggers https://arkansaswomenbloggers.com/

susan anglin head shot Susan Anglin , Spotted Cow Review, shares truth, treasures and transitions from her perspective as wife, mother, registered nurse and  farmer  on a 4th generation Arkansas dairy located six miles west of Bentonville. Transformed from Bentonville city girl into a farmer after 29 years of ‘on the job’ training, Susan enjoys  sharing  her passion for farm life and food production.

#AWBU Foodie Friday Challenge Winning Appetizer {Foodie Friday}

By Kellee Mayfield of Delta Moxie

When I registered for Arkansas Women Bloggers Unplugged (#AWBU) this year, I registered for Foodie Friday as well. Last year I arrived at the end of the Foodie Friday Challenge and witnessed how much fun it was.

I don’t consider myself an amazing cook because I keep my meals simple. If I’m not preparing my meal in a blender, I’m keeping the number of ingredients to about 3 to 5. So when Amanda Brown asked me to be a table leader for this year’s #AWBU Foodie Friday Challenge, I agreed and considered that they might be desperate for help!

The team leaders were provided guidelines a few days before the big event, and I knew then the Foodie Friday coordinators had made a mistake in asking me to lead a team.

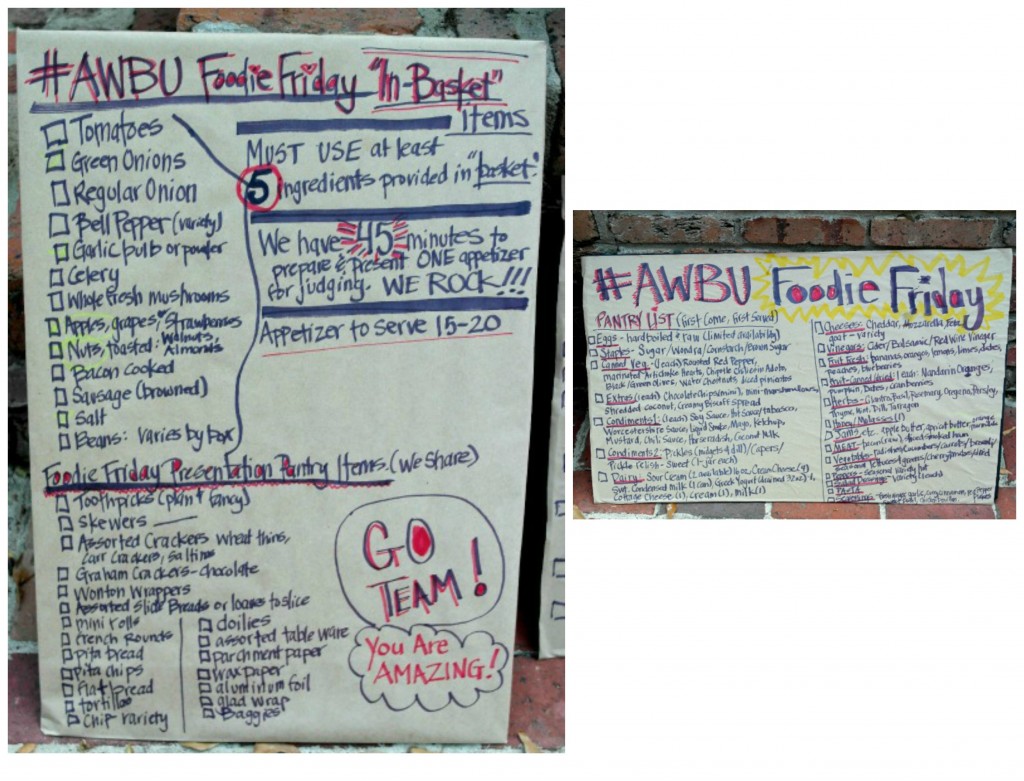
We had a maximum of 45 minutes to prepare and present for judging one appetizer that could serve 15-20. Each team was given an “In-Basket” of items from which we had to use at least one ingredient, Presentation items which we were to share with other teams, and Pantry items which were first come, first served. Team Leaders were also told just a few days before the conference that we could bring ONE secret ingredient.  I chose to bring miso.

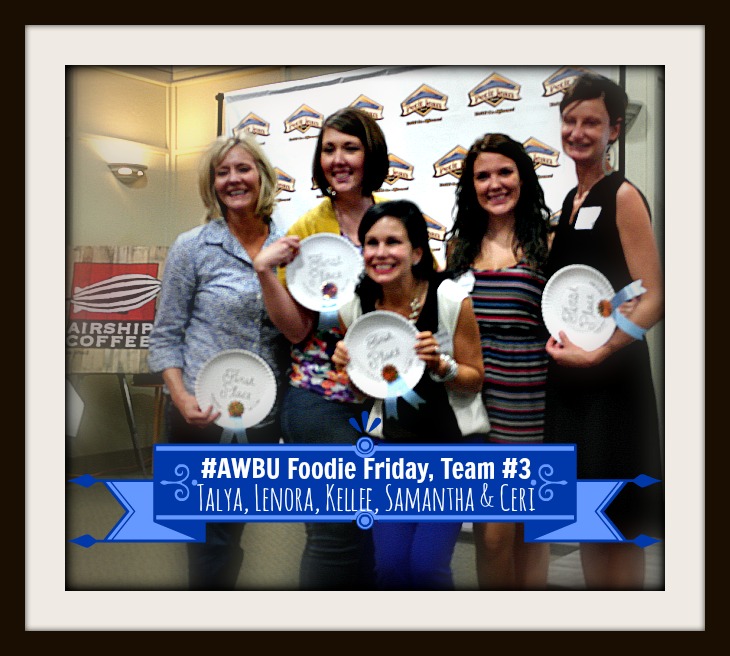
There were seven groups of approximately 4-5 team members; the team members were assigned randomly. My team, Team #3 consisted of Talya of Grace, Grits and Gardening, Lenora Reidel of Confessions of a Marine Wife, Ceri Wilkin of Recipe Doodle and Samantha Craig from the Paul Michael Company. Can a team leader get any more fortunate?

I created these easy to read boards for my newly formed team to visualize the ingredients, guidelines and discuss our options.

photo 1 Foodie Friday boards

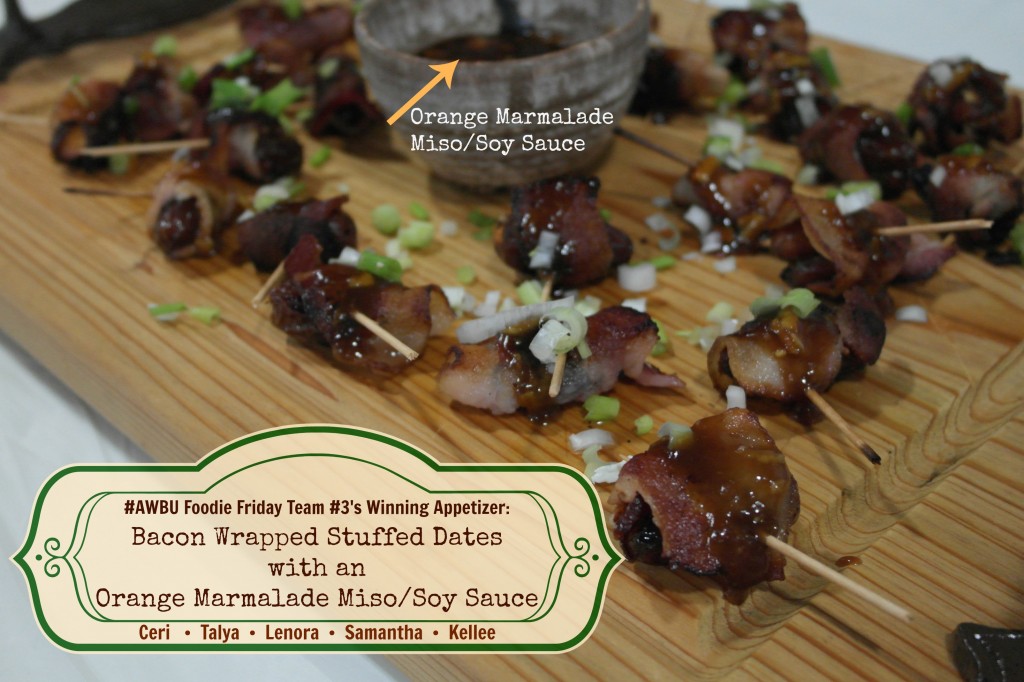
Ceri was nominated as our kitchen runner and Lenora served as our pantry runner. Talya and Samantha were the bosses of the prep table. These women are amazing. They orchestrated and created an incredible winning appetizer, Bacon-wrapped Stuffed Dates with an Orange Marmalade Miso/Soy Sauce.


Bacon-wrapped Stuffed Dates with an Orange Marmalade Miso/Soy Sauce

SAMSUNG CSC

Ingredients

1 bag of whole pitted dates

1/4 package of feta or goat cheese

1 bag of whole almonds

Petit Jean Meats bacon slices, quartered

toothpicks


Sauce

1 jar of orange marmalade

1 tbsp. miso

3 tbsp. water

1/4 cup soy sauce

Preheat oven to 500º F.

Split dates down the center lengthwise. Place one almond inside each date, add a pinch of feta or goat cheese, wrap in 1/4 slice of bacon and secure with a toothpick. Repeat until all dates are filled and wrapped.

Place on baking sheet. Bake until bacon is cooked (about 10-15 minutes). (In the case of the Foodie Friday Challenge we did not have access to the oven so we pan seared the bacon until it was cooked.)

Sauce

Blend miso into three tablespoons of hot water and dissolve. In a sauce pan, add 1 jar of orange marmalade, dissolved miso and water, 1/4 cup soy sauce. Stir and simmer for simmer 20 minutes. (or microwave for 30 seconds, as Ceri prepared it in our case).

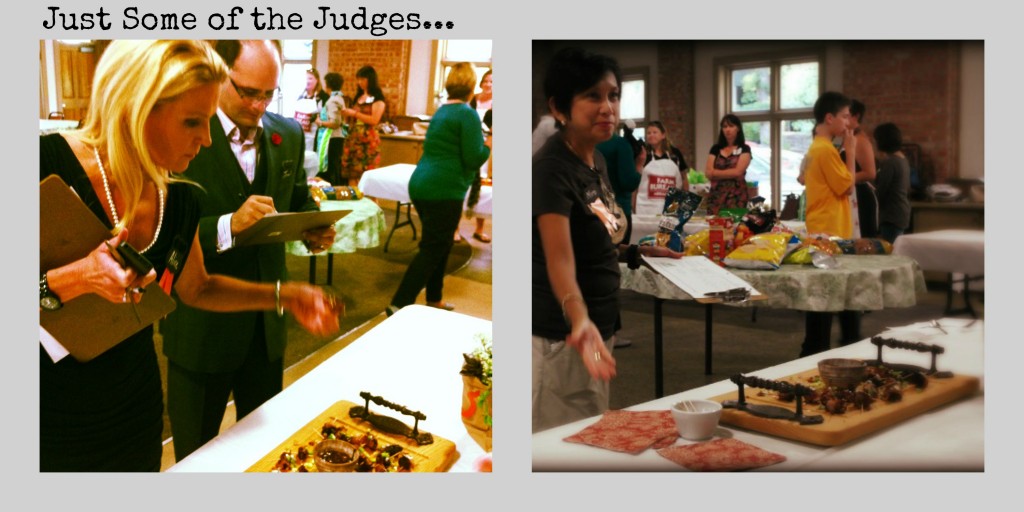
Thank you, Debbie Arnold, Julie Kohl, Amanda Brown and Gina Knuppenburg for coordinating a very informative Foodie Friday and an incredibly fun Foodie Friday Challenge.  And thank you, esteemed judges: Mimi SanPedro, Joel DiPippa, Daniel Walker, Kevin Shalin, Alice Stewart and Justin Burks.

photo 3 judges at foodie friday

Talya, Ceri, Lenora and Samantha, you women created a fabulous appetizer!

The thank you list is not complete without extending our heartfelt gratitude to our wonderful AWBU Foodie Friday Sponsor, Arkansas Farm Bureau. What a delicious and enriching event.

SAMSUNG CSC

Enjoy!

Kelly Jo at Delta Moxie

In 2007, Kellee Mayfield and her family moved to Lake Village. Kellee was quickly given the nicknamed “Kelly Jo” and the name stuck.

Kelly-Jo-and-Delta-Moxie-225x300As an Oklahoma native, Kelly Jo writes about living in very southeast Arkansas and the Mississippi Delta which has been penned the most Southern place on earth. She also shares her art as well as the art of resourcefulness as being the key to really small town living. Kellee is a mother, wife and contract clinical specialist for a medical device company. And she has a southern drawl. Catch up with Kelly Jo at Delta Moxie.

Dutch Oven Breakfast Casserole {Foodie Friday}

ARfoodiefridayASH6

Fall is my favorite time of the year.  The weather cools off and we are finally able to comfortably enjoy the beautiful outdoors of Arkansas.  We love to take weekend canoeing trips, ride our horses into the Ouachita Mountains, and fish on our great lakes.    Our wonderful state has so many beautiful areas, and let me encourage you to explore them all for yourself.  There is a misconception, that while you are camping in the wilderness, you cannot eat good food.  That is soooooooo wrong.  Some of the best meals I have ever eaten were on the side of a river or on an island in the middle of Lake Ouachita.  To improve your camping meals, I would like to share our favorite and easy Dutch Oven Breakfast Casserole.

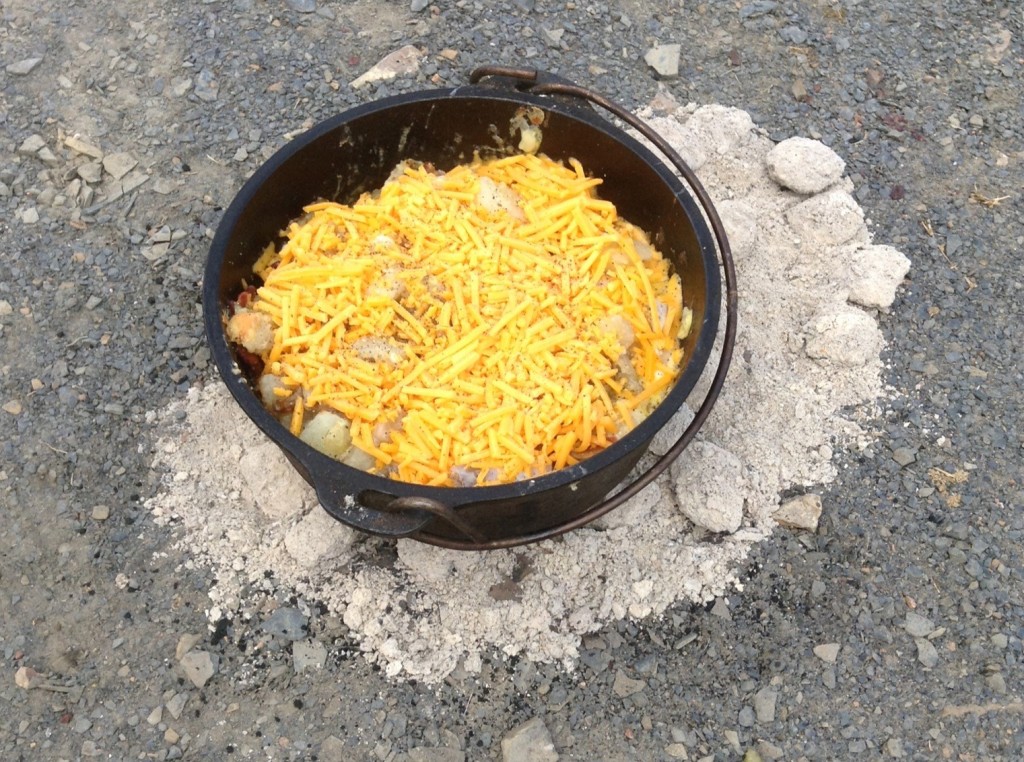
The only cooking utensils you will need are a 9 inch cast iron Dutch Oven (with legs and a lipped lid), a large spoon, a knife, and a Dutch Oven lid lifter (or a hammer works nicely).  We normally use wood to build our cooking fires, but I am demonstrating with charcoal, to make it easier for you to reproduce.  To prepare a hardy amount of breakfast for two people, you will need: ? pound of Petit Jean Hickory Smoked Bacon, 2 large potatoes, ½ white onion, 5 Great Day Farms extra large eggs, and shredded sharp cheddar cheese.

 ash1

Begin by arranging your charcoal briquettes in a pyramid shape (just like you would in a grill) on the ground, in a large clear area.  Ignite the charcoal and you can begin your food preparation.

ash2
Cut your bacon into 1 inch pieces, cut your potatoes into 1 inch cubes, and dice your onion.

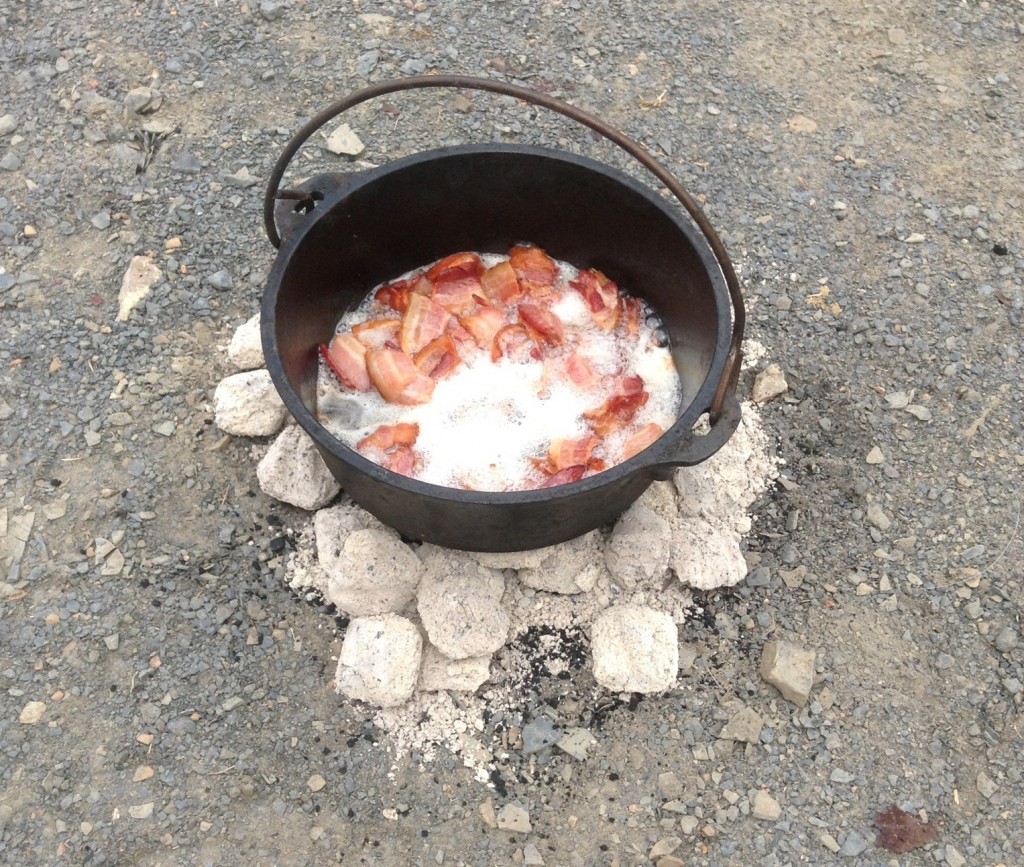
When the briquettes are ready, use your Dutch Oven lid lifter to flatten your pyramid out a little, so the Dutch Oven can sit on top of the coals.  Add your bacon to the Dutch Oven and cook completely with the lid removed.  The process of frying the bacon is exactly the same as you would on a stove top.

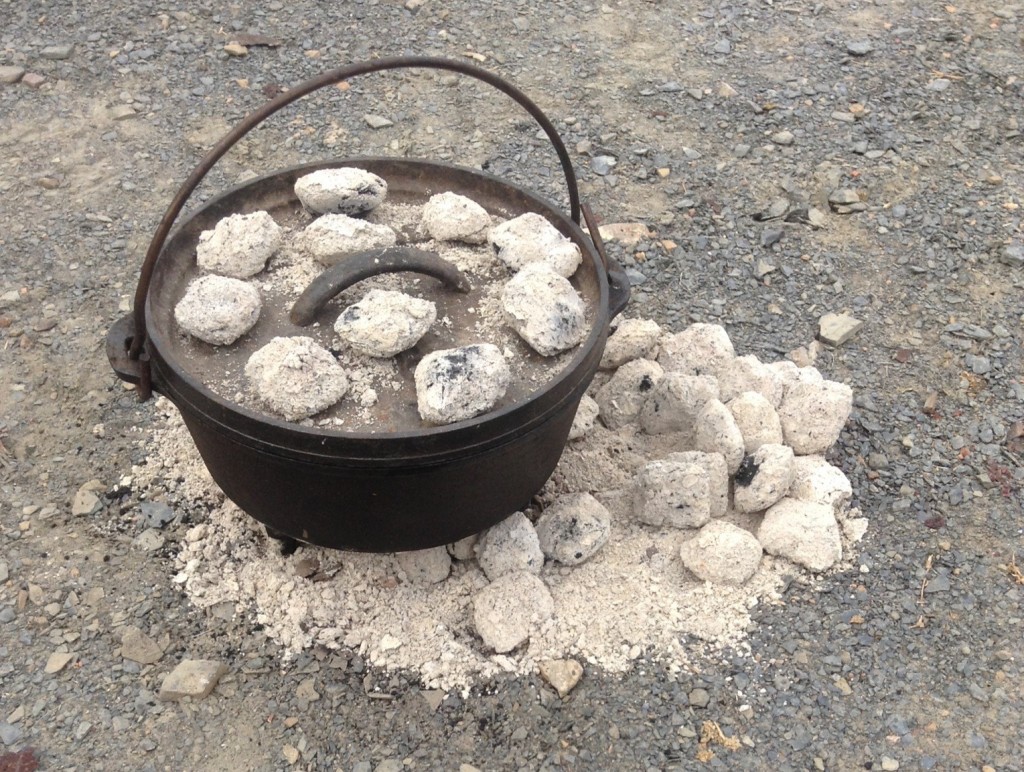
When the bacon is cooked, remove it from the Dutch Oven and sit aside.  Try very hard to not eat any of your bacon.  Petit Jean Bacon usually makes the perfect amount of grease, so you do not have to go through the dangerous process of removing any.  Add your potatoes and onions to the Dutch Oven and cover with the lid.  Arrange your briquettes in a single layer and place approximately 9 briquettes on top.

ash3
After 5 minutes, remove the lid and rotate approximately 45?.  This alleviates any hot spots and prevents you from burning your potatoes.  After 10 minutes, remove the lid, stir your potatoes, and replace the lid.  Fifteen minutes into the process, rotate the lid again.  The potatoes should be soft after 20 minutes, but if they are not, you can continue to rotate the lid every 5 minutes and stir every 10 minutes, until they are finished.

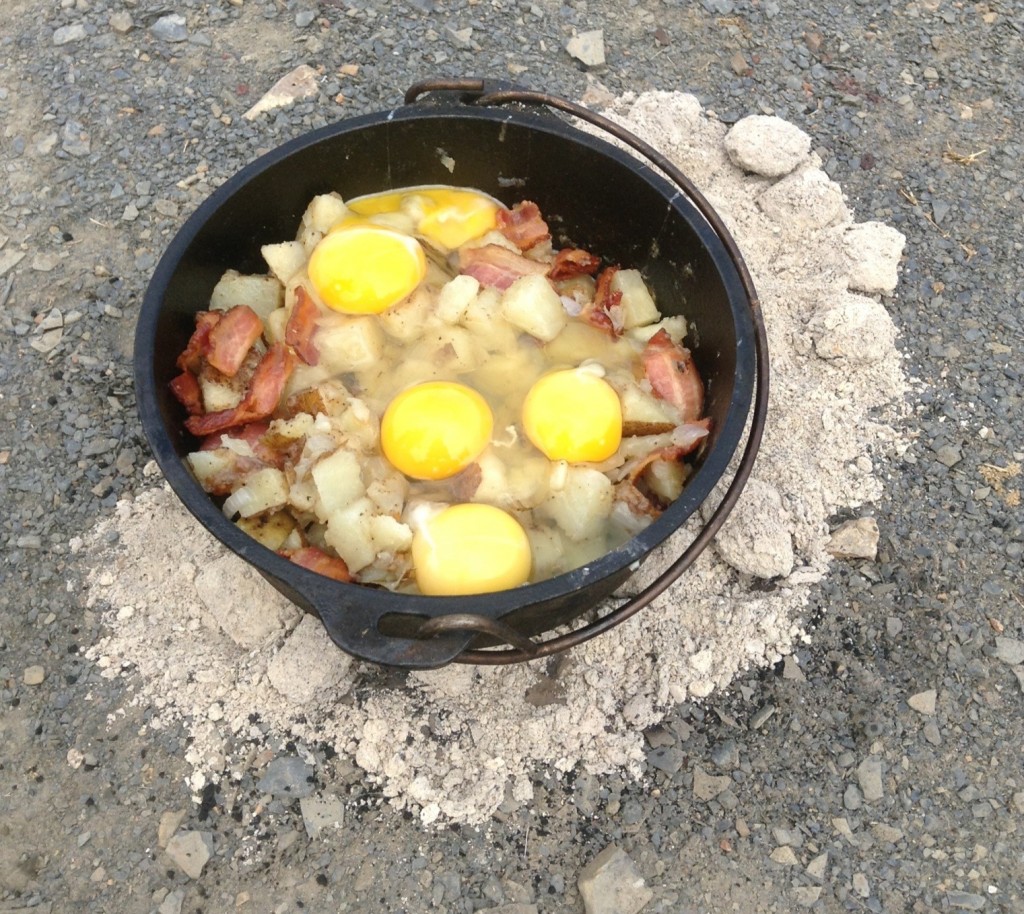
When the potatoes are completely cooked, add your bacon to the Dutch Oven and stir gently.  Now, add your 5 eggs.

ash4
Stir gently once more, to break the yolks and replace the lid.  It will take a little over 5 minutes to cook the eggs.  When the eggs are completely done, remove the lid and cover with shredded cheddar cheese.  You can add as much, or as little, as you wish.

Dutch Oven Breakfast Casserole  Ashley Ederington
Replace the lid, and after about 5 minutes the cheese will be melted completely.

Yummy! In case you are wondering, a serving is half the contents of the Dutch Oven (a huge portion) and is approximately 675 calories.

Do not let Dutch Oven cooking intimidate you.  If you have any questions, feel free to tweet me at @MrsEderington, and I will help you every step of the way!

run trailAshley Ederinton is a wife, mother, and student.  She loves to run, mountain bike, and swim, hopes to become a marine biologist, and tries to keep God first in her life and in her family.

In the side bar of her blog The Ederington Family she has a quote by Olympic swimmer Dara Torres that says, “They may become harder to achieve, but your dreams can’t stop because you’ve hit a certain age or you’ve had a child.” This quote is a perfect example of Ashley.