By Amanda Fiveash of The Frugal Greenish Mama
Growing up in Arkansas I always loved autumn. The air was crisp, the beautiful leaves started turning rich colors and the house always smelled delectable. What is it about the cool weather that inspires us to want to cook and bake again? It just feels right.
When I think of fall foods I think of warm bowls of chili, chicken and dumplings or thick and creamy potato soup. While they were always favorites, it’s what was in the oven that I became more excited about! Sometimes we would be blessed with a warm pecan pie, apple pie or something pumpkin that would get us all excited.
Fall just seems to bring us all together. It is a favorite time to have bonfires, hayrides and lots of family and friend get-togethers.
While I enjoy cooking, baking and eating, I enjoy crafting just as much. (Slight confession, maybe not quite as much as eating!) With a new season rolling around, it means time to give our décor a bit of an update. The bright colors of summer are now being replaced with deep, rich hues. Since I am all about being frugal and reusing items I start to see what I have that I can repurpose or update.
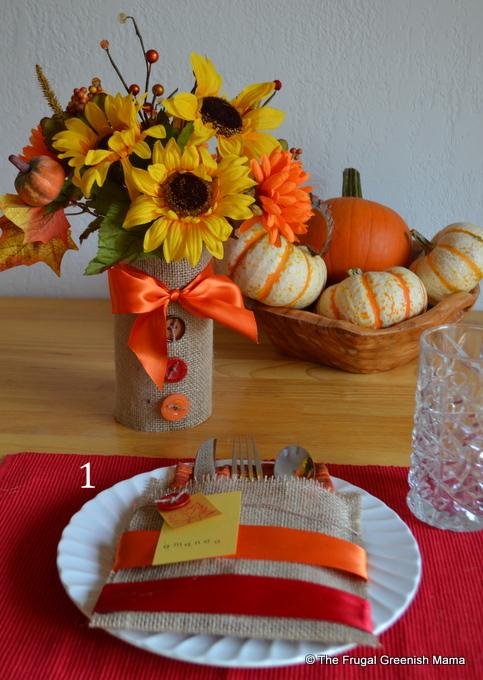
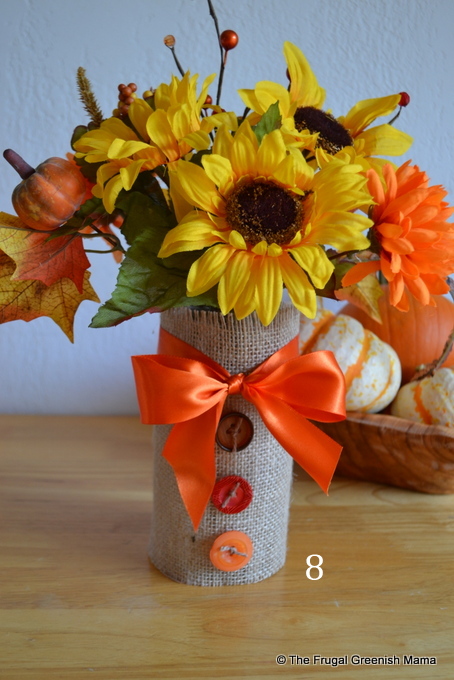
The kids picked out a bunch of silk fall flowers on a recent trip to Michaels and although I am not usually a fan of silk, I decided it would be nice as a centerpiece. Now we just needed a vase. I don’t buy vases but usually repurpose something I have on hand.
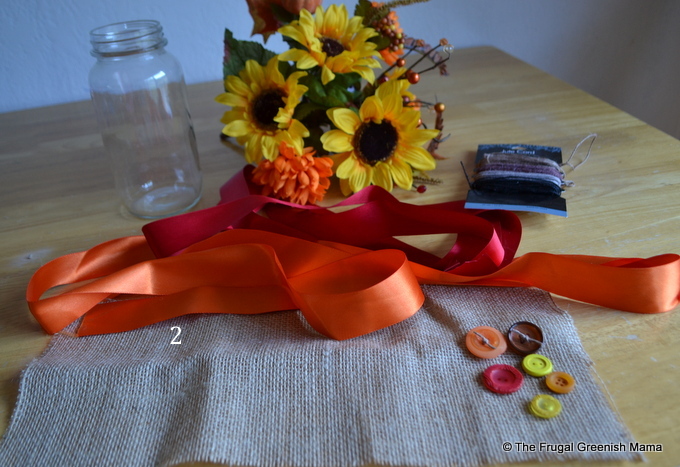
In the spirit of fall we needed something with more of an earthy feel, which is why I love burlap! I collected some ribbons in fall colors as well as some buttons, burlap and my glue gun.
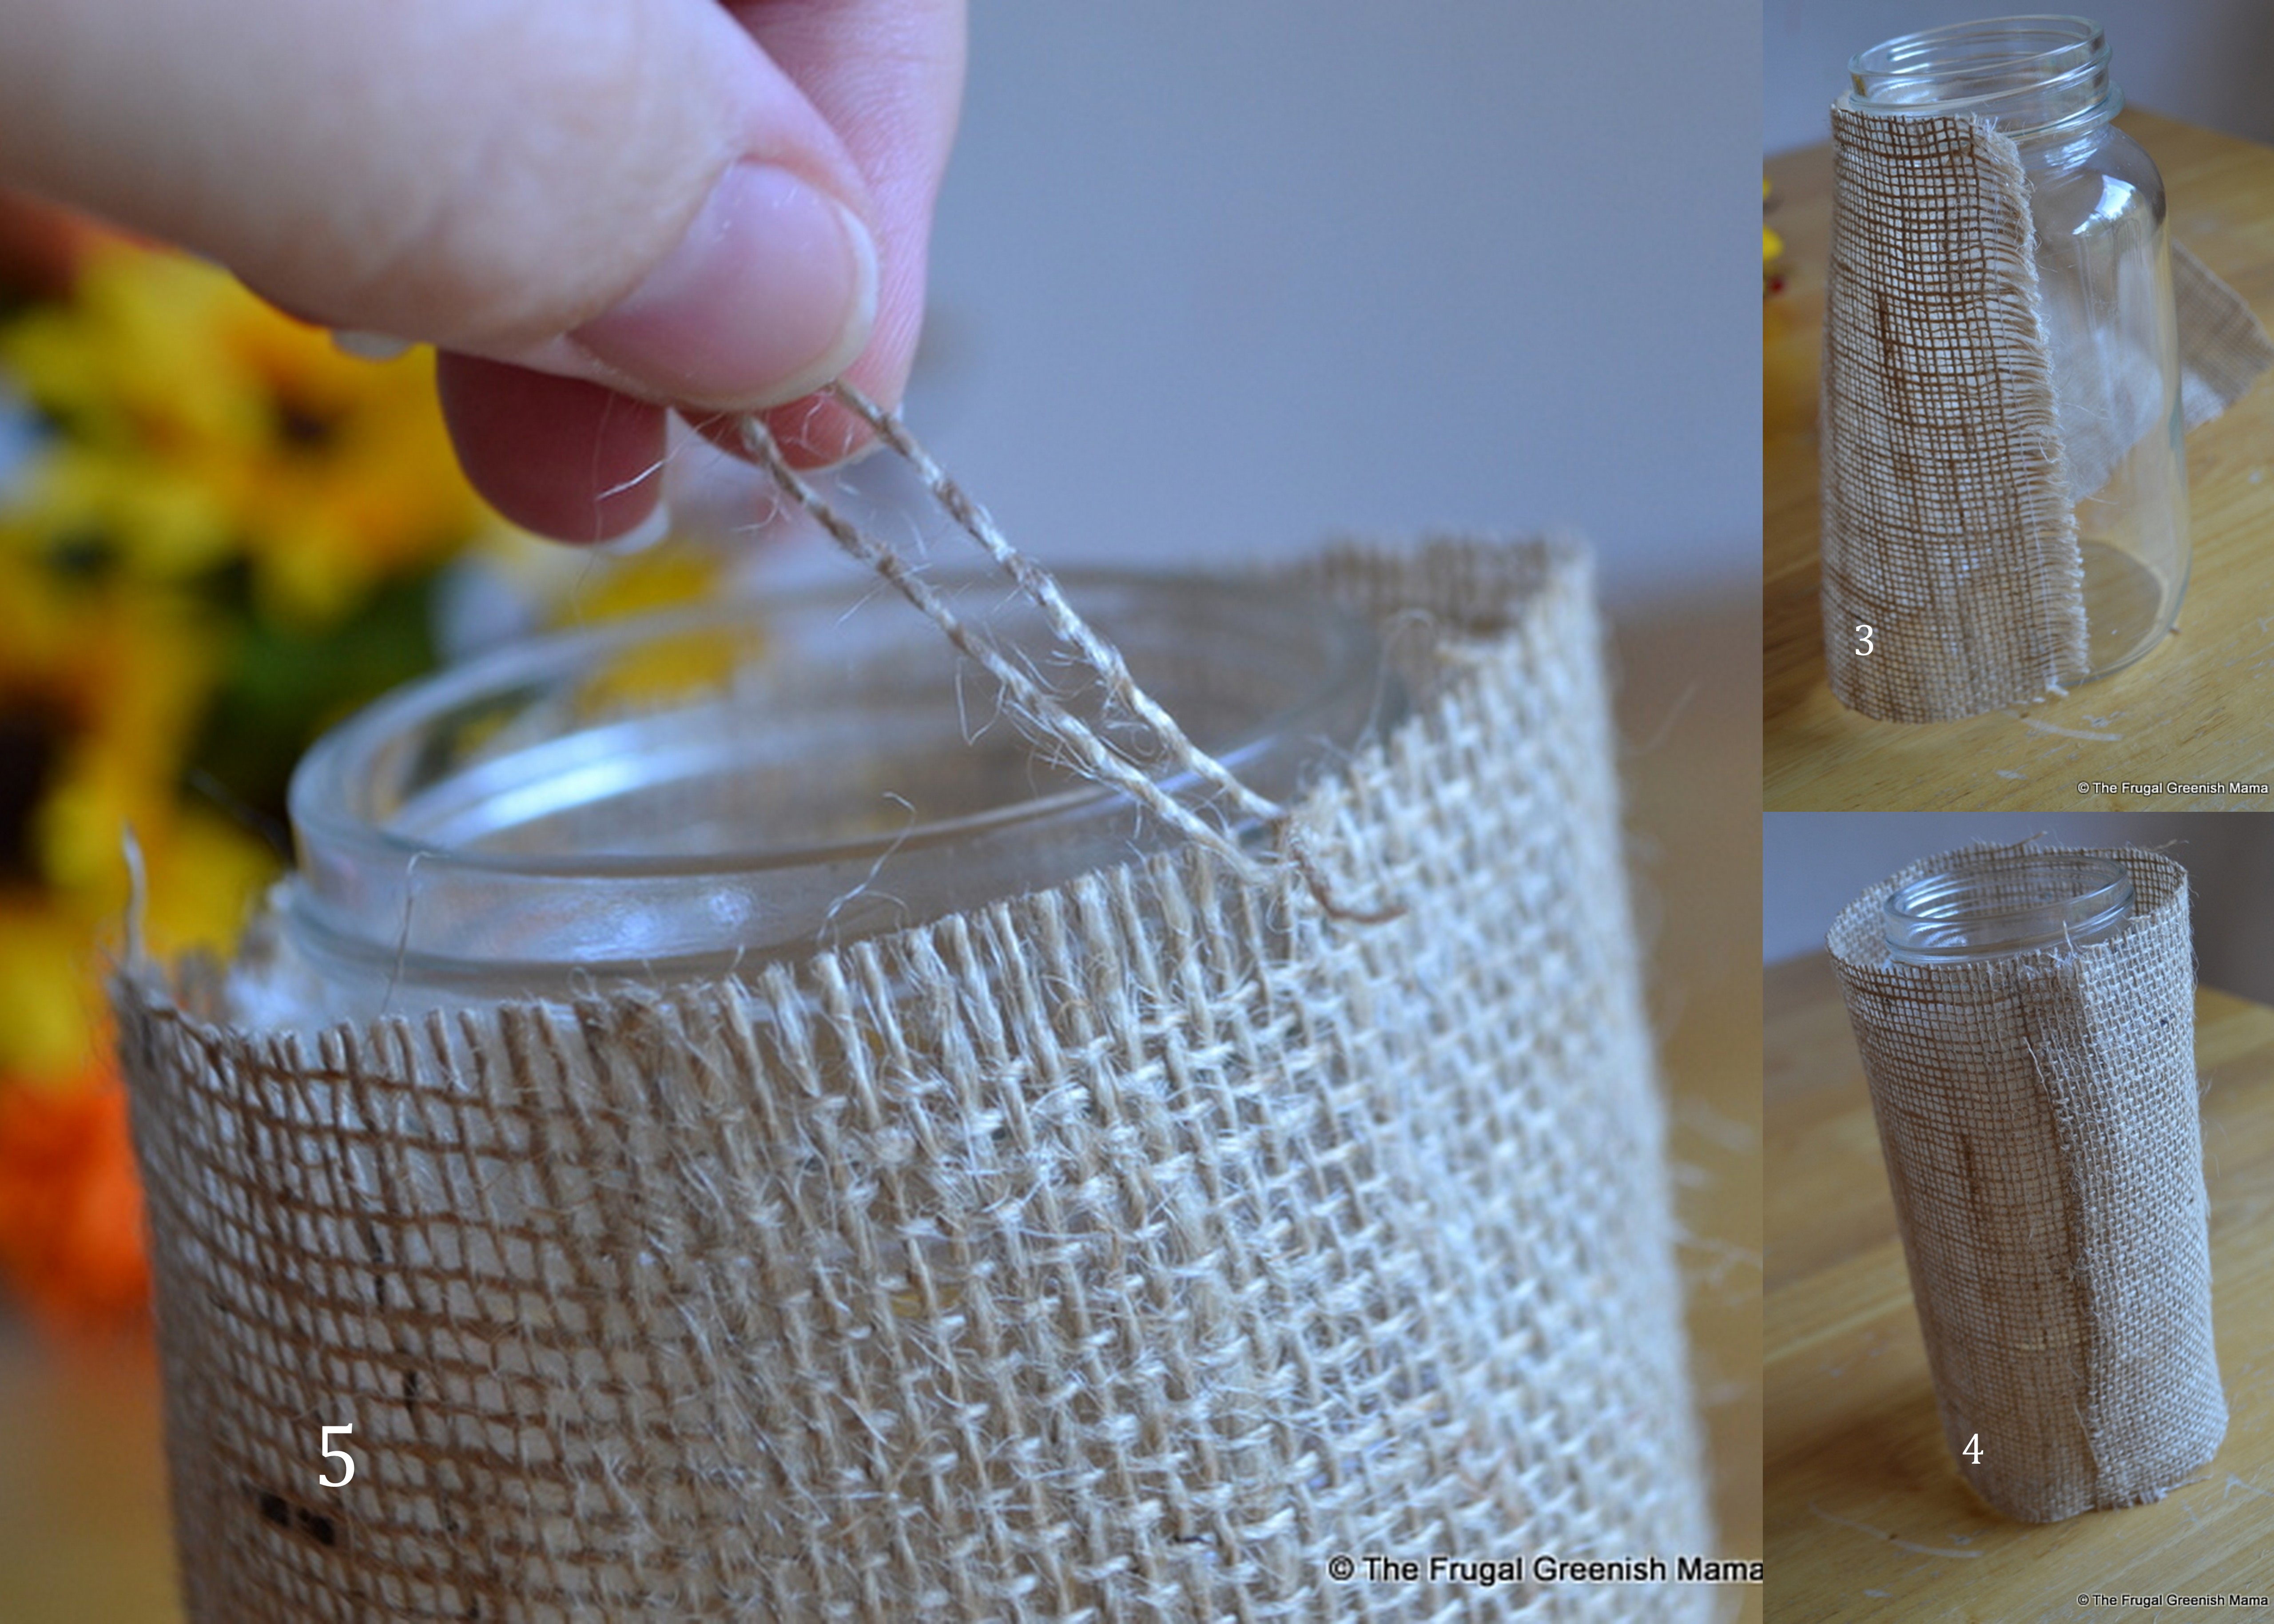
3. To begin, cut your burlap so that it wraps around the entire vase, overlapping the edges just slightly. Cut the top of the burlap just at the top of the vase.
4. Using your hot glue gun, glue the burlap to the vase and then wrap it around tightly and glue the loose edges down.
5. Along the top edge of the burlap, remove one to two cords so it is slightly frayed.
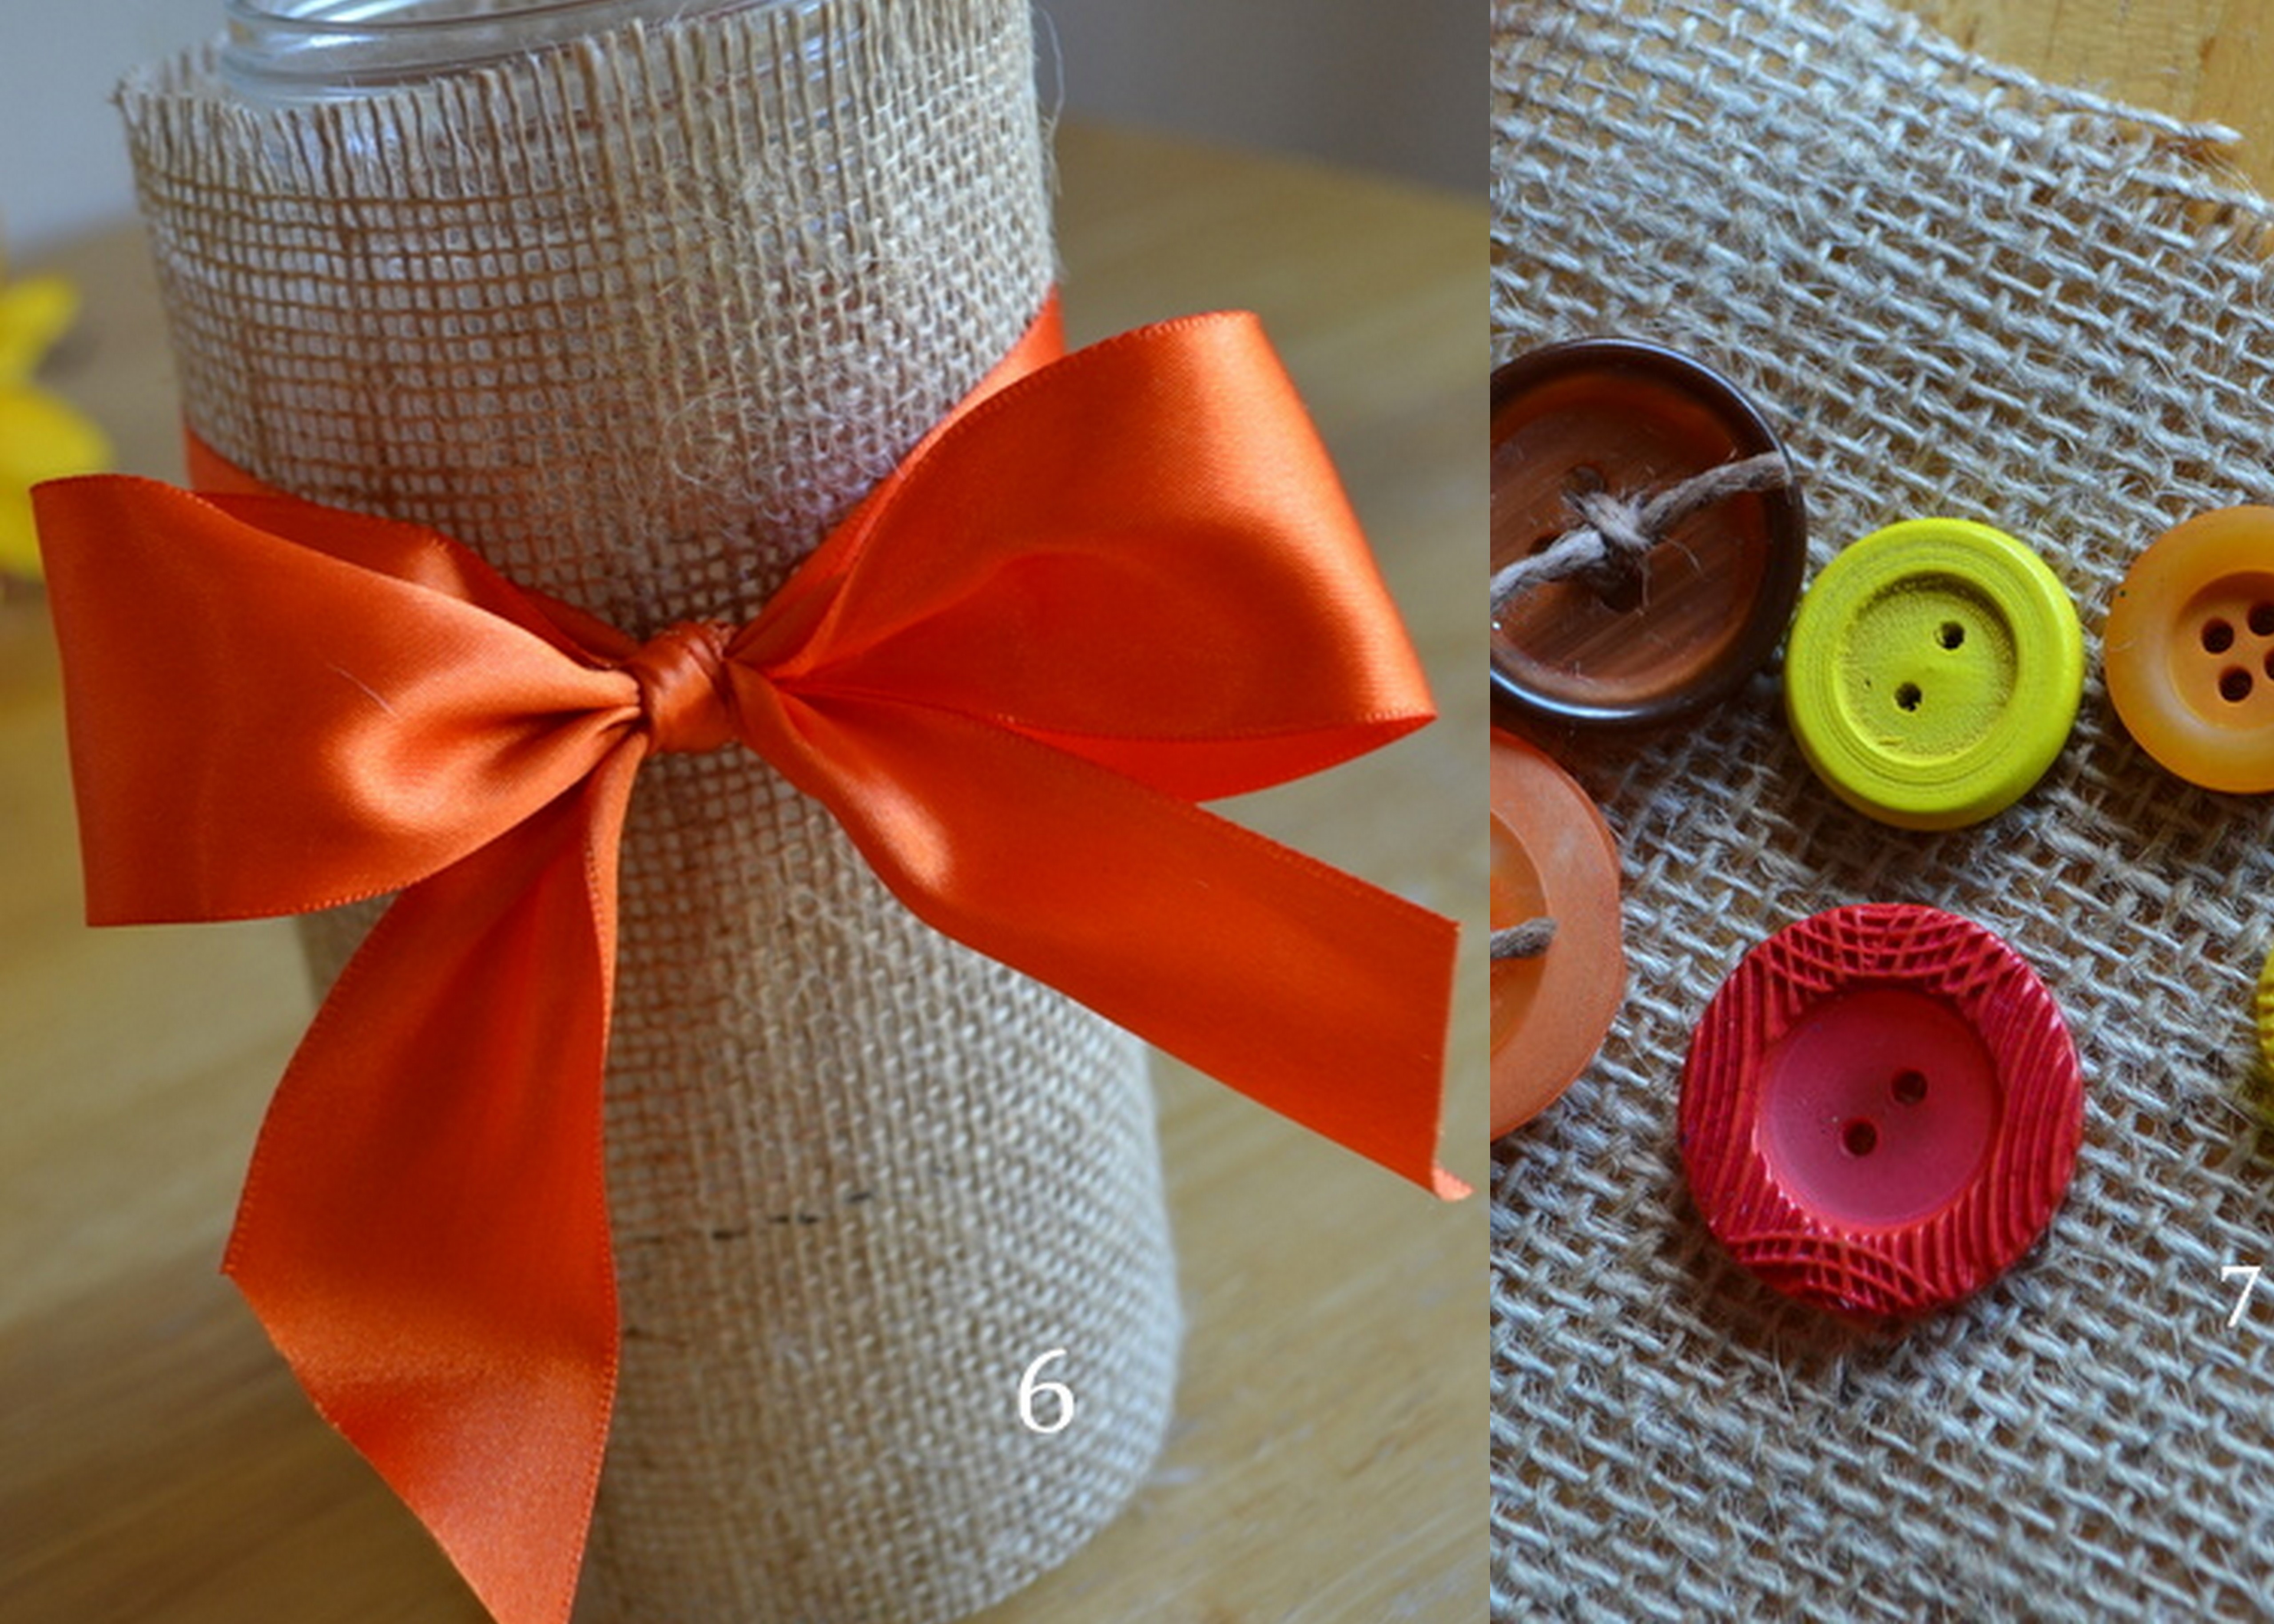
6. Add a ribbon of yo ur choice and tie a bow for the front of the vase.
7. Then take a piece of jute or cord and thread them through your buttons, knotting them. Use your hot glue gun to glue them in place.
Now you have created the perfect vase for your centerpiece! Next up is the menu of delicious food!

Amanda was born in Arkansas and although lived in several other states, returned home to put down roots before starting her own family. She is now a Mama to three beautiful children living in Northern Arkansas. Her blog, The Frugal Greenish Mama is an outlet to share her adventures in motherhood from homeschooling, attempting to feed her family more natural foods and her love of crafting.


‘Very charming! -Marci @ Stone Cottage Adventures
I love it! Very simple and frugal… I could maybe pull this off! 🙂