by Julie Kohl
If you are like most bloggers, you put a lot of photos on your blog and if you are like most bloggers, you might not be doing it properly!
There really is more to properly loading a photo than just clicking upload and insert image.
Photos can be a wonderful addition to your blog posts. With a few simple steps you can optimize your blog photos to improve your page load time and improve your SEO, both leading to a higher page rank.
I’ll admit, I have been uploading my photos incorrectly for years! And even now that I know the PROPER way to do it, I am still lazy, and sometimes don’t do it correctly. It is so much easier to just click upload and insert. In fact, I can do it right from my phone which is what I use to take 99.999% of the photos on my blog. In being lazy I’m not doing myself any favors. It’s also not great for my readers either.
Don’t be like me! Do it the proper way! Here’s how:
1. Resize Your Images BEFORE You Upload
Resizing your images will save you storage space on your blog, will use less bandwidth, and will improve your pages load time.
First, it’s important to know the size of text area on your blog. If your text area is only 600 pixels wide there is NO REASON to upload a file that is 1024 pixels wide. You will have to resize it anyway.
Secondly, consider how large you want the photo in your final post. If it will fill the entire text area than a 600 pixel wide photo (or your individual area width) is fine. If the picture is only going to be used as a thumbnail, go ahead and resize it to 150×150 pixels (the average thumbnail size) before uploading it.
How do I resize my photos?
I resize my photos using Adobe Photoshop Elements. This is a great program and does everything the amateur photographer needs at a fraction of the cost of Photoshop. Many photo editing apps also allow you to resize images as do some of the online sites like PicMonkey and Picassa.
2. Compress Your Images BEFORE You Upload
Compressing your images will also save you storage space on your blog, will use less bandwidth, and will improve your pages load time. The faster your page loads the more bonus points you get in the eyes of Google.
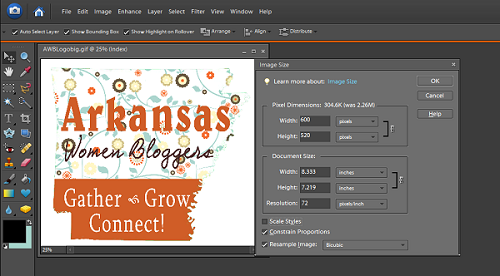
Compressing your image refers to altering DPI or Dots Per Inch. When you are going to print a photo you want a higher DPI. Typically around 300dpi. On the internet you can lower the dpi to 72 without noticing a loss of quality.
In Adobe Photoshop Elements, I can do this by clicking FILE > IMAGE and then changing the dpi to 72 before saving the photo. (Don’t forget to change your file name if you intend to save the original file for printing.) You will have to experiment with your photo editing software to determine its capabilities.
Now that you’ve got your photos PREPPED you are ready to upload them in the same manner that you always do. But we’re not done yet!
Once you’ve got those photos uploaded, we need to make the photos do some work for us. We want to make them SEO friendly so Google and other search engines are able to find them and properly direct readers to your hard work.
3. Photo Titles, Alternate Text, Captions and Descriptions
The way you label your photos can improve SEO and make you more easily searchable by Google. It can also improve your searchability on sites like Pinterest.
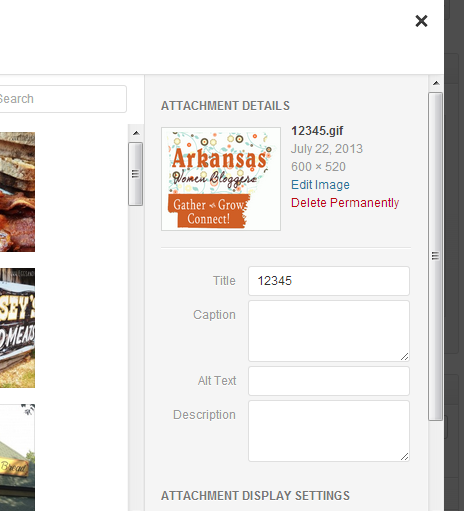
Your blog’s media uploader is going to automatically title your image with the same title that you have in your computer. If you have it labeled “DSC56587” that is what your blog’s uploader will call it. Again, you can save yourself a step by changing your file names BEFORE you upload, but if you don’t you can still fix it within your blog and it’s actually pretty easy to do!
Titles
This is what the WordPress photo uploader looks like:
You will notice that the title is automatically generated based on the file name of my photo. If you do not like this title or it is a generic series of numbers and/or letters you can change the title here.
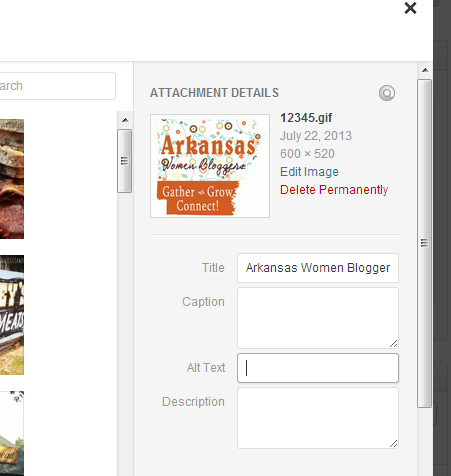
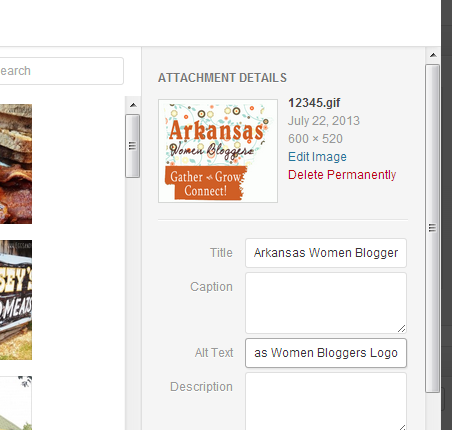
Titles should be fairly simple and worded like you would speak. The title should tell people about the post more so than the contents of the specific photo. “How to bake a cake – dry ingredients” is a much better title than “cake – step 1”. I changed my title from “12345” to “Arkansas Women Bloggers Logo.”
Alternate Text
The Alternate Text (sometimes Alt Tag or Alt Text) is another field you should definitly be using. The Alt Text is what will show up if for some reason your photos do not load. Alt Text is also important because this is how Google reads your photos.
The Alt Text can simply be the same things as your title. If you have good image titles there really is no need to have a different alternate text.
Captions
Captions are optional. Personally, I almost never use them. I just don’t like the way they look. If you fill in the caption field it will create a box around your photo that includes your caption text. It will look like this:
(Insert Caption photo)
As far as I know using captions has no effect on SEO. I choose not to use them but if you like them, have at it!
Descriptions
Descriptions can be useful but I typically skip them due to time constraints. I use a lot of images and adding a description to every one would be very time consuming.
Descriptions were originally designed for visually-impaired people who use screen readers to look at the internet. The screen reader would read the description of the photo to the visually-impaired person allowing them to get a sense of the image.
If you choose to use descriptions us common, everyday language rather than just a list of key words.
Are your blog photos optimized for faster load time and better SEO?

Thanks for the tips! I’ve been renaming and adding alt text, but never thought to resize and reduce them.
Keep bringing tips like these!
I just started filling in the alt tab yet did not realize I can just keep it the same as my photo title. Thanks for the tip!
McCratic says you really shouldn’t have the alt title and the title exactly the same…but what does she know! ;). Just kidding Stephanie!
I just recently started doing this. But like you I get lazy sometimes! Thanks for the tips!
Newbie!! I didn’t know these things and clearly have a lot to learn. Thanks for the tips 🙂
Thanks for this explanation! I’ve heard the captions also boost the seo, but who really knows?! 🙂
I always give descriptions, too. Writers write–any blank space will do! 🙂
Great tips!
It’s better for SEO if your alt tags do not exactly match your title.
Ugh, these are things I know but am lazy and don’t do. Thanks for the reminder!